Moving from Clever to Google Admin Console: Your No-Nonsense Checklist
This checklist guides you through key steps for migrating from Clever to Google Admin Console, ensuring smooth user, app, and device management.

Short answer: Moving from Clever to Google Admin Console requires careful planning around user identities, app assignments, and device management settings to avoid disruption. This moving from Clever to Google Admin console checklist covers the specific administrative steps and technical adjustments you need to complete a smooth migration.
This guide walks you through key differences in identity and access management, the essential pre-migration preparations, and a step-by-step migration process tailored to this switch. You’ll learn how to anticipate common blockers like conflicting user provisioning and device enrollment issues. The focus is on concrete actions to maintain security and uninterrupted access for teachers, students, and staff during and after the move.
What is Clever and Why Move to Google Admin Console?
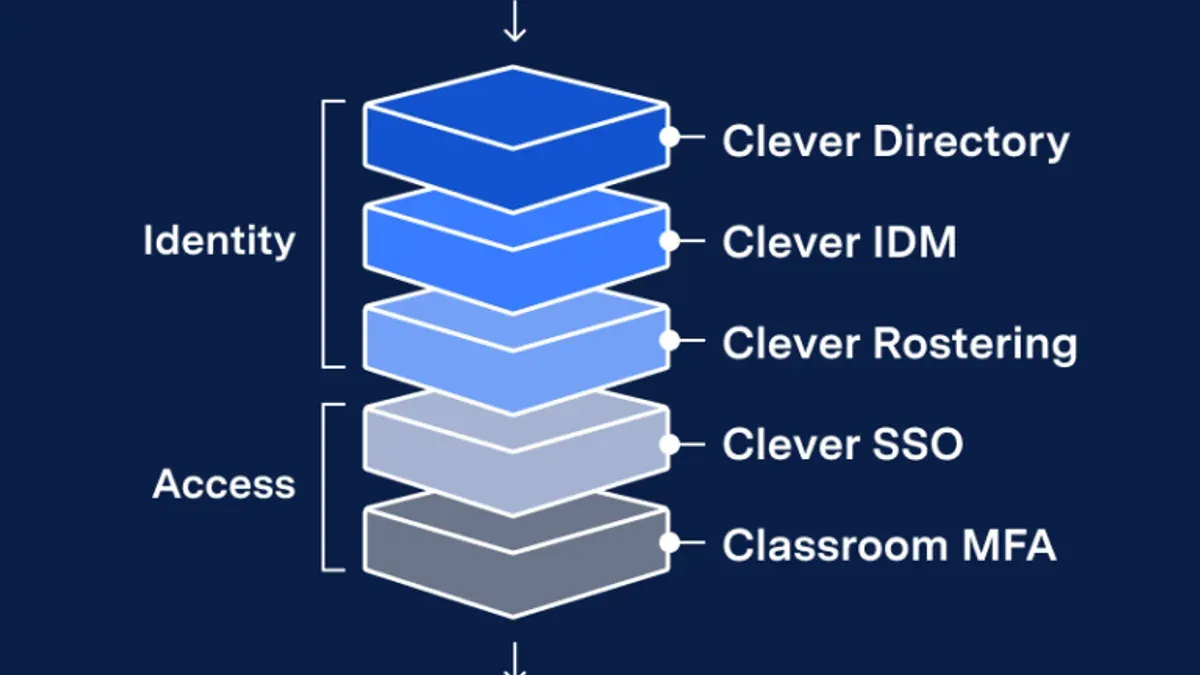
Clever serves primarily as an identity and rostering platform for schools, connecting student information systems (SIS) with educational apps. It automates user provisioning and single sign-on (SSO), simplifying access management but stops short of full device or security policy control. Clever’s value lies in syncing user data and enabling app access without deep device-level management.
The Google Admin Console, by contrast, is a comprehensive IT management platform integrated tightly with Google Workspace for Education. It handles user account administration, device enrollment, policy enforcement, and security settings from a single interface. Google Admin Console supports managing Chromebooks, mobile devices, and user roles with granular controls not available in Clever.
Organizations switch to Google Admin Console to centralize identity and device management under one roof, eliminating gaps left by Clever’s limited device policies. For example, a district struggling to enforce Chromebook security settings through Clever’s app-level approach gains direct control over device lockdown, updates, and compliance in Google Admin Console. This shift resolves common pain points around inconsistent device policies and fragmented user management.
| Feature | Clever | Google Admin Console |
|---|---|---|
| User Provisioning | Automated rostering from SIS | Automated rostering plus manual user management |
| Device Management | None or limited app-level control | Full device enrollment and policy enforcement |
| Security Controls | Basic SSO security | Advanced security policies, 2FA, context-aware access |
| Integration | Focus on third-party apps | Deep integration with Google Workspace and Chrome OS |
User surveys often highlight Clever’s ease of initial setup but frustration with its inability to enforce consistent device policies or integrate fully with Google Workspace management tools. Moving to Google Admin Console addresses these issues by delivering centralized control and stronger security management tailored to school technology environments.
How Does User and Device Management Differ Between Clever and Google Admin Console?
User provisioning in Clever primarily relies on SIS (Student Information System) sync combined with SSO configurations to push user data and grant app access. This means users are created and updated based on roster data, with limited direct control inside Clever beyond app permissions. In contrast, Google Admin Console uses Google Workspace Directory sync, integrating with your identity provider to manage users centrally. This sync allows granular control over user attributes and organizational units.
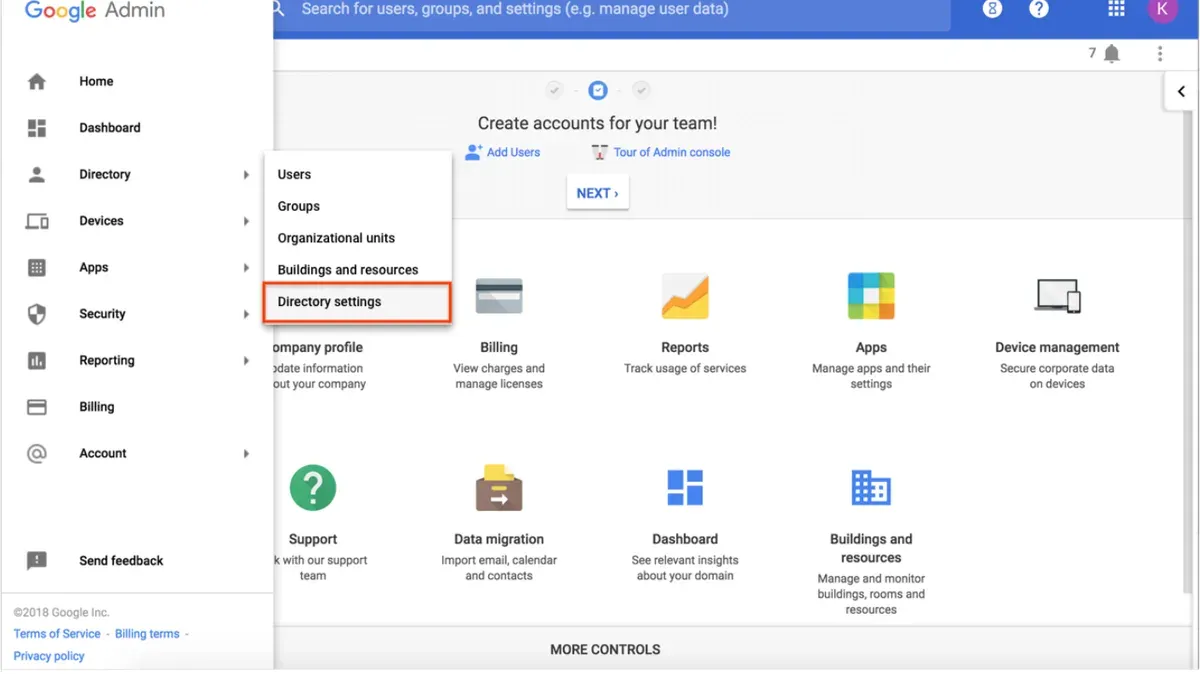
Device management diverges sharply. Clever does not enroll or manage devices directly; it functions as an access portal. Google Admin Console enforces device enrollment policies via the Devices page, allowing admins to mandate OS versions, apply device policies, and remotely wipe managed Chrome OS devices. This control layer is critical for compliance and security.
Third-party app integrations in Clever typically happen through its app library with SSO tokens, whereas Google Admin Console manages OAuth app whitelisting and API access permissions within Security > API Controls. Role-based access in Google Admin Console is more granular: Admin roles like User Management Admin or Device Management Admin have specific rights, unlike Clever’s broader admin privileges tied mostly to rostering and app access.
For example, when onboarding a new teacher, in Clever you await SIS sync to create the account and assign app permissions. In Google Admin Console, you can manually create or sync the user, assign them to an organizational unit, and immediately apply device and security policies. The migration challenge lies in mapping these workflows and permissions accurately to avoid gaps.
What Are the Essential Pre-Migration Tasks You Must Complete?
Start by auditing your current Clever setup: list all active users, their assigned roles, and devices registered in the system. This ensures no accounts or devices get overlooked during migration. Next, map each Clever user data field—such as username, email, and grade level—to the corresponding Google Admin Console attribute. Mismatches here cause access and synchronization errors later.
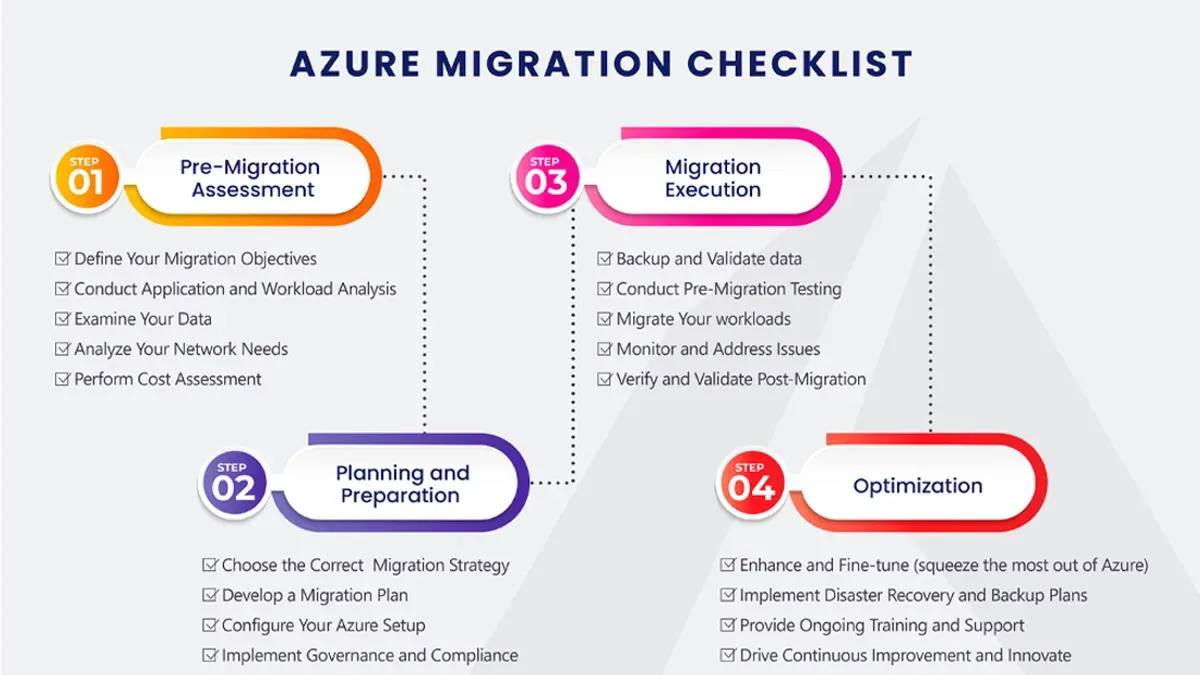
Communicate your migration plan clearly to all stakeholders, including teachers, tech staff, and administration. Outline expected downtime or functionality changes to manage expectations and reduce support tickets. Backup exports of current Clever rosters and configurations are critical; export CSV files from the Clever dashboard under Settings > Roster Export before starting the migration.
Coordinate your migration timing with your Student Information System (SIS) data refresh and Google Workspace administrators. Avoid running migrations during peak school hours or SIS updates to prevent data conflicts. For example, a mid-sized district avoided login failures and lost data by scheduling migration during a weekend and completing a thorough data audit beforehand.
- Audit Clever users, roles, and device inventory
- Map Clever user data fields to Google Admin Console attributes
- Communicate migration plan and impact to stakeholders
- Export backups of Clever rosters and configurations
- Coordinate timing with SIS refresh and Google Workspace admins
How Do You Execute the Migration Step-by-Step?
Start by structuring your Google Admin Console with clear organizational units (OUs) that mirror your school's hierarchy—typically by grade level or department. Assign admin roles precisely under Admin Console > Directory > Admin roles to control access and privileges. Prepare your user import file as a CSV with columns for primaryEmail, firstName, lastName, orgUnitPath, and password. For example:
| primaryEmail | firstName | lastName | orgUnitPath | password |
|---|---|---|---|---|
| [email protected] | John | Doe | /Students/Grade9 | TempPass123 |
Use Admin Console > Users > Bulk upload users to import this CSV or automate syncing with your SIS via Google Cloud Directory Sync. Next, enroll devices by pushing enrollment invitations or using zero-touch enrollment for Chromebooks, then apply device policies under Devices > Chrome Management > User & browser settings. Validate the migration by testing login for a sample group of users and confirming access to key apps like Google Classroom and Drive.
Monitor Admin Console logs and gather user feedback for the first two weeks to catch sync or permission issues. A typical migration timeline spans 2-4 weeks: one week for setup and import, one for device enrollment, and up to two for testing and issue resolution.
- Create OUs and assign admin roles
- Prepare and import user CSV or configure SIS sync
- Enroll devices and apply policies
- Test user access and app integrations
- Monitor logs and resolve issues in early post-migration
Which Common Mistakes Should You Avoid During This Migration?
One frequent cause of migration delays is failing to synchronize your Student Information System (SIS) data properly before starting. If SIS data isn’t current and accurate in Clever, it leads to mismatched accounts and duplicate entries in Google Admin Console, causing confusion for users and admins alike.
Another common error is not aligning user roles and permissions during migration. Over-permissioned accounts compromise security by granting excessive access. For example, assigning broad admin roles instead of custom, least-privilege roles results in unnecessary exposure and possible policy violations.
Ignoring device enrollment prerequisites causes compliance issues. Devices not properly enrolled in Google Admin Console won’t receive required policies or updates, leaving endpoints vulnerable. Schools often discover this when users suddenly lose access to network resources or apps.
Poor communication with teachers and staff leads to frustration and helpdesk overload. If they aren’t informed about login changes or new procedures, they may repeatedly request password resets or report access problems, delaying classroom activities.
Finally, neglecting to validate third-party app Single Sign-On (SSO) compatibility after migration causes interruption in essential tools. Some apps require updated OAuth scopes or reauthorization in Google Admin Console to work correctly.
- Ensure SIS data in Clever is fully updated before migration.
- Review and tailor user roles to avoid over-permissioned accounts.
- Confirm all devices meet enrollment requirements prior to migration.
- Communicate clearly and early with all staff about the migration impact.
- Test third-party app SSO post-migration to prevent access issues.
How Can You Maintain Security and Compliance After Moving to Google Admin Console?
Start by enforcing 2-step verification across all user accounts via Security > 2-step verification in the Admin Console. Pair this with strict password policies under Security > Password Management—set minimum length, complexity, and expiration intervals. These steps block common attack vectors like phishing and credential stuffing.
Next, configure device compliance rules by navigating to Devices > Settings > Chrome Management. Require device encryption, set minimum OS versions, and enforce screen lock policies. Use the Device Health page to monitor compliance status and quarantine or block non-compliant devices automatically.
Leverage audit logs and Security Center analytics found under Reports > Audit and Investigation to track suspicious activity and policy violations. For example, regularly review login anomalies and unauthorized app access attempts to catch breaches early.
Tightly manage third-party app permissions in Apps > Marketplace apps. Limit app installation to only necessary, vetted apps and revoke unused permissions promptly to reduce attack surfaces.
Finally, train your admins on continuous monitoring best practices. Provide them with sample security policy templates and establish a routine review cadence. Districts that implement this layered approach often see fewer security incidents post-migration, maintaining compliance without disrupting user access.
Frequently asked questions
How long does it typically take to move from Clever to Google Admin Console?
The migration timeline varies based on the size of your user base and complexity of integrations. Small districts may complete the transition in a few days, while larger ones might take several weeks. Plan for thorough testing phases to catch configuration issues early.
Can I migrate without interrupting student access to apps and devices?
Yes, but it requires careful planning. Maintain parallel access by keeping Clever active during initial stages and gradually shift authentication to Google Admin Console. Communicate changes clearly and schedule migrations during low-usage periods to minimize disruption.
Do I need to involve my SIS vendor in the migration process?
Involving your SIS vendor is crucial if your SIS is integrated with Clever for rostering or SSO. Coordinate with them to update or reconfigure data feeds and authentication protocols to align with Google Admin Console requirements. Ignoring this step can lead to data sync failures and login issues.
What happens to existing Clever SSO integrations after migration?
Clever SSO integrations will no longer function once you disable Clever as your identity provider. You must reconfigure SSO settings within Google Admin Console and ensure all linked applications accept Google authentication. Review each app’s settings to avoid access interruptions.
What this advice does not cover
This guide does not cover integrations beyond core Google Workspace services or custom third-party apps that may require specialized migration steps. If your district relies heavily on niche educational platforms or proprietary systems linked to Clever, plan for additional migration testing and coordination with vendors. Also, this advice assumes you have administrative rights in both Clever and Google Admin Console and basic familiarity with Google Workspace administration.
Quick checklist
- Audit all user accounts and group memberships in Clever before migration.
- Map Clever roles and permissions to equivalent Google Admin Console settings.
- Export and securely store all user data and device inventories.
- Set up Google Admin Console organizational units reflecting your school structure.
- Configure identity and access management policies, including SSO and MFA.
- Communicate migration timelines and expected downtime to end users in advance.
- Perform a phased migration starting with a pilot group to identify blockers.
- Verify device enrollment and compliance settings post-migration.
- Monitor audit logs and security alerts regularly after migration.
Start by thoroughly auditing your user and device data within Clever. That single step uncovers permission gaps and data inconsistencies that cause most migration headaches. Fix these before touching Google Admin Console to avoid cascading errors. Clear mapping and cleanup upfront save hours later—don’t skip it.
See also: Moving from ClassLink to Google Admin Console: A Practical Checklist · Your Step-by-Step Checklist for Moving from Clever to Apple School Manager · Switching from Clever to ClassLink: What You Need to Know