Moving from Clever to Jamf School: Your Complete Checklist
This checklist guides you through key steps to avoid pitfalls and ensure a smooth transition when moving from Clever to Jamf School.

Short answer: Moving from Clever to Jamf School requires a clear plan to handle device enrollment differences and user authentication changes. This moving from Clever to Jamf School checklist guides you through key steps to avoid common pitfalls and ensure a smooth transition without downtime or lost data.
This article covers what Jamf School is and why it matters for your school, how to get up to speed quickly, steps to log in and access Jamf School, enrolling devices after migration, and common mistakes to avoid. You will get practical troubleshooting advice for the unique challenges in this migration, including managing Single Sign-On issues and device sync nuances that generic guides overlook.
What is Jamf School and why does it matter for your school?
Jamf School is a mobile device management (MDM) platform designed specifically for managing Apple devices in educational environments. Unlike Clever, which primarily focuses on single sign-on (SSO) and rostering, Jamf School provides deeper control over device settings, app distribution, and classroom management tailored to Apple hardware. It supports streamlined device enrollment with Apple School Manager integration, enabling zero-touch deployment and consistent configuration across iPads, MacBooks, and Apple TVs.
The core difference lies in user and device management: Clever handles user identities and access to educational apps, while Jamf School manages the devices themselves, including enforcing security policies like activation lock bypass and restricting unauthorized app installations. This layered approach means Jamf School enhances security and operational efficiency where Clever’s identity focus leaves gaps.
For example, a school deploying 500 iPads can use Jamf School to automatically enroll devices via Apple School Manager's Automated Device Enrollment. This eliminates manual setup and ensures each device has the correct profile, apps, and restrictions from the start. Meanwhile, Clever handles the login credentials students use for apps, but Jamf School governs what happens on the device level, such as locking Safari or enabling classroom screen sharing.
| Feature | Clever | Jamf School |
|---|---|---|
| Primary Focus | User identity and Single Sign-On | Apple device management and configuration |
| Device Enrollment | None (relies on MDM) | Automated Device Enrollment via Apple School Manager |
| Security Controls | Access control via login | Device-level restrictions, activation lock management |
| Classroom Management | App access | Screen sharing, remote control, app deployment |
With Apple device usage growing steadily in schools, Jamf School fills the operational and security role that Clever’s user-centric platform does not address. This makes Jamf School a critical tool for any school relying heavily on Apple technology and aiming for a smooth, secure, and manageable device ecosystem.
How to learn Jamf effectively before your migration
Start with Jamf School's official training resources, available on their website under the "Training" tab. These include self-paced courses and instructor-led sessions covering core topics like device enrollment, profile configuration, and user management workflows. Certification paths such as the Jamf School Administrator certification provide structured learning and a benchmark of your skills; pass rates vary but the certification is widely regarded as attainable with focused study.

Complement formal training with community forums at Jamf Nation and scheduled webinars hosted by Jamf experts. These platforms offer real-world scenarios and peer support that can clarify complex issues often encountered during migrations. For hands-on practice, use the Jamf School sandbox environment accessible through the admin portal. This environment lets you simulate enrollment processes, test policy deployment, and explore device management options without impacting live data.
Focus your learning on Jamf’s device enrollment and management workflows. For example, understanding the nuances of Automated Device Enrollment (ADE) versus manual enrollment can prevent common mistakes during migration. Picture yourself enrolling a set of iPads: knowing how to configure enrollment profiles correctly in Jamf School before the actual switch saves time and avoids lockouts.
- Complete official Jamf School courses focusing on device enrollment and management
- Join Jamf Nation forums and attend live webinars
- Practice in the Jamf School sandbox to simulate real migration tasks
- Study enrollment workflows, especially ADE versus manual enrollment
How to log in and access Jamf School for the first time
Start by navigating to the official Jamf School login page at https://schools.jamf.com. Use your provided email address and the temporary password sent by your administrator. The first login requires you to set a new password that meets the platform's complexity requirements: at least 8 characters, including uppercase, lowercase, numbers, and special characters. If you encounter the error “Invalid credentials”, verify that you are using the email linked to your Jamf School account and double-check for any typos or unintended spaces.
Jamf School uses two main login portals: the Jamf School Manager for administrators and the Jamf Parent or Jamf Student apps for end users. Ensure you are logging in via the Manager portal when performing administrative tasks. A common mistake is attempting to use the mobile app login credentials on the web portal or vice versa, which will cause access errors.
If you face multi-factor authentication (MFA) issues or login verification errors, confirm that you have registered your authentication device properly under the Security Settings > Two-Factor Authentication section after your first login. For example, one school tech coordinator reported receiving a “Verification code expired” error; the fix was resyncing the time on their authentication app and requesting a new code.
Once logged in, your dashboard appears. If it does not load or shows a blank screen, clear your browser cache or try an alternate browser. Jamf School supports Chrome, Firefox, and Safari best.
- Go to https://schools.jamf.com
- Enter your assigned email and temporary password
- Set a new secure password on first login
- Use the Jamf School Manager login for admin tasks
- Register MFA device under Security Settings immediately
- Clear cache or switch browsers if dashboard fails to load
How to enroll devices in Jamf School after moving from Clever
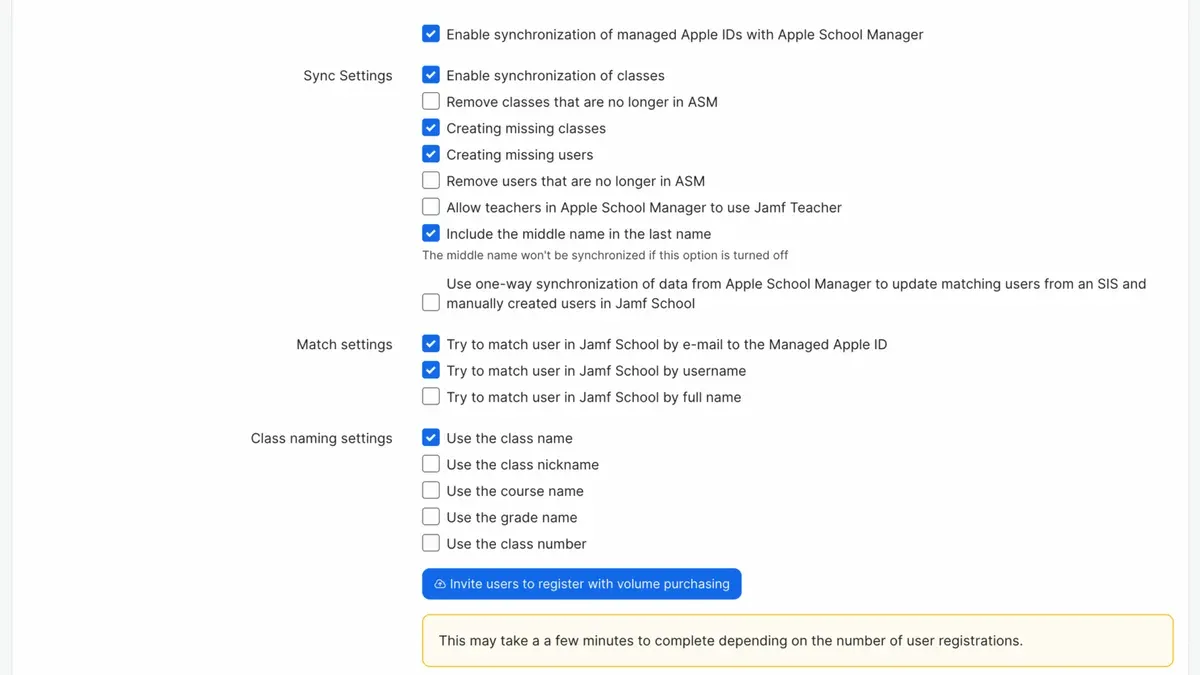
Begin by ensuring your Apple School Manager (ASM) account is correctly linked to Jamf School. Verify that your ASM devices are synced under Settings > Integrations > Apple School Manager. Devices must be assigned to Jamf School in ASM to enable automatic enrollment. Confirm the location and site assignments in ASM match your school's structure to avoid misclassification.
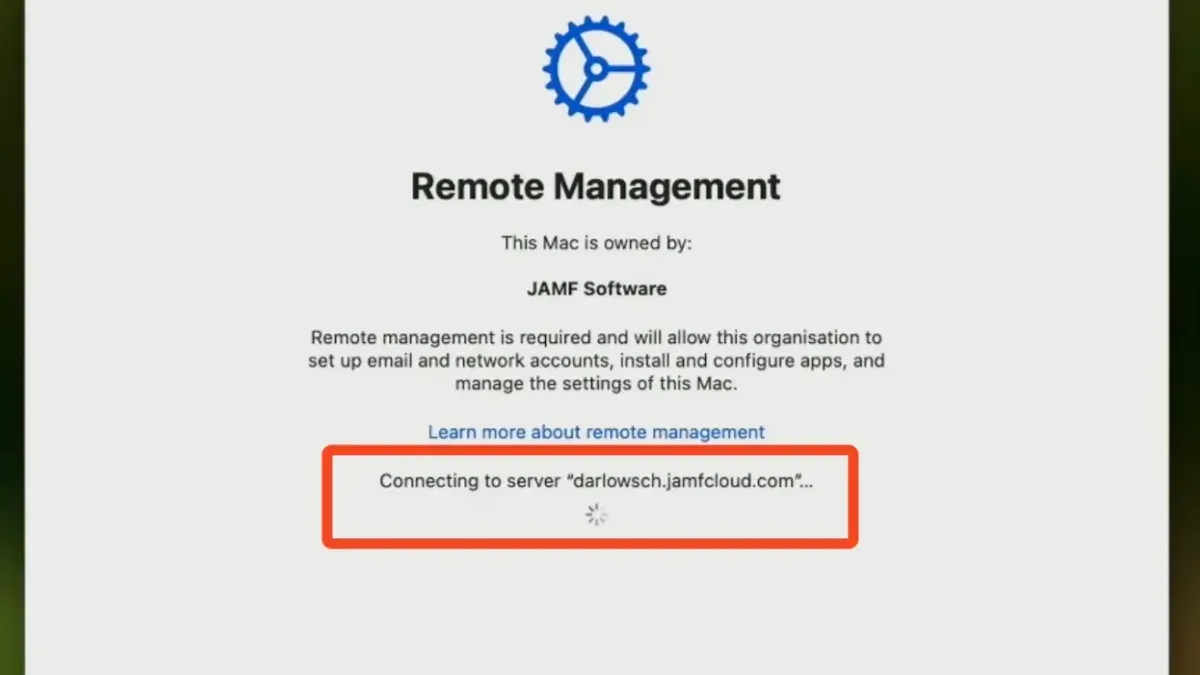
For bulk enrollment, use the Device Enrollment Program (DEP) tab in Jamf School to import devices directly from ASM. This step replaces Clever's device assignment method. Select the correct site and profile for each group of devices. A common pitfall is overlooking the profile assignment, which results in devices not receiving appropriate configurations.
Once devices appear in Jamf School, initiate enrollment by resetting them or starting them fresh. You should see a status update under Devices > Enrollment Status. A typical successful output shows devices transitioning from “Pending” to “Enrolled” within minutes. For example, a batch of 50 iPads might move from pending to enrolled in under 10 minutes, compared to longer delays previously observed under Clever-based workflows.
If you encounter the error message “Jamf School waiting for licenses,” check your license count under Settings > License Management. Purchase or assign sufficient licenses to cover your device count. Incorrect device location settings can cause enrollment failures; double-check your ASM site assignments to ensure alignment with Jamf School's site configurations.
- Link and sync Apple School Manager with Jamf School
- Assign devices to Jamf School and correct sites in ASM
- Use DEP tab for bulk device import and profile assignment
- Initiate enrollment by resetting devices and monitor status
- Resolve license shortages and verify site assignments if errors occur
What common mistakes to avoid when switching from Clever to Jamf School
One key mistake is failing to verify license availability before starting device enrollment. Without enough Jamf School licenses assigned to your Apple School Manager account, devices queue indefinitely during enrollment. For example, a district delayed deployment by weeks because their license count was half what they needed. Always confirm license counts in Jamf School’s Settings > Licensing before migration.
Another frequent error is overlooking how location and user role settings impact device management. Jamf School uses Sites to segment devices and assign permissions. If you don’t map your Clever groups correctly to Jamf School sites and assign accurate user roles under Accounts > Roles, users may lose access or devices may be unmanaged. One school saw 30% of devices unusable post-migration due to misconfigured site assignments.
Ignoring user training before the switch leads to a surge in support tickets. If teachers and IT staff aren’t familiar with Jamf School’s interface and login process, they struggle with device check-ins and app assignments. This often doubles support calls in the first month after migration. Schedule focused training sessions and distribute quick-reference guides on Jamf School basics to reduce friction.
- Check Jamf School license availability in Settings > Licensing before enrolling devices.
- Map Clever groups to Jamf School Sites and assign correct user roles under Accounts > Roles.
- Provide targeted user training to teachers and tech staff before and immediately after migration.
Frequently asked questions
What does Jamf school log in process involve?
The Jamf School login process requires you to authenticate using your school’s identity provider credentials, typically tied to your existing Single Sign-On (SSO) system. After entering your username and password, you may need to verify multi-factor authentication if your institution enforces it. Access is granted through the Jamf School portal, where you manage users and devices.
Why am I seeing Jamf school waiting for licenses message?
This message appears when your Jamf School account has not been assigned sufficient licenses to cover all enrolled devices or users. Check your license count under Settings > Licenses & Users and ensure you have enough active licenses for the devices you manage. Purchasing or reallocating licenses promptly resolves this hold-up.
How do I fix Jamf school location not correct errors?
Location errors typically stem from mismatched or incomplete device information during enrollment. Verify that device location attributes are correctly mapped by reviewing device records in Jamf School under Devices > Inventory. Correct physical location fields manually or update your import CSV files to include accurate location data before re-enrollment.
What is the difference between Jamf school sign in and Jamf school manager login?
Jamf School sign in refers to the general user login portal where students, teachers, or staff access their accounts. Jamf School Manager login is a separate access point for IT administrators with elevated permissions to configure settings, manage devices, and oversee the entire deployment. The Manager login provides administrative controls not available through the standard sign-in.
What this guide does not cover
This guide does not cover migrating from Clever to Jamf School on non-Apple devices, as Jamf School is primarily designed for Apple ecosystems. If your environment includes Android or Windows devices, you will need a different management solution or additional tools. Also, this checklist assumes you have administrative access to both Clever and Jamf School portals and a basic understanding of MDM concepts. For complex network or directory integrations beyond standard Jamf School capabilities, consult a specialized consultant or Jamf support directly.
Quick checklist
- Verify administrative credentials for both Clever and Jamf School portals before starting.
- Download and review the Jamf School Administrator Guide focusing on device enrollment.
- Log into Jamf School via the dedicated URL and confirm access to Device Management.
- Prepare Apple devices by unenrolling them from Clever and backing up critical data.
- Enroll devices into Jamf School using Apple School Manager or manual enrollment methods.
- Validate user login flows by testing with a sample student and teacher account.
- Check device profiles for correct configuration and restrictions within Jamf School.
- Monitor enrollment status and troubleshoot errors using Jamf School’s built-in reports.
- Communicate changes clearly to end users, emphasizing new login steps and support contacts.
To move forward efficiently, start by logging into your Jamf School portal and familiarizing yourself with the Device Enrollment section. This is where you’ll spend most of your time and catch common pitfalls early, like missing Apple School Manager linkages or incomplete user syncs. A clear step-by-step approach here prevents cascading issues later and ensures your migration stays on track.
See also: Moving from Clever to Google Admin Console: Your No-Nonsense Checklist · Moving from ClassLink to Jamf School: Your Precise Migration Checklist · Switching from Clever to ClassLink: What You Need to Know · How to Build a Clever Implementation Timeline That Works