How to Set Up a Passkey for Apple ID on iPhone: A Step-by-Step Guide
This guide explains how to set up a passkey for Apple ID on iPhone, enhancing security with easy-to-follow steps and troubleshooting tips.

This article explains how to set up a passkey for Apple ID on an iPhone, detailing each step clearly and efficiently. Passkeys are a newer, more secure alternative to traditional passwords, designed to simplify authentication without sacrificing security. Understanding the difference between passkeys, passcodes, and passwords is essential for effective Apple ID management.
Setting up a passkey involves navigating the Settings app, accessing Apple ID preferences, and enabling the appropriate security options. This guide also covers integrating passkeys with password managers like 1Password for streamlined access. Troubleshooting common issues and comparing passkeys with passwords help users make informed decisions about their Apple ID security strategy.
Before you start: What is needed to set up a passkey for Apple ID
A passkey is a cryptographic credential designed to replace traditional passwords, providing stronger security without relying on user-generated strings. Unlike passcodes, which are device-specific numeric or alphanumeric codes used to unlock an iPhone, passkeys are stored securely and synced across Apple devices via iCloud Keychain. Passkeys authenticate Apple ID sign-ins using Face ID, Touch ID, or device PIN without transmitting passwords, reducing phishing and credential theft risks.
Setting up a passkey for Apple ID requires an iPhone running iOS 16 or later with two-factor authentication enabled on the Apple ID account. Face ID or Touch ID must be configured because biometric authentication is integral to using passkeys. Additionally, iCloud Keychain must be enabled to securely store and sync passkeys across devices.
Third-party password managers like 1Password now support Apple passkeys, allowing users to create, store, and autofill passkeys on iPhones. This integration provides an alternative to iCloud Keychain while maintaining security and usability.
- Ensure the iPhone is updated to iOS 16 or later by going to Settings > General > Software Update. A message confirming the device is up to date indicates readiness.
- Verify two-factor authentication is active by navigating to Settings > [user name] > Password & Security. The “Two-Factor Authentication” status should show as “On.”
- Set up Face ID or Touch ID under Settings > Face ID & Passcode or Touch ID & Passcode. A successful setup is indicated by the option to add a fingerprint or face scan.
- Enable iCloud Keychain at Settings > [user name] > iCloud > Keychain. The toggle should be green, confirming activation.
- Optionally, install and configure 1Password or another compatible password manager from the App Store, following the app’s instructions to enable passkey support.
How to set up apple passkey
- Open the Settings app on the iPhone and tap the name at the top to access Apple ID settings. A screen showing Apple ID, iCloud, Media & Purchases should appear.
- Tap Password & Security. This section contains options related to sign-in security and authentication methods.
- Look for the Passkeys option within Password & Security and tap it. If passkeys are not yet enabled, an option to Create Passkey will be visible.
- Select Create Passkey. The system will prompt to authenticate using the configured biometric method, either Face ID or Touch ID, depending on the iPhone model.
- After successful biometric verification, the device generates a unique cryptographic passkey linked to the Apple ID. A confirmation message appears stating the passkey has been created and will be saved securely.
- The passkey is automatically stored in iCloud Keychain to enable seamless use across Apple devices signed in with the same Apple ID. The screen confirms the passkey is saved and active.
- Exit the settings. The Apple ID passkey is now set up and can be used for passwordless sign-ins where supported.
Tip: Ensure iCloud Keychain is enabled beforehand to avoid passkey saving issues during setup.
How to set up a passkey iphone for Apple ID login
After creating a passkey for Apple ID, sign-in on the iPhone and other Apple devices shifts from entering passwords to biometric authentication, streamlining security and speed. Face ID or Touch ID automatically authenticates the user when signing in, removing the need to manually type credentials.
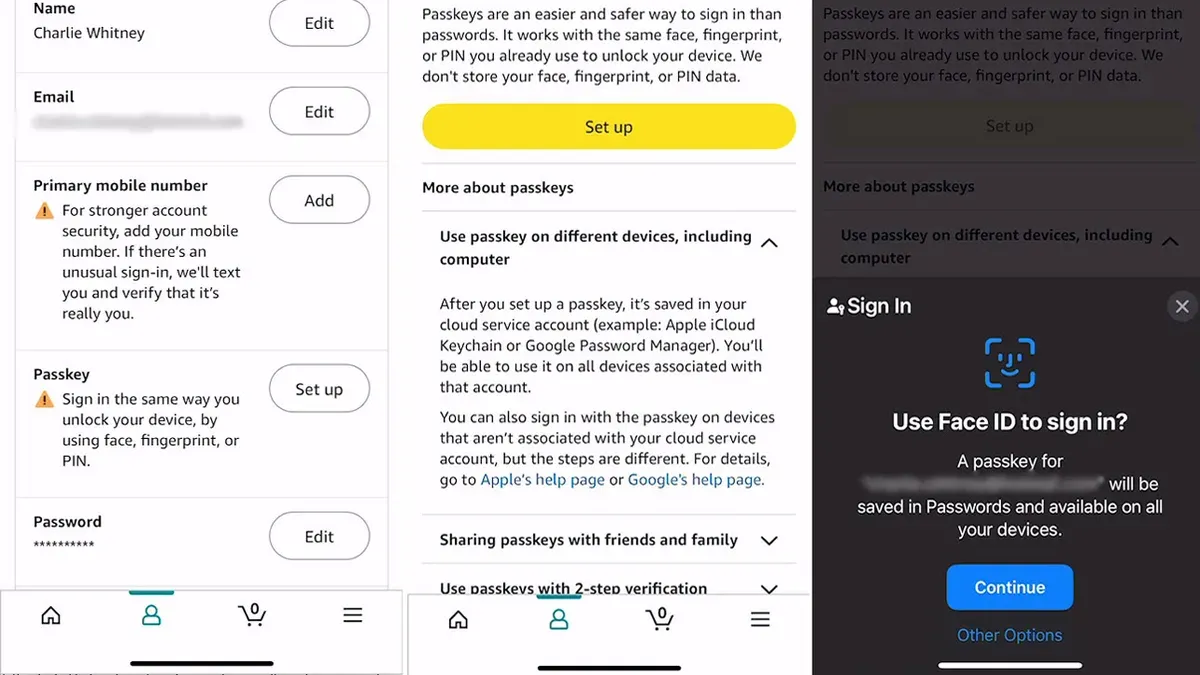
- On the sign-in screen for Apple ID, select the option to use a passkey instead of entering a password. The device prompts for Face ID or Touch ID authentication.
- Authenticate with Face ID or Touch ID. Upon successful recognition, the passkey stored in iCloud Keychain autofills the login fields.
- Complete the sign-in process; the device confirms access has been granted without password input.
If biometric authentication is unavailable or fails, fallback options include entering the Apple ID password manually or using account recovery methods. The passkey system enhances security by eliminating password exposure and reducing phishing risks since passkeys are device-specific and cryptographically protected.
Compared to traditional password entry, passkey sign-in is faster because it removes typing and guessing steps. It also provides stronger security as it relies on asymmetric cryptography and biometric verification, making unauthorized access significantly more difficult.
Tip: Ensure iCloud Keychain is enabled to allow seamless passkey autofill across Apple devices, simplifying sign-in and syncing credentials securely.
How to create a passkey for Apple account with 1Password
1Password integrates with iCloud Keychain to securely store and autofill Apple ID passkeys, providing an extra layer of convenience and backup. Using 1Password alongside iCloud Keychain allows users to manage passkeys across multiple devices and platforms, including non-Apple environments, while maintaining strong encryption standards.
To create and synchronize a passkey for an Apple account with 1Password, follow these steps:
- Open the 1Password app on the iPhone and sign in to the user vault. Successful sign-in reveals the main vault interface.
- Navigate to the login item for the Apple ID account or create a new login entry by tapping “+” and selecting “Login.” You will see the login form editor.
- Use the built-in passkey creation feature by selecting “Add Passkey” or similar wording available in the login item settings. This prompts 1Password to generate a cryptographic passkey linked to the Apple ID.
- After creation, save the passkey within the login item. The item now securely stores the passkey alongside the username and other credentials.
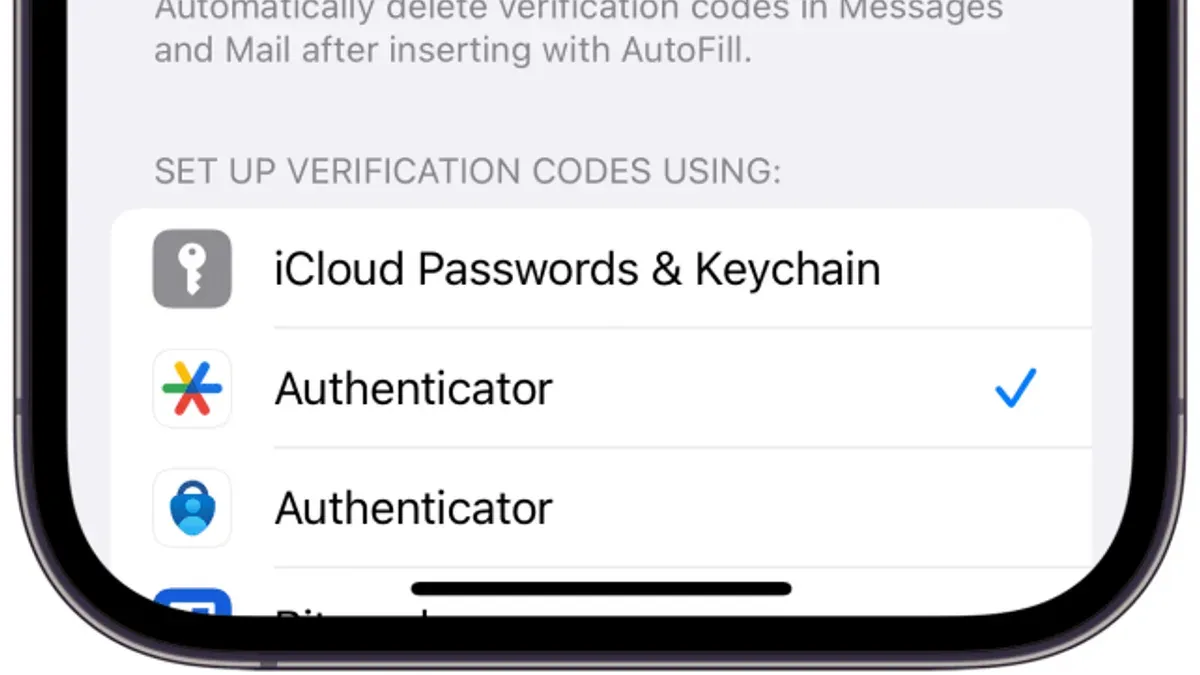
- Enable 1Password’s autofill feature in iOS Settings under Passwords > Autofill Passwords, ensuring 1Password is checked. This allows 1Password to autofill Apple ID passkeys when signing in.
- Sync 1Password data through your preferred method (iCloud, 1Password server) so the passkey is available on all authorized devices.
Security considerations: While 1Password encrypts passkeys locally and in transit, users should trust the password manager’s security model and keep the master password strong and confidential. Unlike iCloud Keychain, 1Password offers cross-platform support but relies on third-party infrastructure, so evaluating personal threat models is advisable.
Tip: Regularly update both iOS and 1Password to benefit from the latest security patches and passkey management improvements.
How to sign in with passkey apple
Signing into an Apple ID account using a passkey streamlines authentication by replacing traditional passwords with biometric or device PIN verification, ensuring enhanced security and convenience. This process begins when the user selects the Apple ID sign-in option on supported devices or websites that recognize passkey credentials.
- On an iPhone, iPad, or Mac, navigate to the Apple ID sign-in page or app where passkey login is supported. The interface will prompt to use a saved passkey if available.
- Choose the option to sign in with a passkey. The system will then request biometric authentication via Face ID or Touch ID, or alternatively, the device PIN if biometrics are unavailable. Successful authentication will complete the sign-in process instantly.
- For cross-device scenarios, such as signing in on a Mac using an iPhone, the Mac will prompt the iPhone to approve the sign-in via a notification. Approving on the iPhone with biometric verification transfers the passkey securely to the Mac, enabling login without entering a password.
- When signing in on non-Apple devices or browsers, the process depends on the password manager or platform used to store passkeys. For example, 1Password users can autofill passkeys on supported browsers after biometric or master password verification.
- If a device does not have access to the passkey, the sign-in falls back to traditional Apple ID password entry, maintaining account accessibility.
Users report high success rates with passkey sign-ins, citing faster authentication and reduced errors compared to password input. Common issues include delayed device-to-device communication or biometric sensor misreads, typically resolved by retrying authentication steps.
Tip: Ensure devices are updated and connected to the internet for seamless cross-device passkey sign-in.
Troubleshooting common issues when setting up or using Apple ID passkeys
Several issues can arise when setting up or using Apple ID passkeys. If the passkey creation option is missing or greyed out, first verify that iCloud Keychain is enabled under Settings > [user's name] > iCloud > Keychain. Lack of two-factor authentication or outdated iOS versions can also disable passkey options. An error message like “Passkey setup unavailable” often indicates these prerequisites are unmet.
Biometric authentication problems, such as Face ID or Touch ID not working, may stem from sensor calibration issues or disabled biometric settings. Navigate to Settings > Face ID & Passcode or Touch ID & Passcode to ensure biometrics are active and properly enrolled. Restarting the device often resolves temporary hardware glitches causing biometric failures.
When passkey autofill does not appear during sign-in, check that Autofill Passwords is enabled via Settings > Passwords > Autofill Passwords and that iCloud Keychain or the chosen password manager is selected. Conflicts can occur if multiple password managers are active simultaneously; disabling one temporarily can identify the source of the issue.
Conflicts between iCloud Keychain and third-party password managers like 1Password are common. To avoid credential overlap, use only one manager for Apple ID passkeys and disable autofill in the other. Regularly updating both iOS and password manager apps improves compatibility and reduces errors.
If passkeys must be reset or if reverting to passwords is necessary, follow these steps:
- Go to Settings > Passwords > tap the Apple ID entry and select Delete Passkey. The system should confirm passkey removal successfully.
- Sign out of Apple ID under Settings > [user's name] > Sign Out, then sign back in using the traditional password method.
- Reset two-factor authentication if prompted, following Apple's official guidance.
- Create a new passkey afterward if desired, ensuring all prerequisites are met.
Tip: Regularly check for iOS updates and password manager app updates to minimize passkey-related problems.
How to set a password for apple id versus passkey: What users need to know
An Apple ID password is a traditional secret string used to authenticate a user. It requires manual entry and is vulnerable to phishing, credential stuffing, and brute force attacks if not complex or regularly updated. Apple recommends strong, unique passwords combined with two-factor authentication to mitigate these risks.
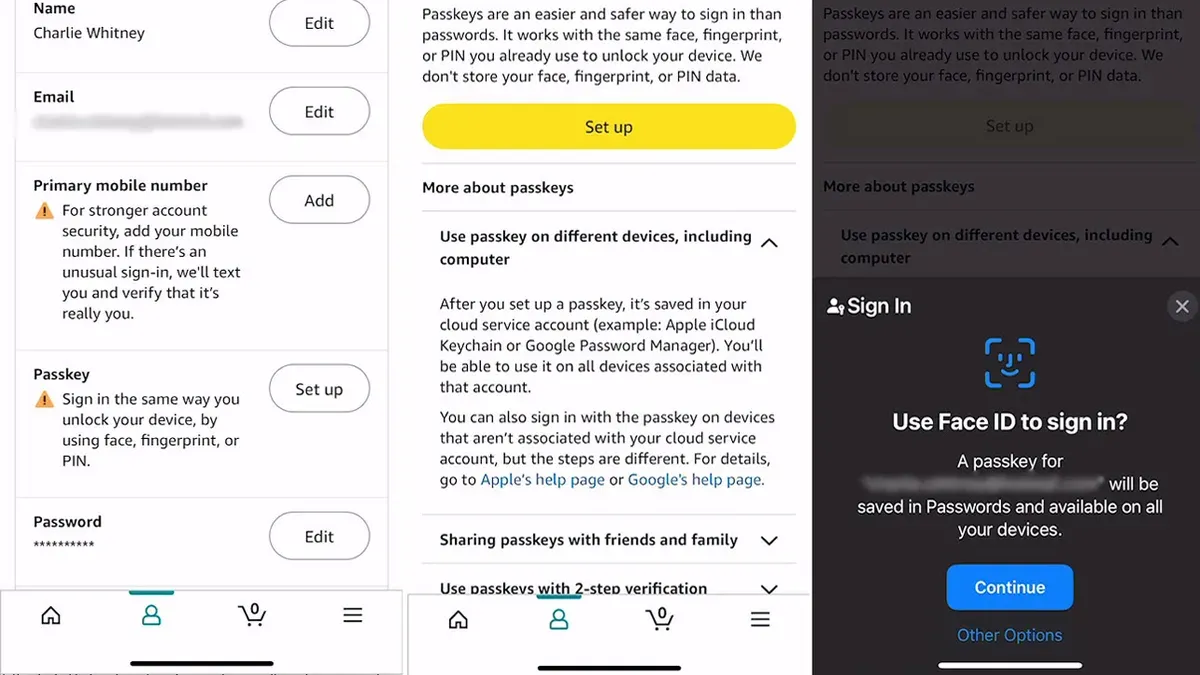
Passkeys replace passwords by using cryptographic keys stored securely on devices. They offer phishing-resistant authentication because the private key never leaves the device and cannot be intercepted or reused by attackers. Passkeys also streamline login by using biometric verification or device PIN, reducing reliance on password memory.
Despite their advantages, passkeys are not yet universally supported. Passwords remain necessary for fallback scenarios, such as logging in on legacy devices, certain third-party services, or during account recovery. Apple’s security guidelines suggest maintaining a strong password as a backup while transitioning to passkeys.
For effective Apple ID security, users should enable passkeys where supported and keep two-factor authentication active. Regularly updating the Apple ID password and using a reputable password manager can safeguard fallback credentials. Combining passkeys with strong password hygiene provides layered defense and flexibility across devices and services.
Frequently asked questions
How to create a passkey apple?
Creating a passkey for Apple ID involves using the built-in security features on an iPhone or Mac. Navigate to Settings, select Passwords, and choose to add a new passkey. The system generates a cryptographic key pair that replaces traditional passwords during login. This process requires device authentication such as Face ID, Touch ID, or a device passcode to confirm the creation.
How to get an apple passkey?
An Apple passkey is obtained by setting it up directly on the device through the Passwords section in Settings. When signing into an app or website that supports passkeys, the option to create and save a passkey appears automatically. The passkey is stored securely in iCloud Keychain and synced across Apple devices.
How to setup a passkey on iphone?
To set up a passkey on an iPhone, open Settings and go to Passwords. Select the option to create a passkey for your Apple ID or supported accounts. Authenticate using Face ID, Touch ID, or your device passcode. The passkey will then be saved in iCloud Keychain for seamless use across devices.
How to get apple id passcode?
The term 'Apple ID passcode' often refers to the device passcode or two-factor authentication codes, not the password itself. The device passcode is set through Settings > Face ID & Passcode (or Touch ID & Passcode). Two-factor authentication codes are generated automatically and sent via trusted devices or phone numbers.
How do i set up a passcode?
Setting up a device passcode on an iPhone requires opening Settings, selecting Face ID & Passcode or Touch ID & Passcode, then tapping Turn Passcode On. Choose a numeric or alphanumeric code and confirm it. This passcode protects device access and is required when creating or using passkeys.
What this advice does not cover and who should do something else
This guide does not cover setting up passkeys on non-Apple devices in detail; users relying on cross-platform access should consult additional resources to ensure compatibility and security across their device ecosystem. Additionally, users who have not enabled two-factor authentication (2FA) on their Apple ID cannot set up passkeys and must first secure their account by turning on 2FA in Settings > [user’s name] > Password & Security.
For those managing enterprise or managed Apple IDs, passkey setup may be subject to organizational policies and restrictions. Consulting the IT department or Apple Business Manager documentation is recommended for these cases.
Tip: Enable two-factor authentication before attempting to create a passkey to avoid setup errors and enhance overall account security.
The single most useful next step is to enable two-factor authentication if it is not active, then follow the step-by-step process to create and manage passkeys directly within the iPhone Settings under Passwords > Add Password > Use Passkey. This ensures a smoother setup experience and stronger protection for the Apple ID login credentials.
See also: How to Set Up a Passkey for Amazon: A Step-by-Step Guide · How to Secure Your YouTube Account: Step-by-Step Guide · How to Secure Your X (Twitter) Account: Step-by-Step Guide · How to Secure Your WeChat Account: A Complete Step-by-Step Guide