Switching from Pear Deck to Padlet: A Practical Guide for Educators
Discover practical steps and benefits of switching from Pear Deck to Padlet to boost student collaboration and lesson flexibility.

Short answer: Switching from Pear Deck to Padlet means moving from a tool designed primarily for interactive presentations to one focused on collaborative workspaces. You make this switch when your teaching goals prioritize flexible student collaboration and content organization over structured slide-based interactions.
This guide explains why you might choose Padlet over Pear Deck by comparing their core features, how to access and use both platforms effectively before switching, and practical steps to migrate your lessons. It also addresses common concerns Pear Deck users face during the transition, helping you decide if and when to make the change smoothly.
Understand Why You Use Pear Deck
Pear Deck excels as an interactive presentation tool designed to boost student engagement during live lessons. Its core value lies in enabling educators to embed formative assessments directly into slides, allowing students to respond in real time. This dynamic interactivity helps teachers gauge understanding instantly, making it easier to adapt instruction on the spot.
Common reasons educators choose Pear Deck include its seamless integration with Google Slides and Microsoft PowerPoint, built-in question types like multiple choice, draggable, and text responses, plus features such as the “Student Dashboard” for ongoing monitoring. These tools support a variety of lesson formats—from quick checks for understanding to detailed interactive lectures—frequently used in synchronous class sessions.
However, some educators consider switching due to Pear Deck’s limitations in facilitating open-ended collaboration and the recurring costs associated with premium features. For example, while Pear Deck supports interactive input, it doesn’t provide a freeform workspace for brainstorming or group idea sharing. If your teaching style demands more student-driven collaboration alongside formative assessment, this gap might be a deciding factor.
Picture a live lesson where you use Pear Deck to ask students to solve math problems on slides and receive immediate feedback. You benefit from engagement and control but may find the format restrictive when wanting students to co-create or organize ideas freely. Recognizing these strengths and constraints helps clarify what you want to preserve or change as you explore alternatives like Padlet.
Learn How to Access and Use Pear Deck Before Switching
Accessing Pear Deck is straightforward if you use Google Workspace. Start by opening Google Slides, then go to Extensions > Add-ons > Get add-ons. Search for "Pear Deck" and install the add-on. Once added, you’ll see Pear Deck as an option within the Extensions menu, allowing you to integrate interactive questions directly into your slides.
To create a Pear Deck presentation, open your Google Slides deck and select Extensions > Pear Deck > Start Lesson. This launches a session where students can join through a unique code or link you share. They interact in real time, answering questions embedded in your slides.
Pear Deck’s Power Up features enhance engagement by enabling additional question types, such as draggable items or drawing responses, which go beyond the basic multiple-choice or text answers. These features require activating Power Up, typically through the Pear Deck sidebar within Google Slides.
Compared to Padlet’s onboarding, which starts with setting up a board and inviting collaborators, Pear Deck begins with presentation creation and live session start. For example, you might create a math quiz slide deck in Pear Deck, add a draggable number line question via Power Up, then launch a live session where students answer simultaneously.
- Open Google Slides and install Pear Deck add-on via Extensions > Add-ons > Get add-ons
- Create a presentation and add interactive questions through Pear Deck menu
- Start a Pear Deck session to generate join links for students
- Activate Power Up features to access advanced question types
Explore What Padlet Offers Compared to Pear Deck
Padlet provides a versatile, collaborative workspace distinct from Pear Deck’s interactive presentation format. Its core strength lies in flexible boards that support brainstorming, sharing, and collaboration, allowing you and your students to contribute asynchronously or synchronously.
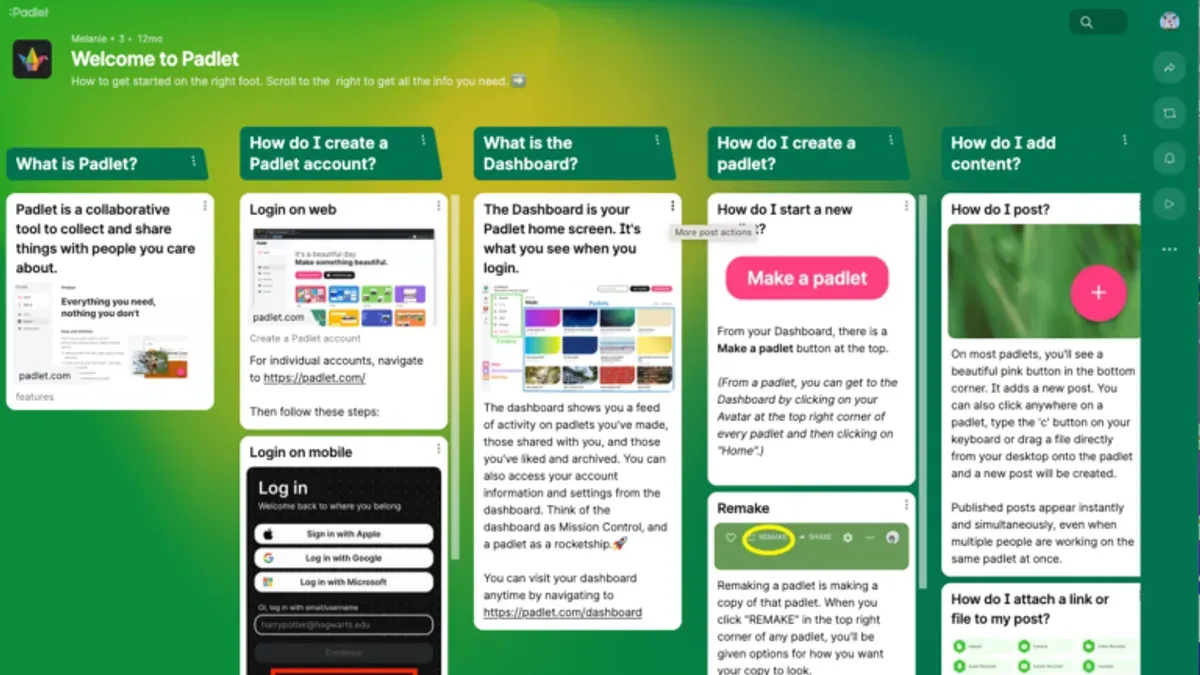
While Pear Deck focuses on live sessions with real-time formative assessment, Padlet enables ongoing interaction. For example, you can create a "Wall" board where students post text, images, links, videos, and documents to explore a topic over several days, rather than during a single presentation.
Padlet supports a wider variety of multimedia content, including PDFs, audio recordings, and embedded websites, which broadens the range of learning activities. This makes it ideal for collaborative projects, peer feedback, and resource curation beyond a linear slide deck.
| Feature | Pear Deck | Padlet |
|---|---|---|
| Primary Use | Interactive live presentations | Collaborative boards for ongoing engagement |
| Session Type | Mostly synchronous | Both synchronous and asynchronous |
| Content Types | Slides with interactive questions | Text, images, video, audio, links, documents |
| Collaboration | Limited to responses in live session | Open contributions, comments, reactions |
Imagine running a history lesson where students contribute to a Padlet board with photos, timelines, and questions before class, then use that content as a launchpad for discussion. This contrasts with Pear Deck’s format where interaction happens mainly during a teacher-led slide presentation.
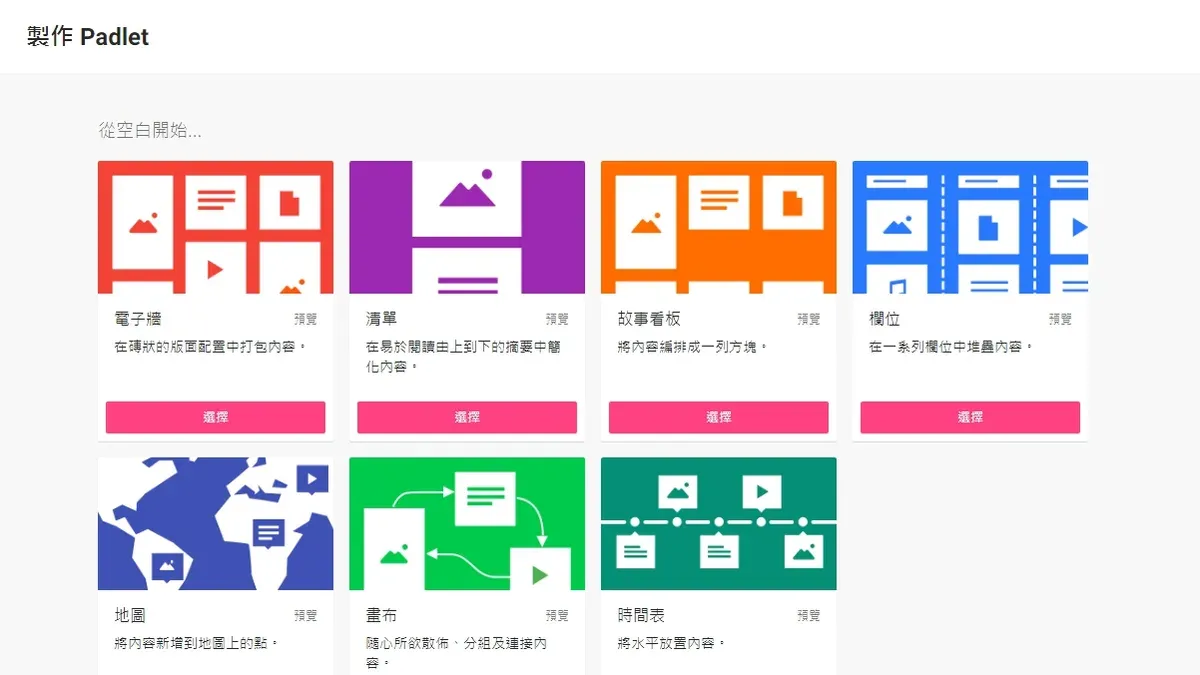
- Use Padlet’s board templates like "Canvas" or "Shelf" to organize multimedia content creatively.
- Set clear expectations for synchronous vs asynchronous participation to match your teaching style.
- Encourage students to comment and react on Padlet to foster deeper collaboration.
Plan Your Transition: How to Move from Pear Deck to Padlet
Start by reviewing your Pear Deck lessons to identify slides with interactive questions, polls, or discussions that can be adapted into Padlet’s flexible boards. While Pear Deck sessions cannot be directly exported, export your session notes and student responses by downloading session reports as CSV files for reference to recreate activities.
Next, set up your first Padlet board by selecting a layout that fits your lesson style, such as Wall or Canvas for open-ended discussions or Stream for sequential posts. For example, a Pear Deck slide with a reflective question can become a Padlet post where students add text, images, or links asynchronously or live.
Manage student access by creating a Padlet link with appropriate privacy settings—Public with password, Private with invite-only, or Members-only—to control participation. Unlike Pear Deck’s live session model requiring immediate student engagement, Padlet supports flexible timing and varied contribution types, so communicate expectations clearly.
A practical example: convert a Pear Deck slide asking students to submit three ideas by creating a Padlet Wall board titled "Brainstorm Session." Students post their ideas as individual notes, allowing for peer replies and multimedia attachments, enriching interaction beyond Pear Deck’s text-based input.
- Export Pear Deck session reports for content reference
- Map Pear Deck interactive slides to Padlet board layouts
- Create Padlet board with relevant privacy and access settings
- Communicate new participation expectations to students
- Test the Padlet board yourself before student use
Avoid Common Mistakes When Switching Platforms
One frequent mistake educators make is expecting Padlet to mirror every Pear Deck feature exactly. Pear Deck’s live formative assessment tools don’t have direct equivalents in Padlet, which focuses more on collaboration. Trying to replicate Pear Deck’s step-by-step interactive slides in Padlet can lead to confusion and diminished student engagement.
Another common error is skipping student orientation on the new platform. Students unfamiliar with Padlet’s interface may struggle to post, comment, or navigate boards, which disrupts lesson flow. For instance, an educator reported that without a brief walkthrough, students repeatedly posted in the wrong columns, delaying activities.
Overloading Padlet boards with excessive content at once is also problematic. Unlike Pear Deck’s guided slide progression, Padlet’s open canvas can overwhelm students if too many posts or resources appear simultaneously. Breaking content into smaller, manageable sections helps maintain focus and prevents information overload.
Clear communication about how students join and interact with Padlet is crucial. Confusion over board URLs, access permissions, or posting instructions frequently arises, especially in remote or hybrid settings. Providing explicit steps and checking student access before lessons avoids technical delays.
- Match Padlet’s strengths without forcing Pear Deck features one-to-one
- Provide a student tutorial or demo on Padlet basics
- Divide content into smaller Padlet boards or manageable sections
- Communicate access instructions clearly and verify student login
Read next
- Moving from Pear Deck to Nearpod Checklist for Educators
- Switching from Pear Deck to Microsoft Forms: A Practical Educator’s Guide
- Switching from Pear Deck to Google Forms: A Confident Educator’s Guide
- Moving from Padlet to Pear Deck Checklist: A Practical Educator’s Guide
Frequently asked questions
How to access pear deck?
You can access Pear Deck by visiting the official website and signing in with your Google or Microsoft account. After logging in, you can start creating or presenting interactive slides directly from the Pear Deck dashboard or through the Pear Deck add-on in Google Slides.
How to use pear deck?
To use Pear Deck, create or open a Google Slides presentation, then activate the Pear Deck add-on to add interactive questions and activities. Present your session live while students respond in real time via their devices, with results displayed on your dashboard for instant feedback and engagement tracking.
How to make a pear deck?
Start by opening Google Slides and installing the Pear Deck add-on from the add-ons menu. Use the Pear Deck sidebar to insert interactive elements like multiple choice, draggable, or text response slides into your presentation. Once complete, save and present to engage your students interactively.
Why use pear deck?
Pear Deck enhances presentations by integrating real-time interaction, allowing you to assess student understanding instantly and adjust instruction accordingly. Its seamless integration with Google Slides makes it easy to add engagement without leaving your familiar presentation environment.
how to access pear deck
Access Pear Deck by navigating to peardeck.com and signing in with your educational Google or Microsoft account. Alternatively, open Google Slides, go to Add-ons > Get add-ons, search for Pear Deck, and install it to start creating interactive lessons within your slides.
What This Advice Does Not Cover
This guide focuses specifically on educators transitioning from Pear Deck to Padlet for classroom collaboration and presentation purposes. It does not cover switching to Padlet for non-educational uses such as corporate projects or personal organization. Additionally, if your teaching relies heavily on Pear Deck’s specialized formative assessment features—like live student pacing controls or embedded slide annotations—you may need to maintain Pear Deck alongside Padlet or explore other assessment tools designed for those unique needs.
Quick checklist
- Identify which Pear Deck features you use most and which Padlet capabilities can replicate or enhance those.
- Familiarize yourself with Padlet’s workspace creation and sharing options through the dashboard menu.
- Export or archive important Pear Deck presentations by selecting "Export" under the "File" menu before migration.
- Start building your first Padlet wall by selecting a template that matches your lesson format (e.g., grid or stream).
- Communicate the platform change clearly to students, including how to access Padlet walls via shared links or QR codes.
- Test a small lesson or activity on Padlet before a full transition to identify any workflow adjustments.
- Avoid migrating all content at once; prioritize most-used lessons and resources first.
To move forward confidently, begin by exporting your key Pear Deck presentations and creating a Padlet account. Launch your first Padlet wall using the "Start from template" option, then invite a small group of students to interact. This hands-on approach will reveal how Padlet’s collaborative tools fit your teaching style and highlight any adjustments needed before a full switch.