Moving from Blooket to Google Forms Checklist: A Practical Guide
This guide helps you transition from Blooket to Google Forms checklist with clear steps for creating effective, customizable checklists.

Short answer: Moving from Blooket to Google Forms checklist means shifting from a game-based quiz platform to a flexible form tool that supports customizable checklists and detailed tracking. Google Forms lets you build straightforward checklists for assessments or attendance, while Blooket focuses on interactive learning games.
This article covers exactly how to manage this transition with a practical checklist approach. You will learn the key differences between the two platforms, how to create effective checklists in Google Forms, adapt Blooket-style quizzes into forms, use Google Sheets to track progress, and avoid common pitfalls when switching. The goal is to give you clear steps and setups so you can confidently replace Blooket games with purposeful Google Forms checklists.
What is the difference between Blooket and Google Forms for checklists?
Blooket is a game-based platform designed to engage students with quizzes and interactive gameplay. Its strength lies in gamification elements like points, timers, and leaderboards that motivate participation. However, it offers limited options for detailed data collection or form customization beyond quiz formats.
Google Forms, by contrast, is a versatile tool for creating surveys, quizzes, and especially checklists. It supports customizable checkboxes, multiple-choice questions, and branching logic, allowing you to tailor forms precisely to your needs. Integration with Google Sheets means you can track responses in real time and analyze data efficiently.
Consider a scenario where you want to track student progress on a multi-step project. Blooket might engage students with quiz rounds, but Google Forms lets you create a checklist with specific tasks, deadlines, and conditional follow-ups. You gain control over form design and can repurpose the tool beyond games for assessment or administrative tracking.
| Feature | Blooket | Google Forms |
|---|---|---|
| Primary Purpose | Game-based quizzes and engagement | Customizable surveys, quizzes, and checklists |
| Gamification | Points, timers, leaderboards | None (focus on form functionality) |
| Checklist Support | Minimal or none | Checkboxes, branching logic |
| Data Management | Basic result summaries | Detailed response tracking via Sheets |
| Use Cases | Interactive review games | Assessments, progress tracking, surveys |
How do you create a checklist in Google Forms?
Start by opening Google Forms and choosing either a blank form or a checklist template from the Template Gallery. If you select a template, search for "Checklist" or "To-Do" to find relevant options. Using a template saves time but starting blank gives full control over structure and content.
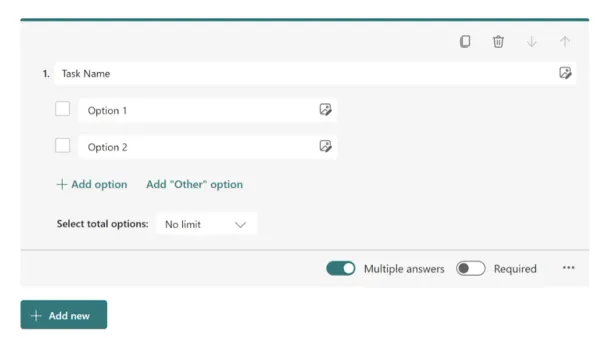
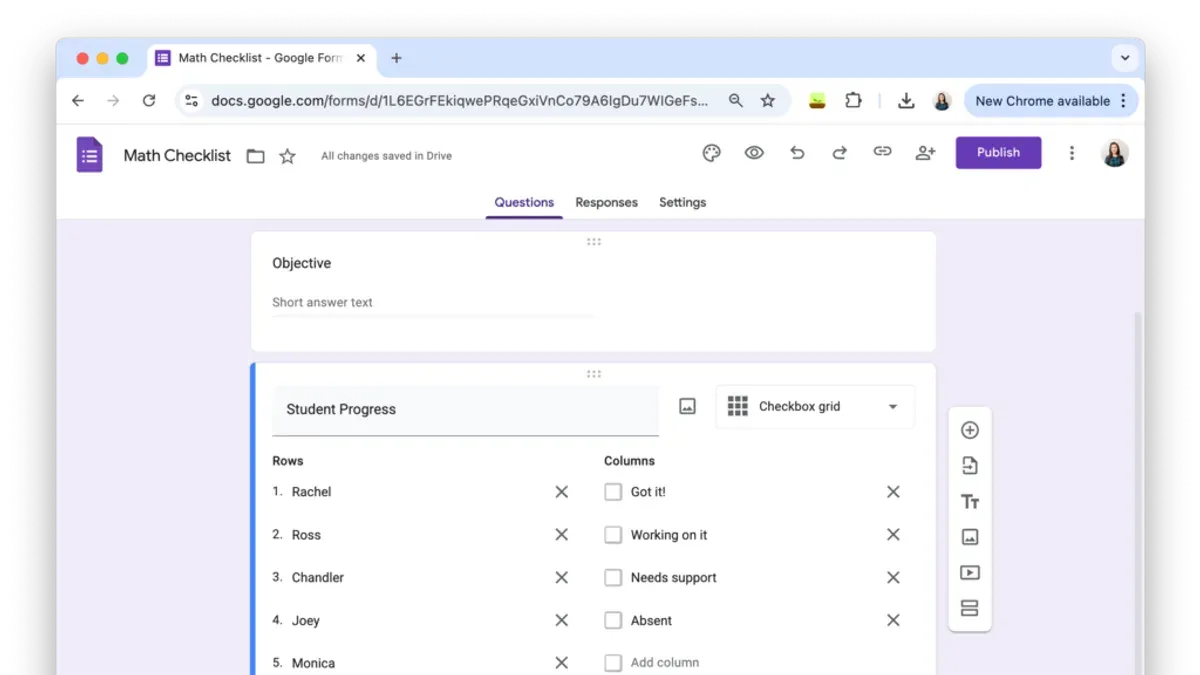
Next, add a question by clicking the plus (+) icon. Change the question type to "Checkboxes." Enter your checklist items as separate options within this question. For example, if you’re creating a "Classroom Setup" checklist, items might include "Projector checked," "Seating arranged," and "Materials distributed."
Organize multiple checkbox questions to group related tasks. Use section breaks to separate categories, keeping the form tidy and easy to navigate. Label each section clearly.
Customize form settings by clicking the gear icon. Make checklist questions "Required" to ensure users complete them before submitting. Turn on the "Show progress bar" option for longer checklists to give users visual feedback on completion status.
After building the form, preview it with the eye icon to test functionality. You can also link the form to a Google Sheet for real-time tracking of checklist responses.
- Open Google Forms and choose blank or checklist template
- Add questions and set type to "Checkboxes"
- Enter checklist items clearly as options
- Group items using sections for clarity
- Set questions as "Required" and enable progress bar
- Preview form and link responses to Sheets
How do you make a Blooket game with Google Forms?
Google Forms can approximate a Blooket-style quiz by using its quiz mode with multiple-choice or checkbox questions. Enable quiz mode under Settings > Quizzes > Make this a quiz to assign point values to answers and provide automatic grading. For example, a Blooket question "What is the capital of France?" can be recreated as a multiple-choice question in Google Forms with "Paris" marked as the correct answer and assigned 1 point.

Keep in mind, Google Forms lacks real-time gamification features like live leaderboards or timers. To compensate, link the form responses to a Google Sheet. In the Sheet, set up formulas to calculate total scores per respondent. Create a simple leaderboard by sorting scores from highest to lowest. This manual step requires refreshing the Sheet but helps track performance similarly to Blooket's scoreboard.
Example scoring layout in Google Sheets includes columns for Timestamp, Respondent Email, Question 1 Score, Question 2 Score, and Total Score (using a SUM formula). Sort by Total Score descending for a leaderboard view. This approach requires extra steps but leverages Google Forms and Sheets for assessment tracking without gamification.
- Enable quiz mode in Google Forms through Settings > Quizzes.
- Create multiple-choice or checkbox questions with answer keys.
- Link responses to Google Sheets for score tracking.
- Use formulas in Sheets to sum scores and sort for leaderboards.
- Note real-time game features like timers and live leaderboards are not available.
How do you use a moving checklist with Google Sheets?
When you link your Google Form to a Google Sheet, all responses populate automatically in real time. This connection creates a living database where every submitted checklist entry appears in rows, allowing you to track completion as it happens.
Use Sheets features like filters to view only incomplete tasks or specific students. Conditional formatting can highlight checked items in green and unchecked in red, providing instant visual cues. For example, apply a custom formula such as =B2=TRUE in conditional formatting rules to mark completed checklist boxes.
Formulas like =COUNTIF(range, TRUE) help calculate how many checklist items a student has completed. You can then create a dashboard tab with summary tables showing total completions per student or task, giving you a high-level progress overview.
Imagine a teacher tracking a class’s homework submission checklist. Each submission updates the Sheet, conditional formatting colors completed assignments, and a summary sheet aggregates totals by student and date. This setup saves time and improves accuracy when monitoring multiple students or complex task lists.
- Link your Google Form to a new or existing Google Sheet via the Form’s Responses tab
- Use Filters to isolate data subsets like incomplete tasks
- Apply conditional formatting with formulas to highlight completion status
- Use formulas like COUNTIF to calculate completion counts
- Create a dashboard tab summarizing progress across students or tasks
What common mistakes should you avoid when switching from Blooket to Google Forms?
Expecting Google Forms to replicate Blooket’s game experience exactly leads to frustration. Google Forms lacks real-time gamification like timed rounds and leaderboards; attempting to mimic these features with complex branching or scripts often results in slow, confusing forms that disengage users. For example, a form overloaded with conditional sections can cause long load times and unclear navigation, reducing completion rates.
Neglecting to plan your checklist structure before building the form wastes time and creates clutter. Without a clear outline, you might add redundant or unrelated items, making the form overwhelming. A common error is mixing assessment questions with checklist items without clear separation, which confuses respondents and complicates data analysis.
Overloading forms with too many questions or complex branching diminishes user engagement. Forms exceeding 20 questions or using multiple sections with skip logic can frustrate users, leading to incomplete responses. Keep branching simple and limit the number of items per section to maintain clarity.
Ignoring response management and follow-up tracking reduces the form’s usefulness. Without setting up notifications, filters, or follow-up steps in Google Sheets, you risk missing important data or failing to act on responses. For instance, not configuring email notifications after form submission can delay feedback to participants.
- Do not expect Google Forms to replace Blooket’s interactive gameplay exactly.
- Plan your checklist structure before creating the form.
- Avoid overloading forms with too many questions or complex branching.
- Set up response management tools like notifications and filters.
Frequently asked questions
Can I use Google Forms as a checklist maker like Blooket?
Yes, Google Forms supports checklists through its checkbox question type, allowing you to create tasks or items users can mark as completed. Unlike Blooket’s game-based format, Google Forms offers straightforward response collection and integration with Sheets for tracking. It lacks gamification but excels in customization and data management.
Where can I find a Google Forms checklist template?
You can find checklist templates directly within Google Forms by selecting "Template Gallery" on the main Forms page. Look for the "To-Do List" or "Checklist" templates, which provide a ready-made structure you can customize. Alternatively, many educators share templates online on sites like Google Drive template repositories or education forums.
How do I add checkboxes in Google Forms?
To add checkboxes, create or open a form, click the plus (+) button to add a question, then select the "Checkboxes" option from the question type dropdown. Enter your checklist items as individual options. Respondents will be able to select multiple items from the list.
Is there a blank quiz template in Google Forms I can use?
Yes, Google Forms offers a blank quiz template under the Template Gallery labeled "Blank Quiz." It includes quiz settings that allow you to assign point values, provide answer feedback, and enable automatic grading. You can customize questions using multiple-choice, checkbox, or short answer formats.
Quick checklist
- Review your current Blooket content and identify core quiz elements to transfer.
- Create a new Google Form, selecting the "Checkboxes" question type for checklist items.
- Set up question logic and sections to simulate game flow where needed.
- Link your Google Form responses to Google Sheets for tracking and analysis.
- Test your form thoroughly, checking for clarity and functionality.
- Avoid overcomplicating forms with unnecessary branching or overly long checklists.
- Keep your form design clean and focused on assessment goals.
What this advice does not cover
This guide does not cover advanced gamification plugins or third-party integrations that might extend Google Forms functionality beyond its native capabilities. If you require interactive game features or real-time competition elements similar to Blooket, consider dedicated quiz platforms or custom development solutions. This checklist focuses strictly on transitioning to Google Forms’ built-in tools for straightforward assessments and tracking.
To move forward, start by mapping your Blooket content directly into a Google Form using the "Checkboxes" question type. This approach preserves the checklist style and lets you build from a simple, manageable base. From there, use Google Sheets to monitor responses and adjust your form iteratively. This step-by-step transition keeps your assessment process efficient and adaptable.
See also: Moving from Blooket to Edpuzzle: Your Complete Checklist · Switching from Blooket to Gimkit: What You Need to Know · Switching from Blooket to Formative: A Practical How-To Guide