How to Grade Student Work in Brightspace: A Clear Step-by-Step Guide
Step-by-step guide to grading student work in Brightspace, covering gradebook setup, grading assignments, quizzes, discussions, and managing grade release.

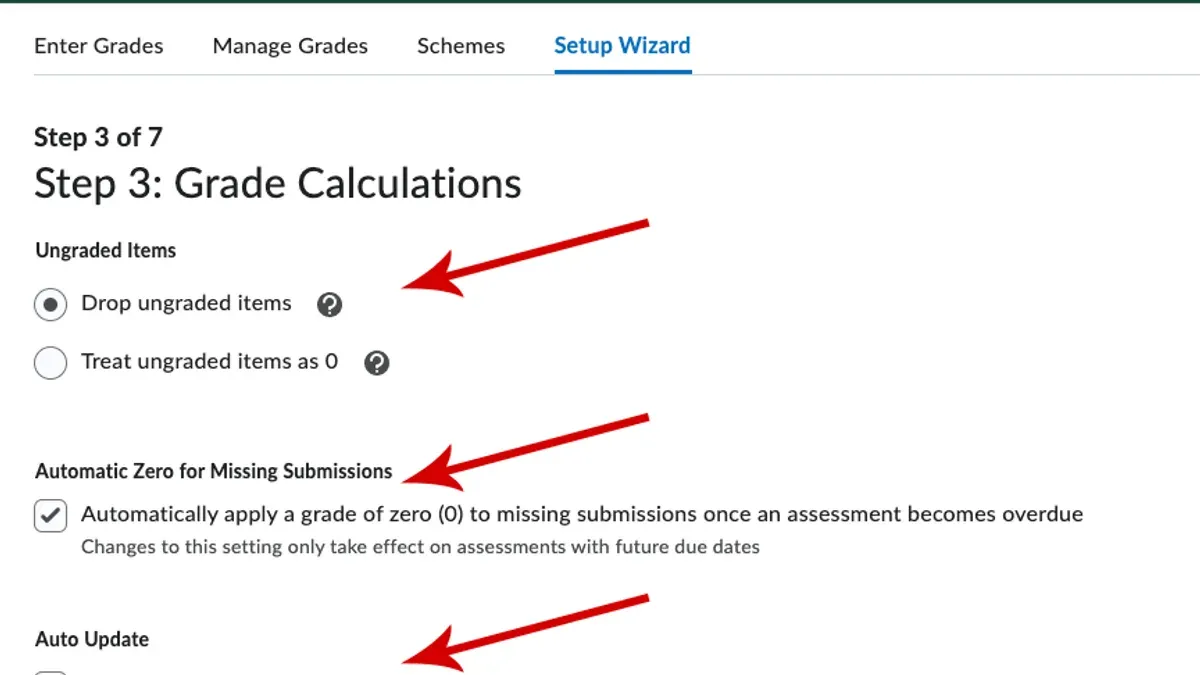
Short answer: To grade student work in Brightspace, set up your gradebook with the appropriate grade items, enter or import grades through the Grades tool, and manage assignment, quiz, or discussion evaluations using built-in grading workflows. Release grades selectively to control student access and unpublish if corrections are needed.
This article covers how to grade student work in Brightspace across all common assessment types. You will learn how to configure your gradebook, enter and adjust grades, grade assignments, quizzes, and discussions efficiently, and handle grade release and unpublishing. Practical steps and tips ensure you balance efficiency with accuracy and maintain clear communication with your students throughout the grading process.
Before you start: What you need to grade in Brightspace
Before grading in Brightspace, confirm you have instructor or TA access that includes permissions for the gradebook and assessment tools. Without these permissions, you won’t be able to enter or modify grades. Next, verify that all course components you need to grade—assignments, quizzes, and discussions—are already created or imported into the course shell. These must be available in Brightspace to link grades properly.
Understand the grading scheme used in your course. Brightspace supports points, percentages, and weighted categories, so know which method applies. If your course uses a rubric for grading, have it ready and linked to the specific assignments or discussions for consistent evaluation. Also, clarify how student submissions will be accessed—whether online text entry, file uploads, or other submission types—so you can efficiently retrieve and review them.
Follow these steps to prepare your Brightspace course for grading:
- Check your role in Brightspace has permissions for gradebook and assessment tools. You should see the "Grades" option in the course navbar.
- Confirm assignments, quizzes, and discussions to grade are created under the respective tool menus (Assignments, Quizzes, Discussions). You should see each listed with correct due dates.
- Review the grading scheme by navigating to Grades > Manage Grades and looking for the grading system used (points, weighted categories).
- Ensure rubrics are created and linked by going to Course Admin > Rubrics and verifying they attach to the relevant assessments.
- Verify submission types in each assessment’s settings to know how students submit work (file upload, text submission, etc.).
How to set up grades in Brightspace
Begin by selecting Grades from your course navigation menu. This opens the Gradebook where you manage all grading components. Your first task is to create grade items representing each assessment type—assignments, quizzes, and discussions.
- Click New and select Numeric Grade Item to create a grade entry.
- Enter a clear Name for the item, such as "Midterm Exam" or "Discussion Participation." Ensure the Max Points reflect the assessment’s total score.
- Assign a Grading Scheme if you use letter grades or custom scales. This ensures consistency across your course.
- Optionally, place the grade item into a Category like "Quizzes" or "Assignments" to organize your Gradebook logically.
- Repeat for all assessments. To create weighted categories, navigate to Manage Grades then Categories, select a category, and set its weight percentage.
- Adjust Grade Item Settings to control release timing and visibility defaults under the Release Conditions tab. Decide if grades are visible immediately or after manual release to maintain control over student access.
Once created, your Gradebook will mirror your course grading policy, providing a centralized and clear structure for assessment management.
Checklist:
- Access Grades from course navigation
- Create grade items for each assessment
- Set item name, max points, grading scheme, and category
- Organize grade items into weighted categories if used
- Adjust release settings and visibility defaults
How to enter grades in Brightspace
To manually enter grades for assessments not automatically scored or to override existing grades, start by navigating to the Grades area in your course navigation menu. Select the specific grade item linked to the assignment or activity you want to grade. This opens the spreadsheet-style gradebook where you can input scores directly into each student’s cell.
Click on a student's cell for the selected grade item to type the earned score. You can also add comments or feedback by clicking the speech bubble icon next to the grade cell. After entering grades and feedback, save your changes using the Save button at the top or bottom of the gradebook to ensure all inputs are recorded.
Use bulk editing tools like the Quick Edit mode or the Import Grades feature for efficiency when handling large classes. These tools let you enter multiple grades quickly and reduce manual errors.
For example, to enter grades for an assignment named "Research Paper," select that grade item, click on each student's cell, input their numeric score (e.g., 85), optionally add feedback, then save. Verify that all grades appear correctly in the gradebook grid before exiting.
- Go to Grades from the course navigation menu; the gradebook grid displays.
- Select the grade item for the assessment you want to enter grades for; the gradebook focuses on that item.
- Click a student's cell and type the numeric grade; the score is editable.
- Click the feedback icon to add comments if desired; a text box appears.
- Save changes using the Save button; grades and comments are recorded.
- Confirm grades appear correctly in the grid before moving on.
How to grade assignments in Brightspace
- Open the Assignments tool from the course navbar. You should see a list of all assignments created for the course.
- Select the assignment you want to grade. This opens the assignment submission list, showing all students and their submission statuses.
- Click a student's name or submission link to open the grading interface. The submission appears alongside grading tools.
- Use annotation tools to mark up the submission directly if you prefer freeform grading. You can highlight text, add comments, and draw as needed.
- If a rubric is attached to the assignment, open it within the grading interface. Use the rubric criteria to assign scores systematically, which ensures consistent and transparent grading.
- Enter the grade and any feedback in the designated fields below or beside the submission. The interface saves your input automatically or on prompt.
- Repeat for each student submission. After grading, choose whether to publish the grades immediately or keep them hidden to review later.
Rubric grading structures assessment into defined criteria with weighted scores, improving consistency and clarity. Freeform grading offers flexibility for subjective or complex feedback but requires more effort to maintain fairness. Screenshots typically show the rubric panel on the right side with clickable criteria, while freeform grading displays annotation tools over the document.
- Open Assignments tool
- Select assignment
- Access student submission
- Use annotation tools or rubric
- Enter grades and feedback
- Publish or hold grades
How to grade a quiz in Brightspace
- Open the Quizzes tool from the course navbar. You should see a list of quizzes available in your course.
- Select the quiz you want to grade. This opens the quiz dashboard where you can review submissions.
- Review automatically graded questions first. Brightspace grades multiple choice, true/false, and other objective questions instantly. Check for any anomalies or answer key errors that require adjustment.
- Manually grade essay or short answer questions by clicking on each submission. Use the provided rubric or grading guide if available. Enter scores for these questions directly in the grading interface.
- Enter or adjust total scores if needed, ensuring all components are correctly summed. You can also add feedback comments here.
- Publish grades to release scores and feedback to students, or withhold if you need more time to review. Publishing updates the gradebook automatically.
- Verify grade synchronization by navigating to the Gradebook and confirming the quiz grades appear correctly under the related grade item.
For example, a mixed quiz with 10 multiple choice questions and 2 short answers will auto-grade the multiple choice instantly. You then manually enter scores for the short answers before publishing the full quiz grade. This ensures efficiency without sacrificing accuracy.
How to grade discussions in Brightspace
- Navigate to the Discussions tool from the course navbar and select the specific discussion forum you want to grade. You should see the list of threads and posts within that forum.
- Review each student’s posts and threads carefully, comparing them against your pre-established rubric or grading criteria. The rubric may include categories like relevance, critical thinking, and engagement.
- Enter grades by clicking the Grade button associated with the discussion forum or individual posts. If your Brightspace version supports inline grading, input scores directly next to each post. Otherwise, open the related grade item in the Gradebook to input scores.
- Provide specific feedback comments for each student to guide their improvement. Use the comment box linked to each grade entry or inline comments where available.
- Decide when to publish grades. You can keep grades private while still working on them or release them immediately by selecting Publish from the grade entry screen. Confirm the grades appear correctly in the Gradebook after publishing.
For example, grading a discussion forum with a rubric involves assessing posts for clarity, evidence use, and respectfulness. Assign a score for each criterion, total the points, and enter the final grade in the associated grade item. Provide comments such as “Good use of sources but expand on your argument” to help students improve future participation.
How to release and unpublish grades in Brightspace
Use the Grades tool to control when students see their grades. After completing grading, you can publish grades individually or in bulk to make them visible to students. This lets you manage grade visibility precisely to match your course schedule.
To release grades, open the Grades tool, select the grade item, and adjust the Release Conditions or Visibility settings to "Released". Once published, students can view their scores and any feedback you provided.
If you need to hide grades temporarily, unpublish them by setting the grade item visibility back to "Not Released". This removes student access without deleting scores or feedback, but students will no longer see those grades or receive notifications related to them.
Unpublishing is useful if you find errors or want to delay feedback until all grading is complete. Always communicate clearly with students about grade release timing to avoid confusion.
- Go to the Grades tool and locate the grade item you want to release or unpublish. You will see current visibility status.
- Click the dropdown next to the grade item and select "Edit Grade Item." The grade item settings page opens.
- Scroll to the "Release Conditions" or "Visibility" section. Change the setting to "Released" to publish grades or "Not Released" to unpublish.
- Click "Save and Close." The grade item's visibility updates accordingly.
- Confirm the change by checking the grade item's status in the Grades list. It should show "Released" or "Not Released" as you set it.
How to see grades and check overall grade in Brightspace
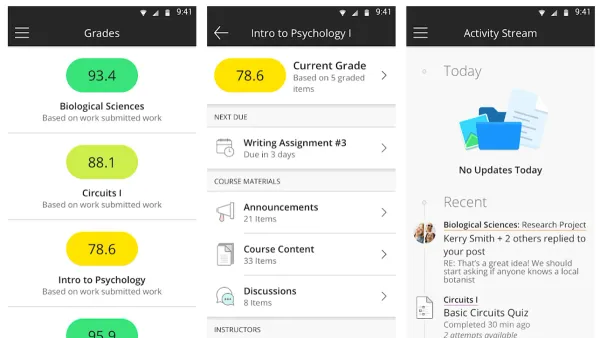
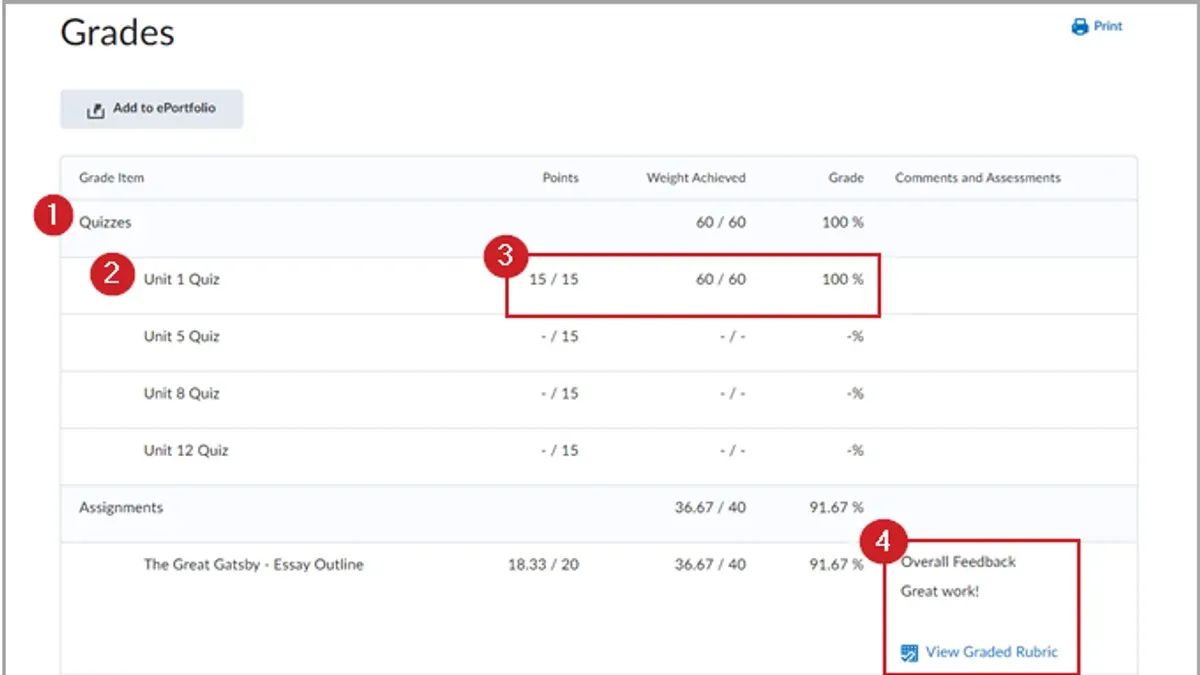
To view detailed grades and overall course standing, navigate to the Grades area from your course navbar. Instructors can see all grade items with scores, feedback, and publication status, while students see only published grades. The overall grade displays as a calculated total based on your configured grading scheme.
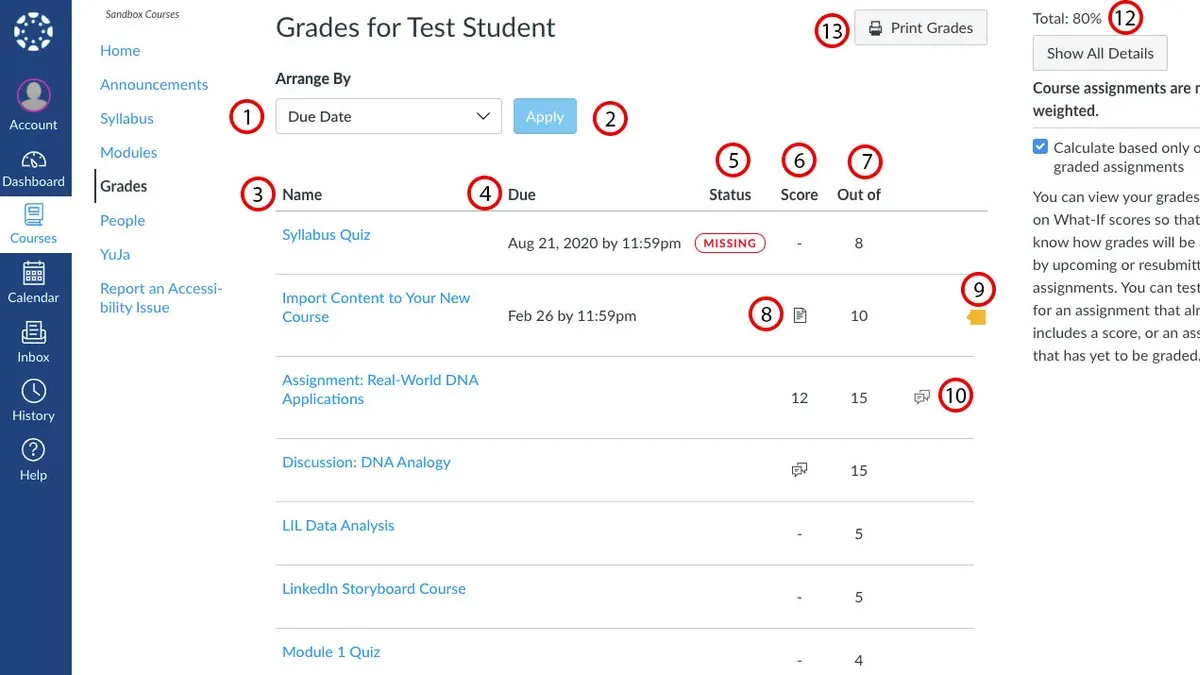
Students access their grades by clicking Grades in the course menu, where individual item scores and the overall grade appear clearly. If grades seem incorrect or missing, verify publication status and submission completion. Instructors can generate gradebook reports via Grades > Export to review performance and spot discrepancies.
Brightspace includes a 'What If' grade feature allowing both instructors and students to enter hypothetical scores for ungraded items. This helps predict final outcomes without affecting actual grades. Access this by clicking the pencil icon next to grade items. Enter test scores and observe the adjusted overall grade immediately.
- Click Grades in the course navbar to open the gradebook. You will see a list of grade items and student scores.
- Locate the Overall Grade column at the end; this shows the calculated final grade based on your scheme.
- For students, clicking Grades shows only published grades and overall standing.
- To use the What If feature, click the pencil icon next to a grade item, enter a hypothetical score, and see the overall grade update.
- Instructors can export grade reports from Grades > Export to analyze grades offline or troubleshoot issues.
Note: Screenshots illustrating instructor vs. student grade views and the What If input panel enhance clarity.
Troubleshooting common grading issues in Brightspace
Grades not syncing between assignments, quizzes, and the Gradebook often stem from misconfigured grade item associations. Check that each assignment or quiz is linked to the correct grade item under Activity Setup. If you see an error like "Grades not syncing," verify synchronization settings in the Gradebook setup.
If students report not seeing published grades, confirm that the grade item is published in Grades > Manage Grades and that release conditions are not restricting visibility. An “Access Denied” message usually means the grade item is still hidden or release conditions are unmet.
Incorrect grade calculations or category weight issues typically arise from improper category setup or missing weight values. Navigate to Grades > Manage Grades, review category weights, and ensure they sum to 100%. The error "Category weights do not total 100%" must be resolved by adjusting weights or enabling weighted grading.
Difficulty unpublishing grades or changing release settings can occur when multiple grade items are grouped or grade schemes conflict. Unpublish grades by selecting the grade item in Grades > Manage Grades and clicking "Unpublish." If the button is inactive, check for grade item dependencies or bulk release settings.
Missing submissions or late work grading complications happen if submissions are not properly collected or if due dates and availability dates conflict. Use Assignments > Submissions to verify received work. Late submissions may require adjusting the late submission settings or manually entering grades.
- Verify grade item linkage for each assessment to ensure synchronization; success is no more sync errors.
- Check grade item publishing status and release conditions; students can view grades.
- Review and correct category weights to total 100%; grade calculations display correctly.
- Unpublish grades via Manage Grades; unpublish button works and grades disappear from student view.
- Confirm all submissions are received and late settings are correct; all student work appears for grading.
Frequently asked questions
How to use brightspace as a student?
As a student, log in to Brightspace with your institution credentials. Navigate the course dashboard to access materials, assignments, quizzes, and discussions. Use the Grades tool to track your progress. Always submit assignments and quizzes through the designated links to ensure they are recorded properly.
How to see grades on brightspace?
To see your grades, open the course and select the Grades tool from the navigation bar. This shows scores for assignments, quizzes, and other graded activities. You can view feedback and grade details if your instructor has released them. Some courses display a grade summary for quick reference.
How to release grades in brightspace?
Instructors release grades via the Gradebook. Go to Grades, select the items to publish, then click the Release option. You can release individual grades or entire grade items. Confirm release to make grades visible to students, ensuring transparency while maintaining control over timing.
How to check overall grade in brightspace?
The overall grade appears in the Grades tool under the Final Calculated Grade column, if your instructor has enabled it. This grade aggregates all graded components based on the course’s weighting scheme. Refresh the page to see any recent updates after grades are released.
How to unpublish grades in brightspace?
To unpublish grades, open the Gradebook and locate the released grade items. Select the grades or grade items you want to hide, then choose the Unrelease option. This removes visibility from students but keeps the grades intact for instructors. Use this to correct errors or update grades before re-releasing.
What this advice does not cover
This guide does not cover configuring Brightspace grade settings at the institutional admin level, which may restrict some grading features depending on your school’s setup. It also does not address creating or modifying question pools, setting up complex grade schemes, or integrating third-party assessment tools. If your grading needs include advanced customization or automated analytics, consult your institution’s Brightspace administrator or support team.
Quick checklist
- Confirm the gradebook structure matches your course assessment plan.
- Set up grade items with correct maximum points and categories.
- Enter grades accurately and verify calculations.
- Use the Assignments and Quizzes tools for grading submissions.
- Manage grade release carefully to maintain transparency.
- Unpublish grades when corrections are needed before releasing updated scores.
- Regularly review overall grade calculations for consistency.
- Address common issues like missing grades or grade visibility promptly.
Start by reviewing your course’s gradebook setup under Grades > Manage Grades. Ensuring the grade items align with your assessment criteria saves time and prevents errors later. Keep your workflow simple and consistent to maintain accuracy and clear communication with your students.
See also: How to Build and Manage a Quiz in Brightspace: A Step-by-Step Guide · How to Assign Work to Small Groups in Brightspace: A Step-by-Step Guide