Google Admin Console Rollout Plan: A Guide for School Administrators
Learn how school administrators can efficiently deploy and manage Google Workspace using a structured Google Admin console rollout plan.

Short answer: The Google Admin console rollout plan for school administrators is a structured approach to deploying and managing Google Workspace for Education tools efficiently across your institution. It helps you set up device management, user policies, and app controls with minimal disruption to teaching and learning.
This guide breaks down the rollout process into clear steps focused on the unique needs of K-12 and higher education settings. You’ll find actionable checkpoints for customizing policies, avoiding common pitfalls like permission errors or user confusion, and measuring success through usage reports. The goal is to empower you to control your Google environment confidently while keeping downtime and support requests to a minimum.
What Is the Google Admin Console and Why Should You Care?
The Google Admin console is the centralized hub for managing all Google Workspace for Education accounts, devices, and user settings within your school. It lets you control access, enforce security policies, and configure services like Gmail, Drive, and Classroom from a single interface. This centralized management reduces administrative overhead, which for typical schools means saving hours weekly by avoiding individual account tweaks.
Schools often manage hundreds or thousands of devices and users. The console supports this scale with tools like device enrollment, policy enforcement, and granular role assignments. For example, you can use the “Devices” section to bulk-manage Chromebooks, setting Wi-Fi, updates, and screen time restrictions remotely, preventing inconsistent setups and security gaps.
Beyond convenience, the console helps maintain compliance with privacy laws by controlling data access and enforcing two-step verification. Operational efficiency improves through audit logs and reporting, giving you visibility into user activity and system health. This means less firefighting and more proactive system management.
How Does the Rollout Process Work for Schools?
Start by assessing your school's technical infrastructure and current workflows. Identify device types, network capacity, and existing user groups. This groundwork helps tailor the Admin console setup to your environment.
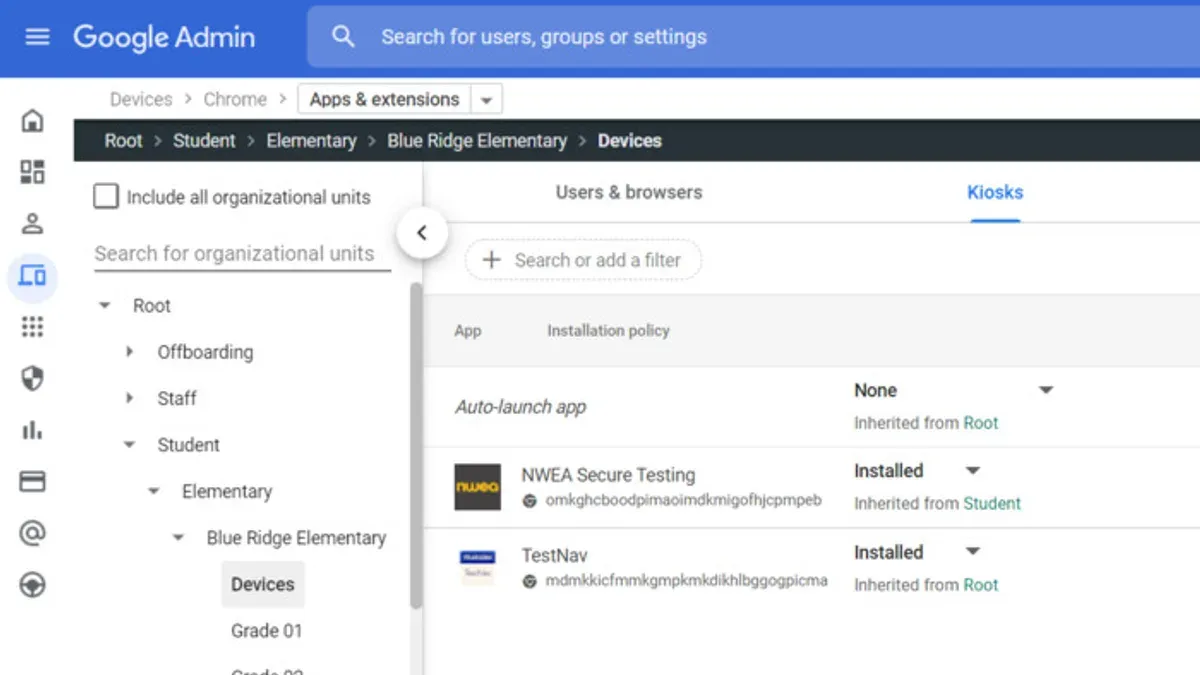
Next, configure Organizational Units (OUs) in the Admin console to reflect your school's structure—such as separating elementary, middle, and high school groups. Assign device management policies within each OU; for example, restrict app installations on student Chromebooks but allow staff more flexibility. Set user groups to match roles like teachers, students, and IT staff for precise policy targeting.
Implement a phased deployment to minimize classroom disruption. Begin with a pilot group of devices or a single grade level. Gradually expand once stability and user acceptance are confirmed. For instance, deploy device policies to 100 middle school Chromebooks first, then scale.
Train your staff before and during rollout. Use Google’s Admin console training resources and schedule hands-on sessions. Clear communication about what changes to expect reduces resistance and support calls.
| Phase | Duration | Focus |
|---|---|---|
| Assessment and Planning | 2 weeks | Infrastructure review, OU design |
| Configuration | 1 week | Policy setup, user groups |
| Pilot Deployment | 2 weeks | Test with a small device group |
| Full Rollout | 4 weeks | Expand to all devices/users |
| Training and Support | Ongoing | Staff education and feedback |
Checklist:
- Assess school network and device inventory
- Create OUs matching school divisions in Admin console
- Set device policies per OU (e.g., app restrictions for students)
- Deploy in phases, starting with a pilot group
- Train staff on Admin console features and changes
- Communicate rollout schedule clearly to all stakeholders
How Do You Tailor Settings and Policies for Your School Environment?
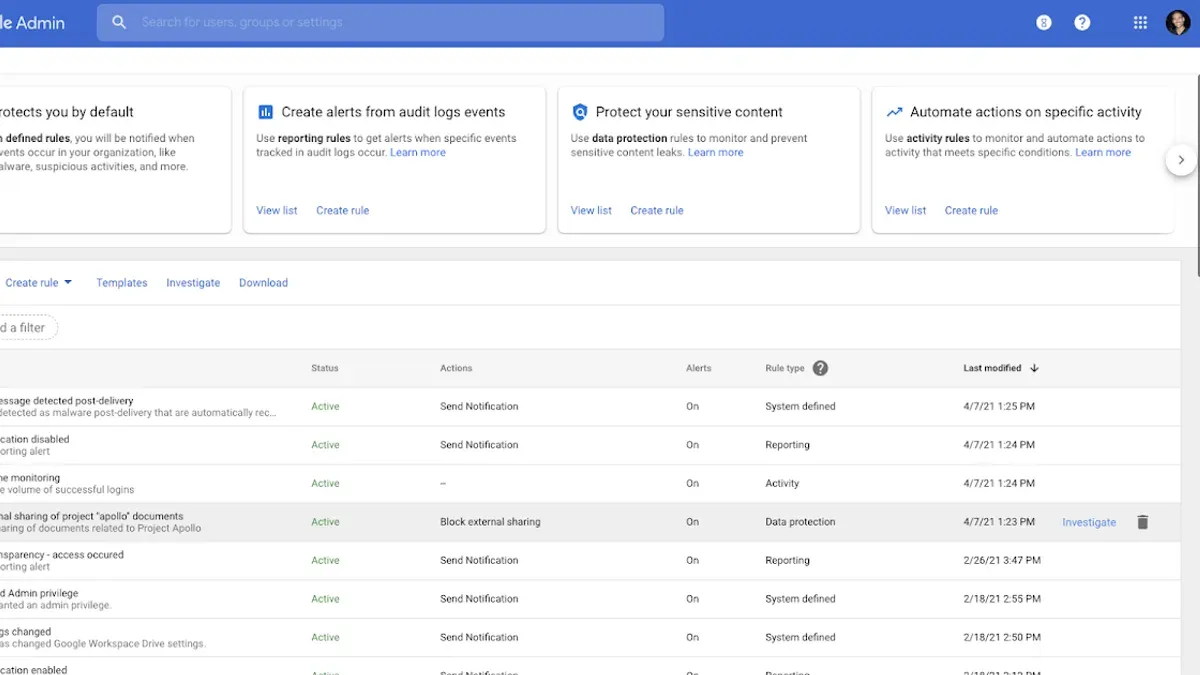
Customizing the Google Admin console starts with device-specific policies. For Chromebooks, enforce settings like forced sign-in, disable guest mode, and enable safe browsing under Devices > Chrome Management > User Settings. Android devices require separate controls under Devices > Mobile > Settings, such as disabling app installs outside the Play Store. Compare key policies across device types in the table below.
| Policy | Chromebooks | Android Devices | Other Devices |
|---|---|---|---|
| Forced Sign-in | Yes (mandatory) | Limited (user-dependent) | Varies |
| Guest Mode | Disabled by default | Not applicable | Varies |
| App Whitelisting | Yes (via Chrome Web Store) | Yes (Play Store whitelist) | Depends on platform |
| Safe Browsing | Enabled | Partial | Varies |
User roles must reflect school hierarchy. Teachers typically get rights to create and manage class groups, assign apps, and reset passwords for their students. Students have limited permissions focused on usage. Staff roles might include broader access to reports and device enrollments. Configure these under Admin Roles > Role Settings.
Content filtering is handled via URL blocking and app whitelisting under Devices > Chrome Management > User > URL Blocking. Secure access controls include enforcing 2-Step Verification and restricting sign-in to school domains only. Integrate with your school’s identity provider (like SAML or LDAP) and SIS to automate user provisioning and sync groups, reducing manual overhead.
For example, at a high school, you might disable YouTube for students but allow it for teachers, enforce password complexity for all, and restrict Chromebook guest mode. This reduces distractions while maintaining flexibility. Missing the step to sync your SIS can cause delays in user role updates, so prioritize that integration early.
- Define device policies per platform in Devices > Management
- Assign precise admin roles under Admin Roles > Role Settings
- Set content filters and app whitelists in Chrome Management
- Enforce secure access with 2-Step Verification and domain restrictions
- Integrate your identity provider and SIS for automated provisioning
What Are the Common Pitfalls and How Can You Avoid Them?
Many schools underestimate the training and support end users need during rollout. For example, a district that skipped thorough training saw frequent helpdesk tickets and frustrated teachers unable to access essential tools. Avoid this by preparing clear training materials and scheduling live Q&A sessions.
Overcomplicating policy structures is another common mistake. Creating too many nested organizational units (OUs) or overly granular rules in the Admin console can cause management headaches. One school’s IT team spent hours troubleshooting policy conflicts because they had 15 overlapping OUs for minor user groups. Keep your OU architecture simple and document your policy logic clearly.
Neglecting staged rollout testing often leads to unexpected downtime. A high school that deployed new device policies system-wide without pilot testing faced network slowdowns and app crashes, disrupting classes for days. Always run a controlled pilot with a small user group before full deployment to catch issues early.
Failing to set clear communication channels with stakeholders creates confusion and delays. In one district, teachers and staff didn’t receive timely updates, resulting in misinformation and resistance. Establish regular updates via emails or staff meetings and designate a point person for questions.
- Plan comprehensive user training and support.
- Simplify OU and policy structures.
- Conduct phased pilot testing before full rollout.
- Maintain clear communication with all stakeholders.
How Do You Measure Success and Refine Your Rollout?
Track key performance indicators like device compliance rate, helpdesk ticket volume, and user login frequency to gauge adoption and effectiveness. The Google Admin console offers built-in reports under Devices > Reports and Users > Reports that help you monitor these metrics. For example, a rising device compliance rate above 90% combined with a decline in helpdesk tickets related to login issues signals a smooth adoption.
Gather direct feedback from educators and IT staff through surveys or regular check-ins to identify practical challenges or overlooked needs. This qualitative data complements the console's quantitative insights and reveals issues that numbers alone may miss.
Adjust policies based on this combined data. If device compliance is high but educators report restrictions that hinder workflows, consider relaxing certain app or site controls. Conversely, if helpdesk tickets spike for a specific device type, investigate and tighten related configurations.
For instance, after noticing a 20% increase in password reset requests from middle school staff, you might implement a self-service password reset tool and monitor ticket trends monthly. This iterative approach ensures you refine the rollout to balance security with usability.
- Regularly review device and user reports in the Admin console.
- Conduct surveys or meetings with educators and IT personnel.
- Analyze helpdesk ticket categories and volumes.
- Adjust policies incrementally based on data and feedback.
- Repeat measurement cycles monthly or quarterly.
What Should You Do If You Encounter Issues During Rollout?
Technical and operational issues during rollout are inevitable. Common problems include device enrollment failures, policy conflicts, or user access errors. Begin troubleshooting by isolating the issue: check error messages in the Admin console under Devices > Chrome Management or Users > Directory. Use Google’s Help Center and Admin console support for documented solutions. Support tickets typically receive initial responses within one business day, but complex issues may take longer.
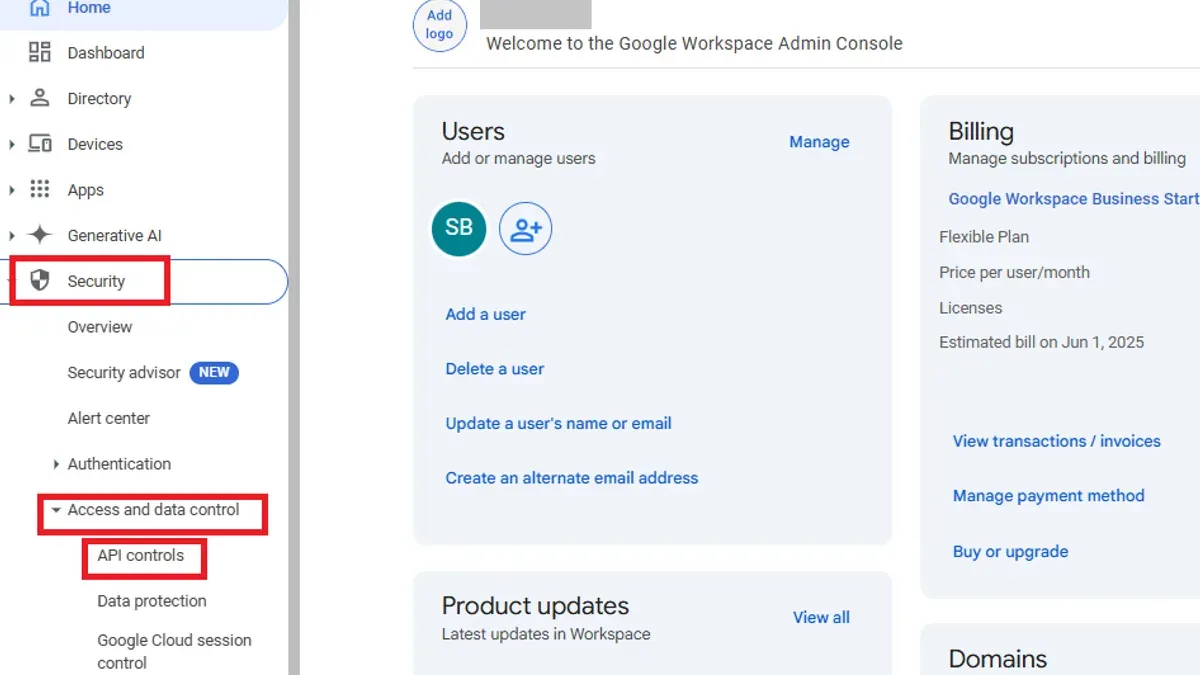
If the issue persists, escalate using a decision tree: first internal IT assessment, then Google support escalation, followed by external professional services if resolution is delayed beyond a critical window. For example, if device enrollment stalls during peak deployment, escalate after 48 hours to avoid halting classroom activities.
Leverage Google’s community forums to find solutions from other school admins who faced similar problems. When necessary, hire consultants specializing in Google Workspace for Education to handle complicated integrations or large-scale policy conflicts.
Maintain teaching continuity by preparing backup plans such as temporary local user accounts or offline lesson plans while resolving rollout issues. This limits disruption and keeps classrooms functioning.
- Identify error messages in Admin console logs
- Search Google Help Center and community forums
- Submit and monitor support tickets (expect 1-day initial response)
- Follow escalation decision tree for unresolved issues
- Engage external consultants for complex problems
- Prepare backup plans to sustain teaching during downtime
Frequently asked questions
How long does a typical Google Admin console rollout take in a school?
A typical rollout spans 4 to 8 weeks depending on school size and device quantity. Initial setup and policy configuration take about 1 to 2 weeks. Staged device enrollment and staff training usually extend the timeline, allowing time to identify and fix issues before full deployment.
Can I manage multiple school sites with one Google Admin console?
Yes. The Google Admin console supports multi-domain and organizational unit structures, allowing you to manage multiple schools or campuses under one console. Use organizational units to apply different policies by site and group users or devices accordingly.
What training do staff and students need for an effective rollout?
Staff need focused training on device management, user provisioning, and policy enforcement via the Admin console. Students require orientation on device usage rules and access protocols. Use concise guides and short live sessions to minimize downtime and reinforce key tasks.
How do I ensure data privacy and security compliance using Google Admin?
Set up Data Loss Prevention (DLP) rules under Security > Data Protection. Enable 2-Step Verification for user accounts in Security > Authentication. Regularly audit user activity via Reports > Audit log to detect anomalies. Adjust sharing permissions in Apps > Google Workspace to restrict external access.
Quick checklist
- Confirm all school devices are enrolled under your Google Workspace for Education account.
- Set up organizational units reflecting your school's structure for targeted policy application.
- Enable key security settings: 2-step verification enforcement and password policies.
- Test user access levels to ensure teachers, students, and staff have appropriate permissions.
- Schedule rollout phases to minimize class disruption, starting with a pilot group.
- Monitor device and user reports weekly to catch anomalies early.
- Prepare a communication plan for staff and students covering changes and support resources.
- Document all configuration changes and maintain a rollback plan.
What this advice does not cover
This guide does not cover detailed technical troubleshooting of hardware or network infrastructure outside the Google Admin console scope. For issues related to device hardware failures, Wi-Fi network setup, or third-party software conflicts, consult your vendor support or network specialist. This plan assumes you have basic familiarity with Google Workspace administration.
Your next step: Start by organizing your users and devices into clear organizational units within the Admin console. This foundational step allows you to apply policies precisely, reduce errors, and streamline management as you proceed with the rollout.
See also: Moving from Clever to Google Admin Console: Your No-Nonsense Checklist · Moving from ClassLink to Google Admin Console: A Practical Checklist · Moving from Apple School Manager to Google Admin Console: Your Complete Checklist · Apple School Manager Rollout Plan for Private Schools: A Practical Guide