How to Set Up Student Groups for Projects in Brightspace Step-by-Step
Step-by-step guide to setting up student groups for projects in Brightspace to enhance collaboration and simplify group assignment management.

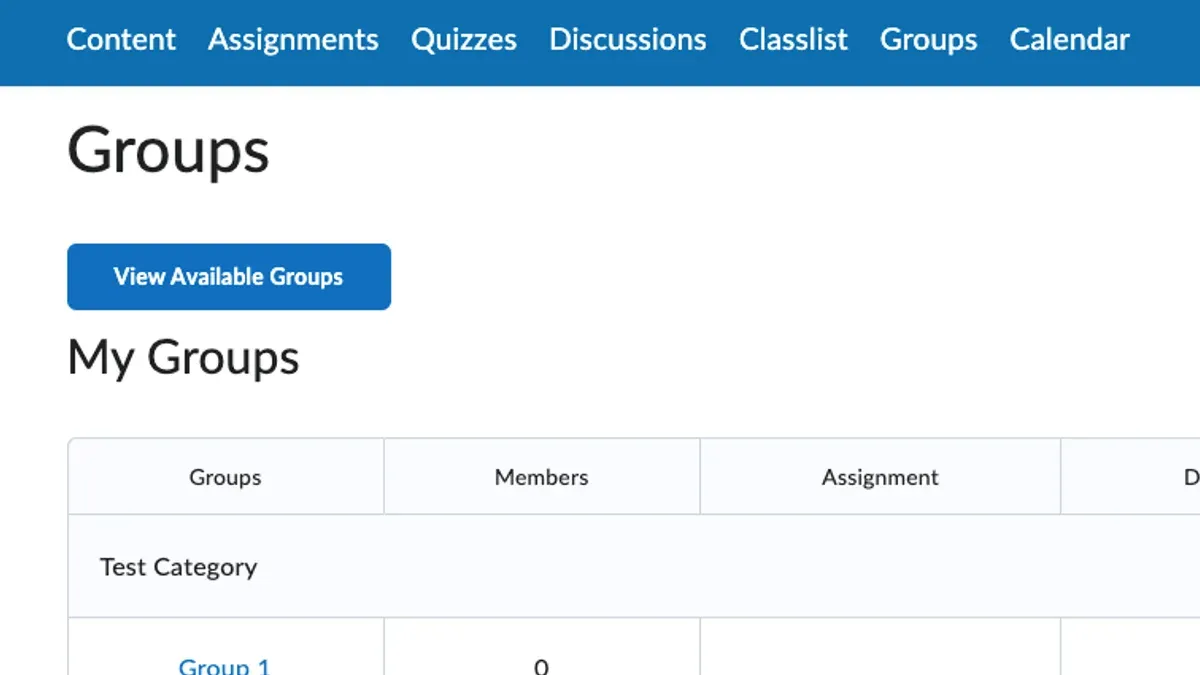
Short answer: To set up student groups for projects in Brightspace, you create groups under Course Admin > Groups, define group categories, and configure enrollment methods like manual or self-enrollment. Then, link these groups to your project assignments via the assignment settings to enable group submissions and collaboration.
This article covers how to set up student groups for projects in Brightspace step-by-step, focusing on practical decision-making for instructors. You will learn how to create and configure group categories, assign students efficiently, link groups to assignments, manage group collaboration tools, and troubleshoot common issues that Brightspace guides often overlook. Clear examples and tips ensure your group projects run smoothly from setup to course end.
Before you start: What you need to prepare
Begin by clarifying your class size and the group structure you want. For example, a class of 30 students can be divided into 6 groups of 5 members each or 10 groups of 3 members. Consider the workload per group and collaboration dynamics when choosing group size. Decide how students will be assigned: will they self-enroll, will you assign them manually, or do you want Brightspace to assign groups randomly? Each method impacts how much setup and monitoring you’ll need.
Prepare your project assignment details including deadlines, grading criteria, and whether the assignment is group-based or individual. This ensures seamless linking later. Also, determine how group visibility should work—whether groups are private or visible to other groups affects student interaction and privacy.
Finally, confirm you have the necessary permissions. You need instructor or admin rights in Brightspace to create and manage groups. Without these, group setup options will be limited or inaccessible.
- Check your class roster and decide on total groups or group size; you should see a clear number of students to organize.
- Choose group enrollment method: self-enroll, instructor-assigned, or random; the Brightspace group setup page should reflect this choice.
- Gather assignment details like deadlines and grading setup; have this ready to link groups to assignments.
- Decide on group visibility settings: private or public; verify this option is selectable in your course settings.
- Confirm your user role in Brightspace includes permissions for group management; the course administration menu should confirm your access.
How do you create and configure student groups in Brightspace?
- Navigate to the course homepage and select Communication from the top menu, then click Groups. You should see the Groups management page.
- Click New Category to create a group category that organizes your project groups logically. Enter a clear category name (e.g., "Project Teams") and an optional description. Confirm by clicking Save. The category appears in the list.
- Open the newly created category and select New Group. Name your group according to your scheme (e.g., "Team Alpha"), add a description if desired, and set the group's visibility to students as needed. Save the group.
- Repeat step 3 to add all groups within the category based on your intended group size and number of teams.
- Back in the group category, click Edit Category to set the enrollment type. Choose from manual enrollment (you add members), self-enrollment (students choose groups), or random enrollment (Brightspace assigns students evenly). Set maximum members per group if applicable, then save your settings.
After these steps, your group category and groups are configured and ready for member enrollment and linking to assignments.
| Step | Expected Outcome |
|---|---|
| 1 | Access to Groups page within course |
| 2 | New group category created and listed |
| 3 | Group added within category, visible in list |
| 4 | All groups created matching your course design |
| 5 | Enrollment type set with limits applied |
How do you link student groups to project assignments?
To enable group submissions for project assignments in Brightspace, start by navigating to the assignment's setup page. Locate the Submission & Completion section and check the box labeled Group Submission. This activates the option to link your assignment to a specific group category you created earlier.
After enabling group submission, select the correct group category from the dropdown menu. This ensures that only members of those groups can submit collaboratively. Below, configure submission settings such as allowing one submission per group to prevent duplicate uploads.
Next, adjust the grading options under Evaluation & Feedback. Choose whether grades apply to the entire group or individual members. Grades assigned to the group will automatically appear on each member's profile, ensuring consistent record keeping.
Here’s what you should see once configured: The assignment setup page displays Group Submission enabled, the selected group category linked, and grading set to apply to groups. Students will submit once per group, and all members can view the submission and grades.
- Open the assignment setup page; verify you are in the correct course and assignment.
- In Submission & Completion, check Group Submission; a dropdown menu appears.
- Select your group category from the dropdown; confirm it matches your student groups.
- Set submission options, such as allowing one submission per group only.
- Go to Evaluation & Feedback and choose grading to be by group.
- Save the assignment; confirm the summary page reflects all group submission settings.
How do students join and collaborate within groups?
Students join groups in Brightspace either through self-enrollment or by instructor assignment. For self-enrollment, students navigate to the "Classlist" tool, select the "Groups" tab, then choose their preferred group from the available options. When instructors assign students, groups appear automatically under the "Groups" section without requiring action from students.
Once part of a group, students can access collaboration tools via the group homepage. Key features include group discussions, where members post messages and reply in threaded conversations; file sharing through the group’s shared folder; and a group dropbox for submitting joint project files. The group discussion interface shows posts on the left with timestamps and authors, fostering transparent communication.
Students should establish clear communication norms, regularly check discussions, and upload files promptly to maintain smooth collaboration. Instructors can monitor group activity and participation through the "Class Progress" and "Engagement Dashboard" tools, identifying inactive groups or members and intervening as needed.
- Student logs into Brightspace and clicks on "Groups" under the course navbar. They see a list of their groups if assigned, or available groups if self-enrollment is enabled.
- For self-enrollment, student clicks "Enroll" beside a group name; the group then appears in their "My Groups" list.
- Student accesses the group homepage, clicks "Discussions" to view or post messages; successful posts show in the thread with their name and timestamp.
- Student uploads project files to the group’s shared folder; uploaded files appear in the folder list confirming upload.
- Student submits collective work via the group dropbox; submission confirmation appears upon successful upload.
What common issues arise and how do you troubleshoot them?
Groups not showing or students missing from groups usually result from incorrect group category enrollment settings or sync delays. Verify that each group has students assigned under Course Admin > Groups > Manage Enrollments. Refresh the page or wait a few minutes if changes were recent.
If group submissions don’t link correctly, check that Group Submission is enabled in the assignment settings and that the correct group category is selected. Mismatched categories cause submission errors or prevent group submissions from appearing.
Confusion over group visibility often stems from the Group Restrictions setting. Ensure groups are set as Visible only to group members to avoid privacy leaks. Misconfiguration here can expose student lists or discussions to unintended users.
When students cannot submit or see submission status, confirm the assignment’s availability dates and that group members have proper access rights. Also check if students are correctly enrolled in the group linked to the assignment.
Grades not reflecting for group members often occur if the grade item is not properly associated with the group assignment or if the grade sync failed. Verify gradebook settings and re-link the grade item if necessary.
- Confirm group enrollments under Course Admin > Groups > Manage Enrollments. Success: all students appear in correct groups.
- Check assignment settings at Activities > Assignments > Edit Assignment for enabled Group Submission and correct group category. Success: group submission option active.
- Review group visibility at Course Admin > Groups > Edit Group Category. Success: group members only can see each other.
- Verify assignment availability dates and student group enrollment. Success: students can access and submit.
- Inspect gradebook link at Grades > Manage Grades. Success: grades update for all group members post submission.
How do you manage and update groups during the course?
To modify group membership without losing assignment data, navigate to Communication & Collaboration > Groups. Select the relevant group category, then choose the group to edit. You can add or remove members here; changes take immediate effect and preserve existing submissions and grades.
If your project scope changes, you may need to add new groups or merge existing ones. Create additional groups within the category or consolidate members by reassigning them to a single group. Confirm that all group members are notified of changes to avoid confusion.
Use the Classlist and Group Progress Reports under Assessments to track participation and submission status by group. These reports help identify inactive groups or members who need reminders.
Prepare for reassignments by monitoring student drops or late enrollments. When reassigning, update group membership promptly and communicate clearly with affected students to maintain project continuity.
Example: Before editing, Group A has members Alice, Bob, and Carol. After removing Carol and adding Dave, the group shows Alice, Bob, and Dave, with all previous submissions intact.
- Go to Communication & Collaboration > Groups and select the group category. You should see the list of groups under that category.
- Select the group you want to edit and click Edit Group. The current members display.
- Add or remove members by selecting or deselecting student names, then save. The group membership updates immediately without affecting submission data.
- To add or merge groups, create a new group with Add Group or move members between groups by editing each group’s membership accordingly.
- Notify students of any membership changes via Announcements or email to ensure they are aware of their new group status.
- Check Group Progress Reports regularly to monitor participation and submission completeness for timely interventions.
Frequently asked questions
Can I set up groups to allow students to choose their own teammates?
Yes, Brightspace offers a self-enrollment group option. You create a group category with the setting "Allow users to self-enroll in groups." Students then select their preferred group from the list until the group reaches its maximum size. This method requires clear instructions so students understand the selection deadline and group size limits.
What happens if a student is in multiple groups for different assignments?
A student can belong to different groups across various group categories, each linked to separate assignments. Brightspace keeps these groups isolated per category, so there is no conflict or overlap in submission or collaboration spaces. Just ensure each assignment is linked to the correct group category to avoid confusion.
How do I prevent students from seeing other groups’ work?
When setting up group assignments, select the option "Restrict submissions to group members only." This hides each group's submissions and discussions from other groups. Also, verify that group tools like Discussions and Locker are set to group-specific visibility to keep work private within each group.
Can I import group lists instead of manually creating groups?
Brightspace supports importing groups via a CSV file. Prepare a CSV with required columns like Group Name, Group Category, and Member Usernames or IDs. Use the Manage Groups tool’s import feature under the group category settings to upload your file. This saves time and reduces errors compared to manual entry.
What this guide does not cover and who should look elsewhere
This guide does not cover integration with external collaboration platforms such as Microsoft Teams or Zoom. If your course requires syncing groups with tools outside Brightspace, refer to platform-specific documentation. It also assumes you have instructor-level access in Brightspace and does not detail permissions management or administrative settings outside the scope of course group setup.
If you need to automate group creation based on complex enrollment data or require custom group roles beyond Brightspace’s native options, consider consulting your institution’s LMS administrator or IT support for advanced solutions.
Quick checklist
- Prepare your student list and decide on group size or criteria before starting.
- Create groups via Course Admin > Groups, choosing the appropriate group type (manual or automatic).
- Configure group tools for collaboration, such as group discussions and file sharing.
- Link groups to project assignments under Assignments > New Assignment > Group Submission settings.
- Communicate clearly to students how to join or access their groups.
- Monitor group activity and update membership as needed through the Groups tool.
- Troubleshoot common issues like missing group assignments or access permissions promptly.
To move forward effectively, start by creating a sample group and linking it to a project assignment. This hands-on step reveals nuances in your course structure and helps identify any configuration gaps before scaling up to all student groups.
See also: How to Assign Work to Small Groups in Brightspace: A Step-by-Step Guide · How to Set Up Rubrics in Brightspace: A Clear Step-by-Step Guide · How to Leave Clear, Effective Feedback on Student Work in Brightspace