Switching from Google Admin Console to ClassLink: A Practical Guide
Switching from Google Admin console to ClassLink simplifies IT with better user management, app integration, and single sign-on for schools.

Short answer: Switching from Google Admin console to ClassLink involves moving from a platform primarily focused on Google Workspace management to a more education-centric identity and access management system. ClassLink offers streamlined rostering, single sign-on across diverse applications, and deeper integration with school-specific software, which can simplify your IT operations if your environment extends beyond Google tools.
This article breaks down the functional differences between the two platforms, focusing on user and device management, integration specifics, and the migration workflow. You’ll get a clear checklist for preparing and executing the switch, along with common pitfalls to avoid and metrics to evaluate success after moving to ClassLink.
What Are Google Admin Console and ClassLink, and Why Switch?
The Google Admin Console serves as the central hub for managing users, devices, and settings within Google Workspace for Education. It excels at controlling Google accounts, applying policies through device management settings, and managing permissions tied directly to Google services like Gmail, Drive, and Classroom. However, its scope is mostly confined to the Google ecosystem.
ClassLink focuses on single sign-on (SSO), rostering, and resource management designed specifically for K–12 education. It connects to a wide range of third-party educational apps beyond Google, enabling seamless access for students and staff. ClassLink’s rostering flexibility allows syncing with various student information systems (SIS), supporting diverse school data setups.
Schools often switch to ClassLink to broaden app integration and improve user experience. For example, a district using Google Admin Console only can struggle managing non-Google apps, while ClassLink enables one-click access to all approved tools. Consider your current investment in Google Workspace—if you rely heavily on Google services, keep in mind ClassLink can complement, not replace, Google Admin Console by extending access management.
| Feature | Google Admin Console | ClassLink |
|---|---|---|
| User Management | Google account-centric, Google Workspace integration | Broad SIS integration, supports multiple data sources |
| Device Management | Policy enforcement on Chrome OS and Android devices | Limited device management, focuses on access |
| App Integration | Primarily Google services and some third-party apps | Wide range of educational apps with SSO |
| Single Sign-On (SSO) | For Google services | Cross-platform, cross-app SSO |
| Roster Syncing | Basic, Google Classroom focused | Flexible, multiple SIS compatibility |
How Does User and Device Management Differ Between the Two Platforms?
Google Admin Console primarily manages users within Google Workspace and focuses device management on Chrome OS and Android devices enrolled under its management settings. For example, when provisioning a new user, you create a Google Workspace account, assign licenses, and apply device policies through the Devices > Chrome management section. Password management and access control are centralized within Google Workspace, limiting cross-platform integration.
In contrast, ClassLink’s user management hinges on its rostering sync capability, integrating directly with various Student Information Systems (SIS) like PowerSchool or Infinite Campus. This allows automatic user and class roster updates without manual entry. ClassLink federates identities across multiple platforms, enabling single sign-on (SSO) access for students and staff to numerous third-party apps beyond Google Workspace, supporting a wider range of devices.
For instance, when a new student enrolls, ClassLink syncs that data from the SIS, provisions the user account, and grants app access based on roles set in the ClassLink dashboard. This removes the need to manually create or update accounts within each individual app or device environment. However, this requires configuring identity providers and ensuring SIS integrations are correctly mapped.
Understanding these operational differences is critical when planning migration. Google Admin Console’s device policies are tightly coupled with Google accounts and Chrome devices, whereas ClassLink offers broader, cross-platform access control but demands precise integration setup. User provisioning moves from a Google-centric workflow to one reliant on external SIS syncs, impacting password reset processes and access auditing.
What Are the Key Steps to Prepare for the Switch?
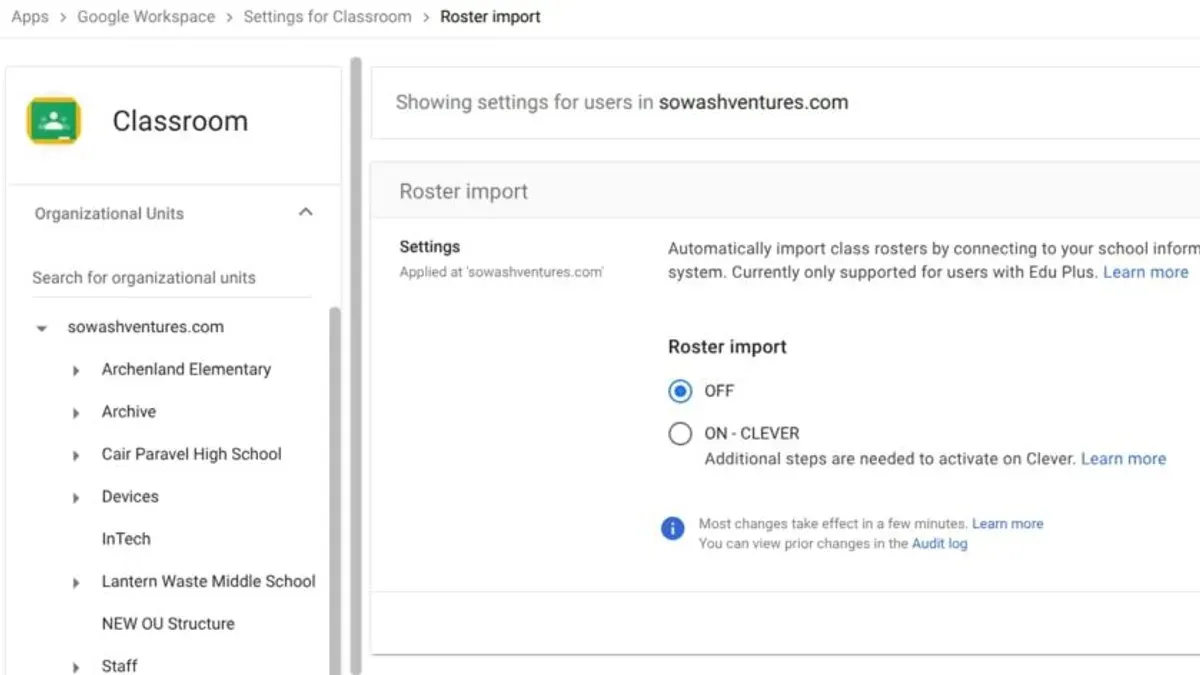
Start with a thorough audit of your Google Admin Console setup. Navigate to Users & Devices > Device Management to export current device enrollments. Under Directory > Users, export user lists and group memberships. Document app integrations found under Apps > Web & Mobile Apps. This baseline helps identify what needs migration or special handling.
Next, identify critical applications and integrations managed through Google Admin Console, such as SSO configurations or API connections. Confirm which apps are essential for daily operations and whether ClassLink supports them natively or requires custom integration.
Map your Student Information System (SIS) data flows and verify compatibility with ClassLink rostering. Check if your SIS exports align with ClassLink's required CSV formats or API endpoints. Incompatible rostering formats are a common pitfall that can delay migration.
Communicate early and clearly with stakeholders. Share a migration timeline highlighting key milestones, such as audit completion, pilot testing, and full rollout. Outline expected changes in user experience and admin responsibilities to minimize resistance.
Finally, prepare backup and recovery plans. Export all user data, device configurations, and app settings before making changes. Store backups securely and test recovery procedures to ensure you can revert if issues arise.
Example checklist for audit and prep:
- Export user and group lists from Directory > Users
- Export device enrollment records from Device Management
- List all apps under Apps > Web & Mobile Apps with current permissions
- Confirm SIS rostering export formats and test in ClassLink sandbox
- Create migration timeline with stakeholder review points
- Backup all critical data and test restore process
How Do You Execute the Migration from Google Admin Console to ClassLink?
Start by setting up your ClassLink tenant through the ClassLink Admin Portal. Navigate to Settings > Identity Providers, and configure SAML or LDAP connections to link your existing identity sources. For example, connect your Google Workspace as an identity provider if you plan to maintain synchronized credentials.
Next, import user and roster data. Export CSV files from Google Admin Console under Users > Export Users and from your SIS if applicable. Upload these files via ClassLink’s Roster Management > Import Roster section, ensuring mappings align with ClassLink’s user schema to avoid mismatches.
Configure single sign-on by enabling the SSO Settings tab in ClassLink. Add the necessary app URLs and assign them to user groups. This enables seamless app launches directly from ClassLink’s dashboard.
Before full rollout, test access with a pilot group. Verify user login, device enrollment, and app launches on multiple devices. Address any authentication failures or permission gaps.
Roll out in phases: Phase 1 with a small department, Phase 2 expands to multiple schools, and Phase 3 finalizes district-wide migration. This staged approach minimizes disruption and allows iterative fixes.
- Set up ClassLink tenant and configure identity providers in Admin Portal
- Export user and roster data from Google Admin Console and SIS
- Import CSV files via ClassLink Roster Management and verify mappings
- Enable single sign-on and assign apps in ClassLink SSO Settings
- Conduct pilot testing for user access, device enrollment, and app launches
- Implement phased rollout: small pilot, expanded groups, full district
For example, a mid-sized district might export 2,000 users from Google Admin Console, import them into ClassLink, and begin Phase 1 with their IT department and administration. After confirming stable access and app launches, Phase 2 would add select schools over 4 weeks, with a full rollout completing in 3 months.
What Common Mistakes Should You Avoid During the Switch?
Neglecting a full audit of your Google Admin Console settings before migration is a primary cause of delays. For example, mismatched organizational units or overlooked API permissions can block data exports or cause sync errors in ClassLink. Underestimating rostering sync complexity and app integration differences leads to broken access pathways. Each SIS integration requires specific mapping and credentials, which, if incomplete, disrupts user access.
Failing to communicate login changes and new workflows to end users creates confusion and support overload. Users unprepared for ClassLink’s single sign-on or app launch process often lock themselves out or submit excessive help requests. Skipping thorough testing phases compounds these issues. One district migrated without a staged pilot, resulting in a multi-day outage where teachers couldn’t access key apps due to SSO misconfigurations.
Ignoring backup and rollback strategies leaves you vulnerable to prolonged downtime. Maintaining export snapshots of Google Admin Console settings and user data enables quick reversion if the migration falters. Without these precautions, the switch risks becoming a disruptive setback instead of a smooth upgrade.
- Conduct a comprehensive audit of Google Admin Console settings before migration
- Map SIS data and app integrations accurately to ClassLink requirements
- Communicate changes clearly to all end users well in advance
- Perform phased testing with pilot groups to catch issues early
- Prepare backup exports and rollback plans to mitigate failures
How Can You Measure Success After Switching to ClassLink?
Start by tracking user login success rates via the ClassLink Admin Console’s Login Analytics dashboard. A consistently high success rate and a notable decrease in password reset tickets indicate smoother access. Monitor app launch times and access consistency across devices using ClassLink’s App Launch Metrics report to ensure fast and reliable entry to resources.

Measure administrative efficiency by comparing the time spent on user and device management before and after the switch. This can be quantified through time tracking or task logs, focusing on reductions in manual provisioning and troubleshooting. Collect structured feedback from educators and students with direct questions like, “Has accessing apps become easier?” or “How often do you encounter login issues?” using surveys distributed via email or integrated tools.
Finally, maintain ongoing oversight of rostering accuracy by regularly reviewing ClassLink’s Roster Sync Reports linked to your SIS. Spotting discrepancies early prevents access problems. For example, a dashboard showing a 95% successful roster sync rate combined with user feedback reporting less than one login issue per week signals a well-executed migration.
- Review Login Analytics weekly to track success rates and password reset trends
- Analyze App Launch Metrics monthly for performance consistency
- Log administrative time spent on user/device management quarterly
- Distribute bi-annual user satisfaction surveys focused on access and usability
- Audit Roster Sync Reports after each SIS update to ensure data integrity
Frequently asked questions
Can I keep using Google Workspace apps after switching to ClassLink?
Yes, switching to ClassLink does not disable access to Google Workspace apps. ClassLink acts as a single sign-on (SSO) platform that can integrate with Google Workspace, allowing seamless access to Gmail, Drive, Docs, and other Google services without logging in separately. You can continue managing Google Workspace licenses and policies within the Google Admin Console independently from ClassLink.
What happens to device management when moving away from Google Admin Console?
When you move away from Google Admin Console, you lose its native device management capabilities like Chrome device enrollment, remote wipe, and policy enforcement. ClassLink does not replace these features directly; it focuses on identity and access management. You will need a complementary device management solution or continue using Google Admin Console for device control alongside ClassLink.
How long does a typical migration take from Google Admin Console to ClassLink?
Typical migration timelines vary based on the size of your user base and existing integrations but generally range from a few weeks to a couple of months. Key factors include preparing user directories, mapping roles, setting up ClassLink launchpads, and testing SSO configurations. Allocating time for pilot testing and phased rollouts reduces disruption.
Is training required for staff and students after the switch?
Yes, training is necessary to familiarize staff and students with the new login process and ClassLink dashboard. Staff should understand managing access and troubleshooting login issues, while students need guidance on accessing apps via ClassLink launchpads. Training sessions or quick reference guides tailored to your environment help minimize confusion.
What this advice does not cover
This guide does not cover switching from Google Admin Console if your organization relies heavily on Google-specific device policies that ClassLink does not manage. If your school uses advanced Google device management features like Chrome device forced re-enrollment or custom OS-level restrictions, consider consulting with a Google specialist or ClassLink integration expert before proceeding. Also, this walkthrough assumes you have existing experience managing identity and access platforms; those new to these systems should seek hands-on training first.
Quick checklist
- Review current Google Admin Console device and user policies for dependencies.
- Map out ClassLink roles and permissions to match your existing structure.
- Prepare a user data export from Google Admin Console, ensuring compliance with privacy rules.
- Set up ClassLink Directory Server and test syncing with your student information system.
- Plan phased migration to minimize downtime and user disruption.
- Communicate schedule and expectations clearly to all stakeholders.
- Monitor system logs closely during initial days post-migration for errors.
- Train support staff on ClassLink-specific management and troubleshooting.
The most useful next step is to perform a detailed audit of your current Google Admin Console setup. Export all user and device policies, identify any Google-specific configurations that won’t transfer, and align these insights with ClassLink’s capabilities. This audit anchors your migration plan and helps avoid costly oversights during the switch.
See also: Moving from ClassLink to Google Admin Console: A Practical Checklist · Switching from Clever to ClassLink: What You Need to Know · ClassLink Implementation Timeline: What You Need to Know to Get Started · Google Admin Console Rollout Plan: A Guide for School Administrators