Moving from Apple School Manager to Jamf School: Your Essential Checklist
This checklist guides you through moving from Apple School Manager to Jamf School, covering device enrollment, user sync, and configuration steps.

Short answer: Moving from Apple School Manager to Jamf School requires careful coordination of device enrollment, user sync, and configuration profiles to avoid downtime and data loss. This moving from Apple School Manager to Jamf School checklist focuses on the specific migration steps and integration nuances unique to these platforms.
This article breaks down the migration process into clear, actionable steps, highlighting common pitfalls and practical solutions. You will learn how to prepare your Apple School Manager data, transition device management to Jamf School, and optimize settings post-migration. The goal is to help you execute the switch efficiently, minimizing disruption to your school’s IT environment.
What Are Apple School Manager and Jamf School, and Why Does the Switch Matter?
Apple School Manager (ASM) serves as Apple's core platform for managing Apple devices, content, and user accounts within educational institutions. It centralizes device enrollment, purchases of apps and books, and user identity management, primarily focused on Apple ecosystem integration. ASM handles device assignments, Apple IDs for students and staff, and content distribution but offers limited mobile device management (MDM) features directly.
Jamf School builds on ASM’s foundation by providing a comprehensive MDM solution tailored to education. It enhances device control with granular policies, app deployment, and usage monitoring. Jamf School also incorporates classroom management tools such as screen monitoring, messaging, and real-time device status, improving IT and teaching workflows beyond ASM’s basic capabilities.
Schools switch to Jamf School to gain advanced device management and classroom engagement features while still leveraging ASM for enrollment and identity. For example, a school using ASM struggled with limited device restrictions and manual user syncs. After moving to Jamf School, they automated device profiles, easily segmented users by grade, and improved classroom interaction through app usage monitoring.
| Feature | Apple School Manager | Jamf School |
|---|---|---|
| Device Enrollment | Centralized, Apple DEP integration | Uses ASM enrollment plus enhanced MDM policies |
| User Management | Apple IDs and roster imports | Syncs with ASM plus flexible user segmentation |
| Device Control | Basic restrictions and assignments | Fine-grained policies, app management, remote commands |
| Classroom Tools | Limited to content access | Screen monitoring, messaging, usage reports |
The switch impacts IT teams by shifting daily device management from Apple’s portal to Jamf’s interface, requiring new workflows but delivering stronger control and visibility. End users experience smoother device setups, fewer interruptions, and better classroom device use. Understanding these core differences clarifies why schools invest effort in migrating from ASM to Jamf School.
How Does the Migration Process Work Between Apple School Manager and Jamf School?
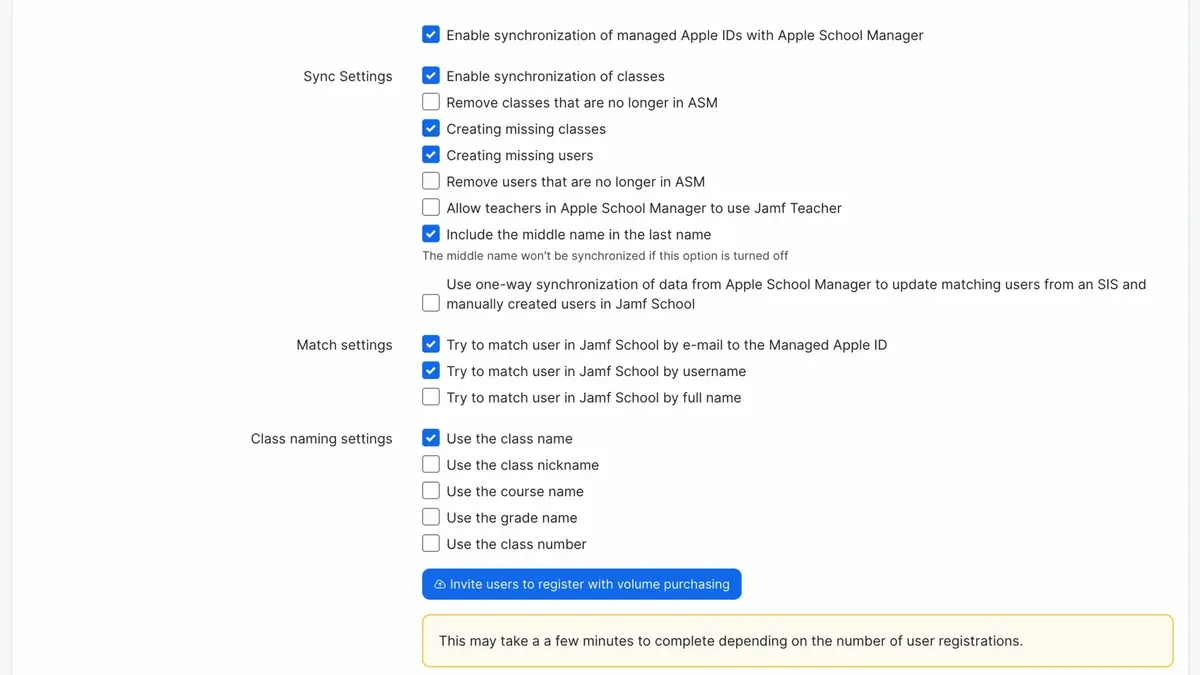
The migration starts with understanding device enrollment differences. Apple School Manager uses Automated Device Enrollment (formerly DEP) to assign devices to management servers automatically. Jamf School requires linking your Apple School Manager account in the Jamf School portal under Settings > Device Enrollment > Apple School Manager. This link enables Jamf School to import device serial numbers and enrollment assignments directly from Apple’s servers.
User and class roster syncing happens through Jamf School’s integration with Student Information Systems (SIS). Unlike Apple School Manager’s static roster exports, Jamf School supports live imports via OneRoster API or CSV uploads under Users > Import. This keeps student and teacher data current, supporting dynamic class changes.
Jamf School consumes data exported from Apple School Manager by pulling device enrollment data through the linked account and syncing user records from your SIS or manual uploads. You must ensure your Apple Business Manager or School Manager account is active with device assignments properly configured before connecting Jamf School. Then, enroll devices in Jamf School by assigning profiles through Device Enrollment > Profiles.
For example, after linking Apple School Manager, Jamf School shows a list of devices ready for enrollment. You assign these devices to a configuration profile in Jamf School’s enrollment wizard, which then pushes settings when the device is activated by the end user. This flow replaces manual device setup and ensures all devices enroll under Jamf School management.
- Link Apple School Manager account in Jamf School under Settings > Device Enrollment
- Verify device assignments in Apple School Manager
- Import or sync user and class data via SIS integration or CSV upload in Jamf School
- Create and assign enrollment profiles in Jamf School
- Activate devices to trigger Jamf School enrollment
What Are the Practical Steps to Prepare and Execute the Migration?
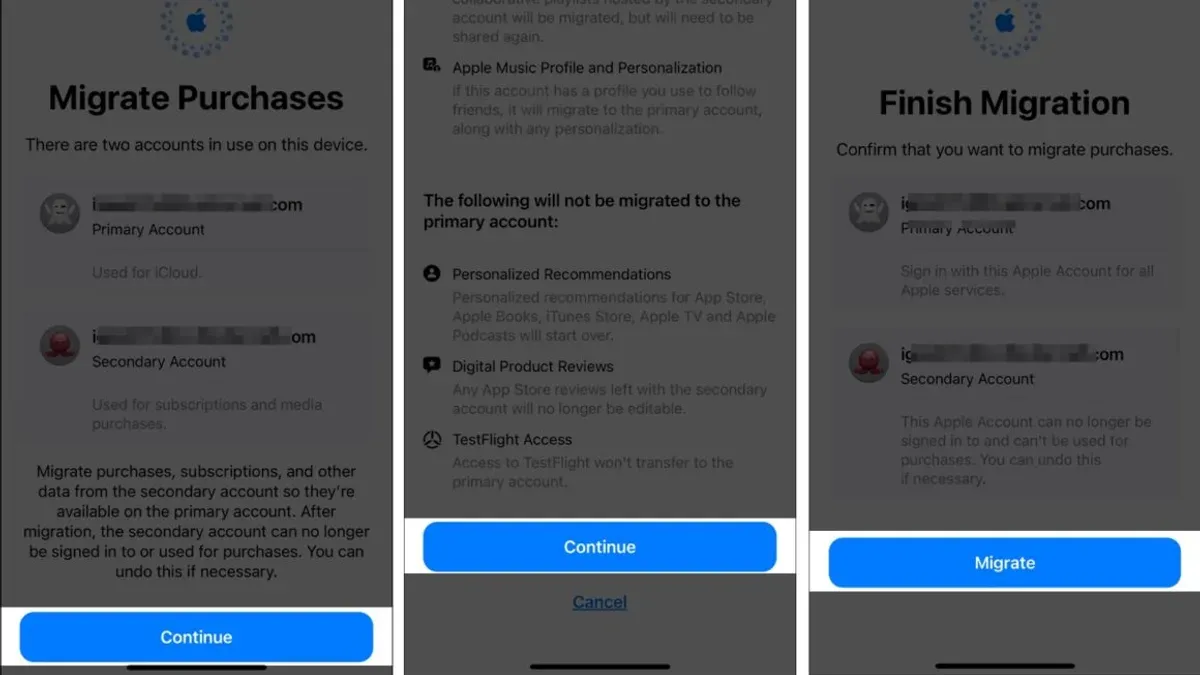
Start by auditing your Apple School Manager setup. Review enrolled devices under Devices & Accounts, check user roles in the Users section, and note content assignments linked to Apple IDs. Document device counts, class groupings, and special roles like administrators or instructors. Next, back up critical data—export device lists, user rosters, and any custom configuration profiles. Save screenshots or export CSVs from Apple School Manager’s Settings menu to record current configurations.
Set up your Jamf School environment before device enrollment. Configure integrations such as your Student Information System (SIS) under Settings > Integrations, and assign user roles matching your Apple School Manager structure to maintain permission consistency. Enroll devices by adding your Apple School Manager MDM server token in Jamf School and enabling Automated Device Enrollment to ensure zero-touch deployment.
Sync users, groups, and classes from your SIS or Apple School Manager to Jamf School, verifying group memberships reflect your school’s operational needs. Test device management policies by pushing standard profiles, app deployments like required educational apps, and user permissions on a small pilot group. Confirm policies apply correctly and devices report accurately.
Finally, communicate the migration timeline and expected changes clearly to teachers, IT staff, and administrators to minimize disruption.
Example checklist with approximate durations:
- Audit Apple School Manager environment (1-2 days)
- Back up data and document settings (1 day)
- Configure Jamf School integrations and roles (1-2 days)
- Enroll devices via Automated Device Enrollment (ongoing during rollout)
- Sync users and groups from SIS (1 day)
- Test policies and app deployments on pilot devices (2-3 days)
- Communicate migration plan to stakeholders (1 day)
What Common Mistakes Should You Avoid During This Move?
Failing to fully audit your Apple School Manager data before migration can cause major setbacks. For example, a district overlooked outdated device assignments, leading to devices enrolling under incorrect users in Jamf School. This mismatch forced a rollback and extended downtime by days. Pay close attention to user role and permission differences; Jamf School uses granular role-based access that doesn’t always map cleanly from Apple School Manager, risking unauthorized access or missing controls.
Timing coordination with educators and students is critical. Migrating mid-semester without clear communication can cause confusion and disrupt learning. Always pilot device enrollments on a small group first to catch enrollment or policy errors early. One school skipped this step and ended up with half the devices not receiving Wi-Fi profiles, stalling teacher workflows.
Do not ignore app licensing and distribution differences. Jamf School manages app licenses differently than Apple School Manager, so verify licenses and distribution methods beforehand to prevent app access issues. Lastly, skipping documentation of every change and a fallback plan leaves you vulnerable if the migration hits snags.
- Complete a thorough audit of Apple School Manager data before migration
- Review and adjust user roles and permissions for Jamf School
- Schedule migration with clear communication to all stakeholders
- Test device enrollments with a pilot group before full rollout
- Verify app licensing and distribution compatibility
- Document changes and prepare fallback procedures
How Do You Optimize Jamf School After the Migration?
After migrating, configure device management policies in Jamf School tailored to your school's needs. Start with settings under Devices > Policies. For example, create a Wi-Fi profile that restricts access to trusted networks only, enhancing security without blocking necessary connectivity. Use compliance policies like "Battery Level Alert" to notify IT when student devices drop below 20% during school hours, avoiding unexpected downtime.
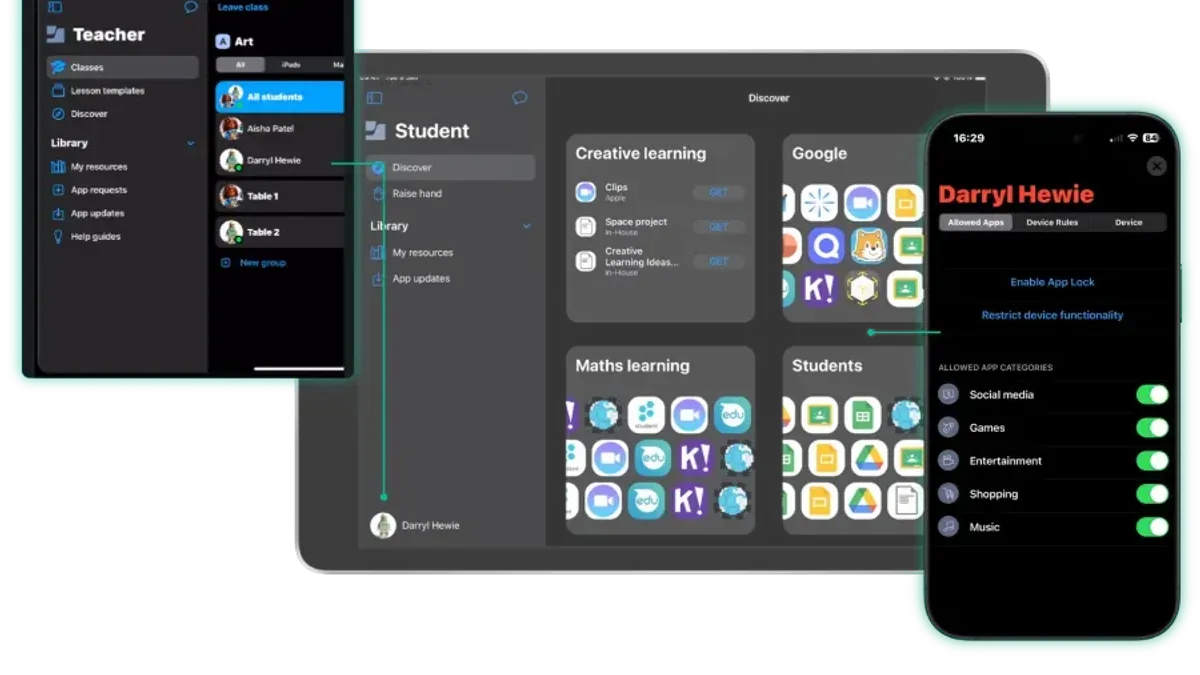
Leverage Jamf School’s Classroom Management by enabling tools such as Screen View and Remote Lock. Teachers benefit from these features to monitor student activity and maintain focus during lessons. Set these under Classroom > Profiles, assigning appropriate permissions by teacher role. This direct control reduces classroom disruptions and supports remote or hybrid learning models.
Set up automated reports and alerts under Reports & Alerts > Schedules. Schedule weekly compliance summaries and security alerts to be sent directly to your IT team. For instance, a weekly device inventory report highlighting unassigned or inactive devices keeps your fleet optimized and reduces licensing waste.
Train IT staff and educators on Jamf School’s interface and capabilities. Use Jamf’s built-in tutorials and assign time for hands-on practice. Familiarity with navigation and policy editing prevents delays and errors in day-to-day management.
Plan regular audits and updates quarterly. Review policy effectiveness, app deployment status, and user syncing accuracy. Adjust permissions or profiles based on audit findings to maintain system integrity and adapt to evolving school requirements.
- Configure targeted device policies under Devices > Policies
- Enable Classroom Management features for teachers
- Schedule automated compliance and security reports
- Train staff and educators on Jamf School use
- Conduct quarterly audits and update configurations
Frequently asked questions
Can I run Apple School Manager and Jamf School simultaneously during transition?
You can run both systems concurrently, but only for a limited time. Apple School Manager handles device enrollment and user sync, so you must maintain its connection to Jamf School until all devices and users are fully migrated. Keep in mind that duplicating management can cause conflicts, so plan a clear cutover date to avoid overlapping device assignments.
How do I handle app licenses when switching to Jamf School?
App licenses purchased through Apple School Manager do not automatically transfer to Jamf School. You need to reassign or re-purchase licenses within Jamf School’s app management console. Before starting the migration, export your existing license reports from Apple School Manager to audit and prepare for reassignment.
What happens to existing device settings after enrollment in Jamf School?
When devices enroll in Jamf School, their previous profiles from Apple School Manager are replaced by Jamf School’s configuration profiles. This means all settings, restrictions, and apps pushed through Apple School Manager are removed unless replicated in Jamf School. To maintain consistency, preconfigure matching profiles in Jamf School before enrollment.
Is there a way to automate syncing between Apple School Manager and Jamf School?
Jamf School supports automated syncing with Apple School Manager via its built-in integration. You must enable the sync under Jamf School's 'Global Settings' > 'Apple School Manager' and provide the appropriate server token. This automation keeps user and device data current but requires periodic token renewal and monitoring for sync errors.
What this guide does not cover
This guide does not cover switching from Apple School Manager to Jamf Pro or other MDM solutions, which have different processes and considerations. If you are migrating to Jamf Pro or managing enterprise devices outside an educational context, consult specialized resources tailored to those platforms. Also, this checklist assumes you have administrative access to both Apple School Manager and Jamf School and that your organization’s network and security policies allow the necessary integrations.
Quick checklist
- Verify Apple School Manager accounts and roles before starting migration.
- Export user and device data using Apple School Manager’s CSV export feature.
- Set up Jamf School with your institution’s organization details and MDM settings.
- Import users and sync with your directory services (e.g., Azure AD or LDAP) within Jamf School.
- Enroll devices by assigning them to Jamf School through Apple Business Manager’s Device Assignments.
- Test enrollment on a small batch of devices before full rollout.
- Configure profiles, restrictions, and apps in Jamf School reflecting your school’s policies.
- Confirm device supervision status and user sync accuracy after migration.
- Communicate changes to end-users and IT support staff.
- Plan fallback procedures to revert enrollment if critical issues arise.
The single most useful next step is to begin the migration with a pilot group of devices and users. This allows you to identify and resolve integration and enrollment nuances unique to your environment before scaling the process across your entire deployment. Avoid rushing the full migration without this controlled validation phase to minimize disruptions and ensure a smooth transition.
See also: Moving from Apple School Manager to Google Admin Console: Your Complete Checklist · How to Switch from Apple School Manager to ClassLink: A Practical Guide · Apple School Manager Rollout Plan for Private Schools: A Practical Guide