Moving from Blooket to Padlet Checklist: A Practical Transition Guide
This checklist guides you through moving from Blooket to Padlet, helping you set up, navigate, and migrate content while keeping students engaged.

Short answer: Moving from Blooket to Padlet requires understanding the shift from a quiz-based game platform to a flexible collaboration board. This moving from Blooket to Padlet checklist helps you set up, navigate, and migrate content without losing student engagement.
This article covers the key differences between Blooket and Padlet, guiding you through setting up Padlet boards step by step. You’ll learn how to navigate Padlet’s interface, post content efficiently, and manage boards with archiving and logging out. The guide also highlights common pitfalls during the transition and provides a practical example of a Padlet discussion board with clear instructions for your students.
What is Padlet and why switch from Blooket to Padlet?
Padlet is a versatile digital board designed for collaboration, brainstorming, and sharing multimedia resources. Unlike Blooket, which centers on game-based quizzes and competitive learning, Padlet offers open-ended interaction where users can add text, images, videos, links, and documents in a flexible layout. This makes Padlet suitable for varied learning styles and encourages group work beyond quiz formats.
Educators often switch to Padlet when they need richer content sharing and more interactive group engagement. For example, instead of a timed quiz, you can create a Padlet board where students post ideas, comment on peers’ contributions, and upload supporting materials. This supports deeper discussions and creativity rather than focusing solely on right or wrong answers.
The table below contrasts key features of Blooket and Padlet:
| Feature | Blooket | Padlet |
|---|---|---|
| Primary Use | Game-based quizzes | Collaborative boards |
| Content Types | Quiz questions and answers | Text, images, videos, links, files |
| Interaction Style | Competitive, timed games | Open-ended, asynchronous or real-time |
| Group Work | Individual or team quizzes | Collaborative discussions and projects |
| Feedback | Scores and rankings | Comments and reactions |
User feedback often highlights that Padlet improves engagement by allowing students to express ideas freely and interact through multimedia. One educator noted that switching to Padlet enabled students with different learning preferences to participate equally, fostering a more inclusive environment.
Picture a history class: instead of answering quiz questions about a historical event, students upload images, primary source documents, and written reflections to a Padlet board. They can comment on each other’s posts, creating a dynamic learning space that extends beyond simple recall to analysis and interpretation.
How to set up a Padlet step by step
Start by visiting padlet.com and clicking the “Sign up” button. You can create an account using your email or sign in via Google or Microsoft accounts. Once logged in, click “Make a Padlet” to begin setting up your board.
Next, choose the Padlet format that fits your goals. For example, select “Wall” for a simple post-by-post layout, “Canvas” for freeform placement of posts, or “Stream” for chronological entries. The choice depends on how you want your students to interact; a grid layout works well for organized content collections.
After selecting the format, customize your board by adding a clear title and a concise description to set expectations. Access the “Settings” menu to configure privacy options: make it private, password-protected, or public. Set permissions for who can view, write, or moderate posts. Enable or disable notifications to control alerts for new activity.
Adjust the appearance to match your style or class theme—choose background colors or upload an image. Review each setting carefully; ignoring permissions is a common mistake that can lead to unwanted access or limited student participation.
For example, create a “Class Discussion” Padlet in Stream format, title it accordingly, set it to password-protected to restrict access, allow students to write posts, and enable notifications to stay updated on contributions.
- Sign up or log in at padlet.com
- Click “Make a Padlet” and select the appropriate format
- Add title and description
- Set privacy and access permissions under “Settings”
- Customize appearance and enable notifications as needed
How to navigate Padlet and work Padlet effectively
When you log into Padlet, you land on the dashboard showing all your boards in a grid or list view. Each board tile displays the title, last update time, and a preview of recent posts. Use the search bar or filter options on the left to quickly locate specific boards. Click a board to open it and start interacting.
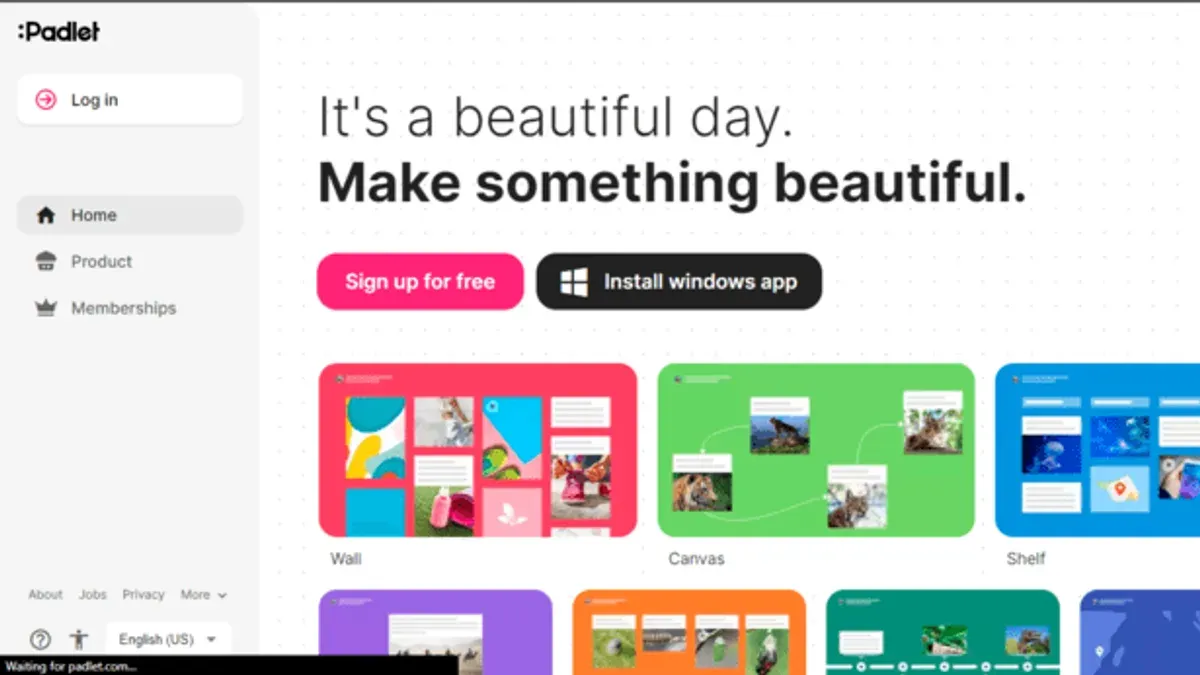
Inside a board, the interface centers on the content area where posts appear in your chosen layout (wall, stream, grid, etc.). To add a post, click the plus (+) button usually at the bottom right. You can type text, then enhance it by attaching images, videos, links, or files using the toolbar icons. Posts can be dragged to rearrange their position if your layout supports manual organization.
For example, in a stream format, typing a question and attaching an image is straightforward. After posting, click and drag the post to reorder or group it logically. This flexibility helps maintain a neat, navigable board, especially as content grows.
Padlet supports collaboration with commenting and reactions. Click a post to open its detail pane, where users can add comments or tap reaction emojis like thumbs-up. Notifications alert you to new comments or posts if enabled in settings, keeping you updated without constant checking.
In summary, navigating Padlet involves using the dashboard to find boards, adding and organizing posts intuitively, and leveraging collaboration tools like comments and reactions to engage participants efficiently.
- Access your boards from the dashboard grid or list
- Click the plus (+) button to add posts with multimedia attachments
- Drag posts to reposition them when layout allows
- Use the post detail pane for comments and reactions
- Enable notifications to track activity without manual refreshing
How to post on Padlet and copy a Padlet board
To post on Padlet, click the pink plus button (+) usually found at the bottom right of your board. You can create posts with text, images, links, or files. For example, select "Upload" to add an image from your device or "Link" to share a URL. Each post can be titled by typing in the "Title" field and formatted using the simple toolbar for bold, italic, or bullet points. Tags help categorize posts and make searching easier later.
When adding a post, use descriptive titles and relevant tags to keep your board organized. For instance, if you add a file about climate change, title it "Climate Data" and tag it "Environment". This helps both you and your students find content quickly.
To copy a Padlet board, open the board, click the three dots (More) in the upper right corner, then select "Make a copy." This creates a duplicate board with all posts intact, perfect for templates or backups. You can rename the copy and modify it without affecting the original.
Sharing options include generating a link or embedding the board on a website. The link is the simplest way to share with students or colleagues—they just click and access the board. Embedding requires copying the embed code from the Share menu and pasting it into your website’s HTML, ideal for integrating Padlet directly into your course page.
For example, after posting a lesson summary and relevant files, copy the board to create a new version for the next class. Share the link via your learning management system or embed the board in your class website for easy student access.
- Click + to create posts with text, images, links, or files
- Use titles and tags for clear organization
- Copy boards via More menu > Make a copy for templates/backups
- Share boards with link or embed code depending on your needs
How to log out of Padlet and archive Padlets
Logging out of Padlet properly is crucial to protect your account, especially on shared devices. On desktop, click your profile icon in the top-right corner to open the dropdown menu, then select Log out. On mobile, tap the three-line menu in the top-left, scroll down, and tap Log out. This ensures no one else can access your boards or personal information.
Archiving Padlets helps keep your workspace organized by moving inactive boards out of sight without deleting them. To archive a board, open the board, click on the three-dot menu (More options) in the upper right, and choose Archive. The board will then appear under the Archived tab on your dashboard. For example, if you finished a training module last semester, archiving that board clears your active workspace but retains the content for future reference.
If you need to recover an archived board, go to your dashboard, open the Archived tab, find the board, click the three-dot menu, and select Restore. This moves the board back to your active workspace, making it editable and visible to collaborators again.
- Desktop logout: Profile icon > Log out
- Mobile logout: Menu > Scroll down > Log out
- Archive board: Open board > More options (three dots) > Archive
- Access archived boards: Dashboard > Archived tab
- Restore board: Archived tab > Board > More options > Restore
Following these steps keeps your Padlet environment secure and clutter-free, making it easier to focus on current projects.
Common mistakes to avoid when moving from Blooket to Padlet
Expecting Padlet to replicate Blooket’s gamification features exactly is a frequent pitfall. Padlet is a collaborative board, not a game platform. For example, one educator tried to run a quiz competition on Padlet expecting automatic scoring like Blooket, leading to confusion and frustration among students. Instead, use Padlet’s strengths: open-ended discussion and multimedia sharing.
Ignoring privacy and access settings can disrupt student participation. Padlet’s default settings might restrict posting or commenting. Check the board’s settings under “Share” > “Privacy” and ensure you choose “Anyone with the link” and enable posting permissions. A teacher shared that a board initially set to “Only me” caused students to be locked out, wasting class time.
Overloading boards with too much content or unclear organization reduces effectiveness. Padlet supports many posts but clutter makes navigation hard. Use clear titles, sections, or columns to segment content. For instance, one trainer who dumped all resources in one feed found students overwhelmed and engagement dropped.
Not training students on Padlet navigation and posting etiquette leads to misuse and frustration. Provide a quick demo on how to add posts, comment, and tag correctly. One case showed students posting off-topic content or duplicating posts until guidelines were clarified, improving workflow.
- Don’t expect built-in gamification; adapt activities to Padlet’s collaborative style.
- Set board privacy to “Anyone with the link” and enable posting rights before sharing.
- Organize content with clear headings or columns to avoid clutter.
- Brief students on navigation and posting rules to prevent confusion.
Example of Padlet discussion board and instructions for students
Set up your Padlet board as a discussion forum by creating a clear prompt post at the top. For example, title the post "Week 1 Discussion: Climate Change Causes" and add a concise question like "What human activities contribute most to climate change?" Use the Wall or Canvas layout to allow free placement of posts, which encourages open conversation. Add designated areas or color codes for initial posts and responses, so students know where to contribute their main ideas and where to reply to peers.
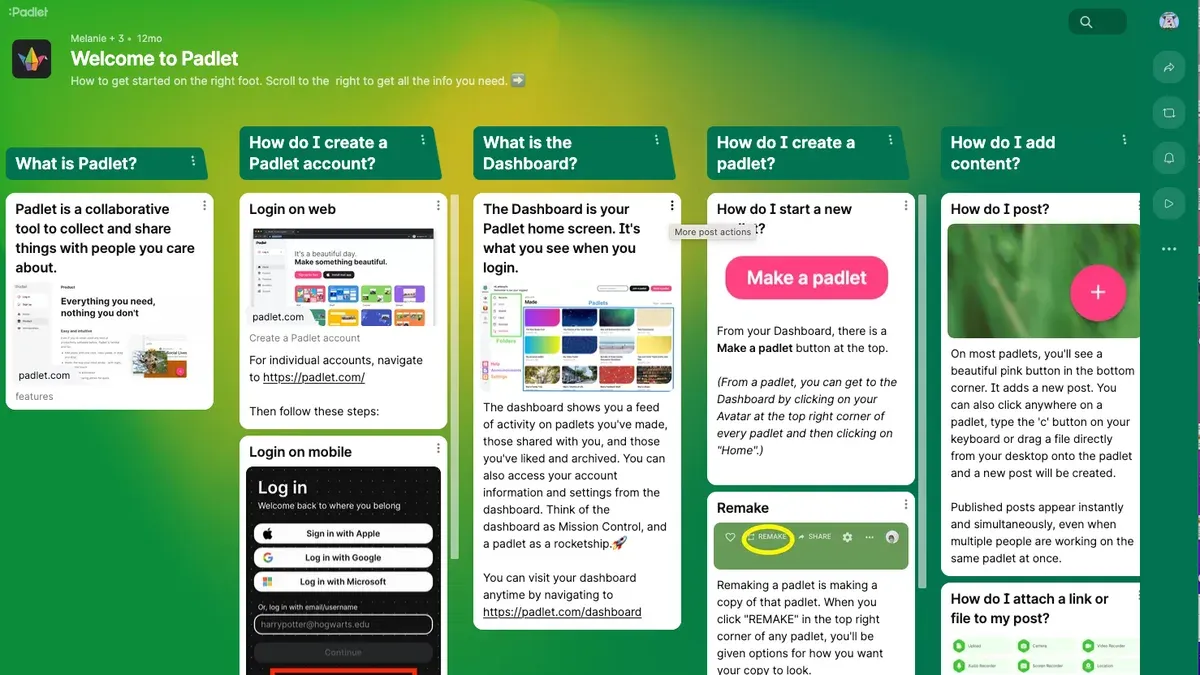
Provide students with straightforward instructions: first, click the "+" button at the bottom right to add their initial post. Encourage them to include text, images, or links to support their answers. Then, to reply to classmates, click on any post and use the comment function below it. Remind students to tag their posts with relevant hashtags or keywords if you enabled tagging, which helps keep the discussion organized.
Encourage engagement by setting expectations for at least one original post and two comments per student. Monitor contributions by regularly checking the activity feed accessible from the dashboard to track new posts and comments. Use the "Lock" feature on posts when discussions are complete to keep the board tidy. Share a sample board link or screenshot with students beforehand so they know what to expect.
- Create a prompt post with a clear question
- Use Wall or Canvas format for flexible posting
- Instruct students to add posts and reply to comments
- Set minimum posting requirements to promote participation
- Monitor activity and lock posts when done
Frequently asked questions
How to post in padlet?
To post on Padlet, open your board and click the plus (+) button or double-click anywhere on the board. A post window appears where you can add text, images, links, or files. After adding your content, click 'Publish' to save the post visible to others.
How to copy a padlet board?
Open the Padlet you want to copy, click the gear icon (Settings) in the top-right corner, then select 'Duplicate.' This creates an exact copy in your Padlet dashboard, preserving the layout and content for you to modify without affecting the original.
How to use padlet step by step?
Start by creating a Padlet from your dashboard and choosing a layout. Customize settings like privacy and access under the gear icon. Invite collaborators using the 'Share' button. Add posts by clicking the plus (+) button or double-clicking the board. Monitor activity and adjust permissions as needed.
How to work padlet?
Working with Padlet means posting, organizing, and interacting with content on your board. Use the sidebar tools to arrange posts, add comments, and react with emojis. Regularly update permissions to control who can view or edit the board to maintain order and engagement.
How to use padlet?
Use Padlet by first creating a board and selecting a layout that fits your activity. Add posts by clicking the plus (+) icon and entering content. Share the board link with participants for collaboration. Manage settings to control visibility and editing rights to suit your session's needs.
Quick checklist
- Create a Padlet account and choose a board type that fits your teaching style.
- Set clear access permissions under Settings > Privacy to control who can view and post.
- Organize your board with sections or columns to mirror your lesson flow.
- Post example content and test navigation to ensure ease of use for students.
- Use the Share button to copy the board URL or embed code for easy distribution.
- Archive or export completed Padlets regularly to keep your workspace manageable.
- Avoid overloading boards with too many multimedia files to prevent slow loading.
What this advice does not cover
This guide does not cover advanced Padlet integrations with other LMS platforms or detailed gamification features beyond basic collaboration. Padlet’s free tier limits may restrict usage for large classes or heavy multimedia use, so consider premium plans if needed.
The single most useful next step is to set up a simple Padlet board now, experiment with its posting and sharing features, and invite a small group of students or colleagues to engage with it to get hands-on experience before fully transitioning from Blooket.
See also: Moving from Blooket to Nearpod Checklist: A Clear-Cut Transition Guide · Moving from Blooket to Microsoft Forms: Your Step-by-Step Checklist · Moving from Blooket to Kahoot Checklist: How to Transition Smoothly · Moving from Blooket to Google Forms Checklist: A Practical Guide