How to Organize Units and Modules in Brightspace for Clear Course Navigation
Discover effective ways to organize units and modules in Brightspace for clear course navigation and improved student engagement.

Short answer: To organize units and modules in Brightspace effectively, structure your course content into clear, logically named units that reflect the course flow, then group related modules within those units for easy navigation. Use consistent naming conventions and leverage Brightspace features like Content Topics and Modules to keep everything accessible and intuitive for students.
This article covers how to prepare before organizing your course, create and name units for logical progression, arrange modules within those units to maximize clarity, utilize Brightspace tools for better navigation, maintain your course structure consistently, and avoid common pitfalls. You will get a step-by-step guide focused on practical decisions that enhance student engagement and streamline course management.
What should you prepare before organizing units and modules?
Begin by reviewing your course syllabus and learning outcomes to establish the foundational structure. This review ensures your units and modules align with the intended educational goals. Gather all course materials—readings, assignments, multimedia—and analyze how they connect to each other and to the learning outcomes.
Decide on the organizational approach that fits your course content: thematic units group topics by subject; chronological units follow a timeline; skill-based units focus on competencies. Choose one to maintain coherence throughout your course.
Estimate the number of modules and submodules based on the syllabus scope and material volume. This helps prevent overcrowding or excessive fragmentation, which can confuse students.
Use this checklist to compare your syllabus structure against your planned module breakdown:
| Syllabus Structure | Recommended Module Breakdown |
|---|---|
| 3 main topics with 2-3 subtopics each | 3 units, each containing 2-3 modules |
| 10 weeks of content, each with lectures and assignments | 10 chronological units, each with 2 modules (lecture, assignment) |
| Skills: research, analysis, presentation | 3 skill-based units, subdivided by related activities |
- Review the syllabus and list learning outcomes; you should see a clear set of goals to guide content grouping.
- Collect all course materials and map their relationships; you should identify logical clusters of content.
- Choose an organizational approach (thematic, chronological, skill-based); you should have a defined structure type for your units.
- Estimate the number of modules and submodules; you should have a rough count to avoid over- or under-structuring.
How do you create and name units for logical flow?
Start by creating unit containers within the Brightspace Content tool that reflect the natural progression of your course. Navigate to Content, select the module where you want the unit, and click "Add a Unit." Name the unit clearly to convey its scope and place in the sequence. Avoid vague titles like "Week 1" alone; instead, combine thematic and chronological cues such as "Unit 1: Introduction to Marketing Concepts." This helps students understand what to expect and how units relate to each other.
Balance unit size carefully. Units that are too large overwhelm students and complicate navigation, while overly fragmented units create unnecessary clicks and disrupt flow. Aim for units that cover a coherent topic or learning goal and contain 3 to 5 modules or lessons. This range keeps navigation manageable without losing thematic focus.
For example, a course combining themes and chronology might use unit names like "Unit 1: Foundations of Marketing," "Unit 2: Consumer Behavior Analysis," and "Unit 3: Marketing Strategy Development." Each unit title signals its focus and order, guiding students through the course logically.
- Go to the Content tool and locate the module for your unit.
- Click "Add a Unit" and enter a descriptive, sequence-aware name.
- Check the unit appears in the correct order within the module navigation.
- Repeat for all major course segments, ensuring unit sizes remain balanced.
- Review the unit list from a student perspective to confirm clarity and flow.
How should you organize modules within units for clarity and accessibility?
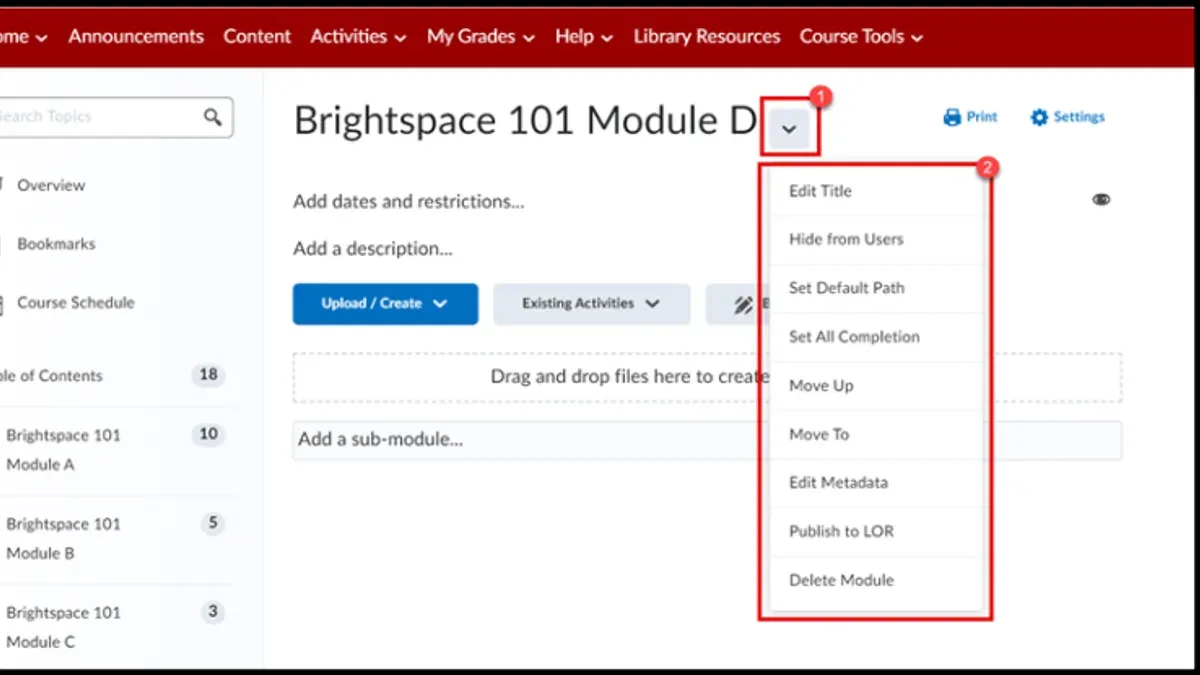
Divide each unit into modules to break content into manageable, focused segments. In Brightspace, use the "Content" tool to create modules and submodules that reflect a clear hierarchy. Start by selecting "Add a module" under the unit, then add submodules if needed to further group related topics.
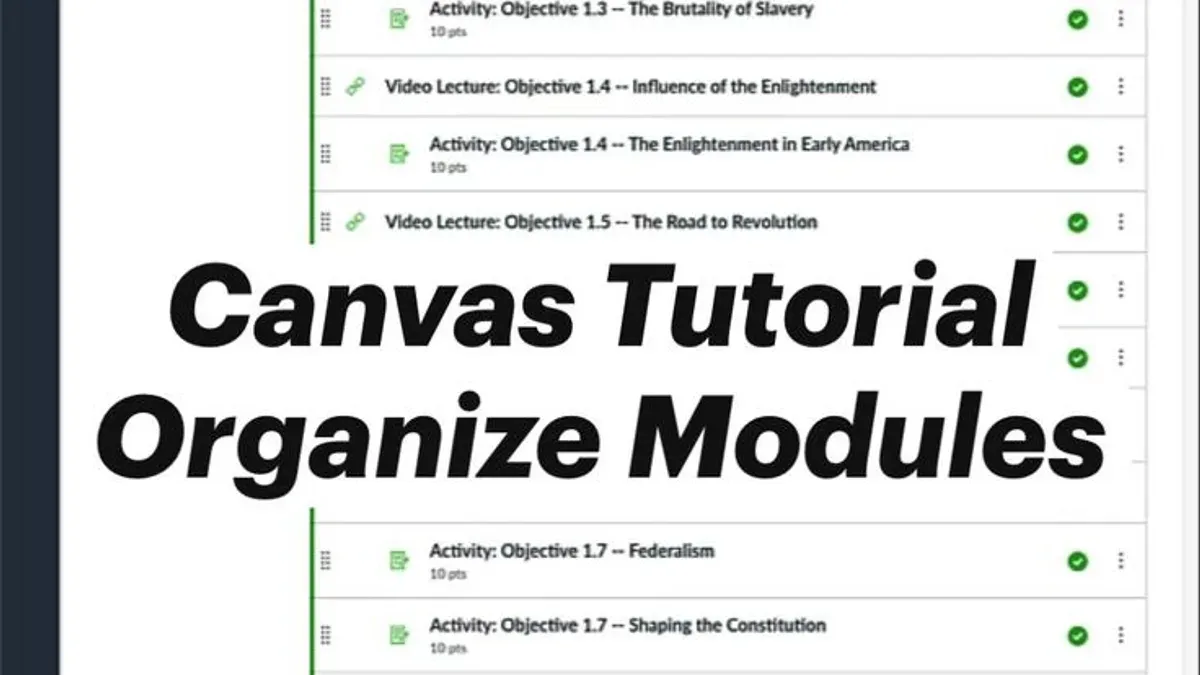
Use descriptive titles for modules that clearly indicate their focus. Maintain consistent formatting for module names—choose a style such as "Week 1: Introduction to Concepts" or "Topic 1.1: Foundations" and apply it throughout. This consistency helps students scan and locate material quickly.
Order modules to mirror the logical progression of learning objectives. For example, place foundational modules first, followed by applications, then assessments. This sequencing supports cognitive flow and reduces student confusion.
| Organization Scheme | Pros | Cons |
|---|---|---|
| Flat Structure (Modules only) | Simple navigation; easy to manage; less overwhelming | Limited depth; harder to group complex topics; can get long |
| Hierarchical Structure (Modules and Submodules) | Better topic grouping; clearer overview; scalable for large courses | More setup time; potential navigation complexity; students may overlook submodules |
- Open the unit in Brightspace Content.
- Click "Add a module" to create a new module; verify it appears in the unit list.
- For detailed grouping, click the module’s dropdown menu and select "Add a submodule"; confirm it nests correctly.
- Name modules with consistent, descriptive titles; preview navigation panel to ensure clarity.
- Drag and drop modules to arrange in learning sequence; check student view to verify order.
How can you leverage Brightspace tools to enhance module navigation?
Use release conditions to control when students access modules. Navigate to the module’s settings, select Release Conditions, and create rules based on dates or completion of prior activities. This ensures students progress through content in your intended sequence without skipping ahead. You should see the module status update to conditionally released when set correctly.
Add summaries or agendas at the start of each unit to provide context. Insert a Text or HTML file as the first module item with a concise overview or learning objectives. Students see this summary immediately, helping them understand the unit’s scope and expectations.
Incorporate checklists or progress tracking to boost engagement and self-monitoring. Use the Checklist tool within units to list key tasks or milestones. Brightspace automatically tracks completion status, displayed visually to students. This transparency encourages steady progress and clarifies outstanding work.
These features work together to create a structured, transparent path for students navigating your course.
- Open the unit in Brightspace and click the gear icon next to a module; select Edit Properties In-place. You should see module settings appear.
- Click Restrictions, then Add Release Condition. Choose a condition like Activity Completed or Start Date. Confirm the rule. The module should now show a conditional release icon.
- At the start of the unit, add a new module item of type Text. Enter a brief agenda or summary and save. It should appear as the first item.
- Add a Checklist from the unit’s New menu. List essential tasks. Save and verify students see progress indicators.
What steps ensure consistent maintenance and updates of your course structure?
Maintain your course by scheduling regular audits every quarter. Check each unit and module for outdated content, broken links, or confusing layout. Confirm that all resources remain relevant and that module sequences still match course goals. This prevents student frustration and keeps navigation intuitive.
Implement version control by saving a backup of your course before major updates. Use the Brightspace export feature under Course Admin > Import/Export/Copy Components to create snapshots. Clearly label versions with dates and change descriptions to track progress and revert if necessary.
Communicate changes promptly to students. Use course announcements or the News tool to highlight updates affecting navigation or content. Provide clear instructions on where to find revised materials to reduce confusion and keep students on track.
Example calendar template for quarterly review:
| Month | Task | Expected Outcome |
|---|---|---|
| January | Audit unit/module content and layout | Identify outdated or unclear elements |
| April | Backup current course version, update modules | Preserve version history, implement improvements |
| July | Review student feedback on navigation | Adjust structure based on real use |
| October | Announce upcoming changes, finalize updates | Students informed; course ready for next term |
- Set calendar reminders for quarterly audits. You should see scheduled tasks in your calendar system.
- Before updates, export your course via Course Admin > Import/Export/Copy Components. A downloadable package confirms success.
- Review and revise units and modules during audits. Updated content and improved layouts should be visible in the course.
- Post announcements in Brightspace News detailing changes. Students should receive notifications and see messages in the course homepage.
- Document all changes with version notes in a shared document or course notes. This record should be accessible and up to date.
What common mistakes cause unit and module organization issues, and how do you fix them?
Unclear titles in units or modules confuse students and slow navigation. Rename titles to be concise and descriptive, like "Week 3: Research Methods" instead of "Module 3." This clarifies content and aids retrieval.
Overlapping content across modules causes redundancy and frustration. Consolidate repeated materials into a single module or clearly explain differences if overlap is necessary. Use Brightspace’s "Content Sharing" feature to avoid duplication.
Broken links or inaccessible content disrupt learning flow and reduce engagement. Regularly run the "Content Validation" tool in Brightspace to identify broken links. Fix or remove invalid links promptly to maintain seamless access.
- Audit your course content titles for clarity. After renaming, students should immediately understand the topic without guessing.
- Review modules for repeated materials. After consolidation, each topic should appear only once or have clear distinctions.
- Run Brightspace's "Content Validation" tool from the Course Admin menu. Fix all flagged broken links; afterward, no alerts should appear.
- Use the "Manage Dates" tool to verify content availability aligns with your course schedule. Ensure no content is unintentionally hidden.
Before and after screenshots typically show cluttered, ambiguous module lists replaced by a clean, logically named, and error-free structure.
Frequently asked questions
Can I reorganize units and modules after students have started the course?
Yes, you can reorder units and modules at any time using the Manage Dates or Content tool in Brightspace. However, be cautious as moving content may affect student progress tracking or release conditions. Communicate changes clearly to avoid student confusion, especially if navigation order is altered.
What is the optimal number of modules per unit to avoid overwhelming students?
Keep units concise by limiting modules to around 3–5 each. This balance prevents cognitive overload while allowing logical grouping of related topics. Too many modules in one unit can dilute focus and complicate navigation.
How do release conditions affect student access to modules?
Release conditions control when students can see or enter modules based on criteria like date, completion of prior activities, or grades. Properly setting these ensures students progress sequentially and access content at intended times, enhancing pacing and course flow.
Can I reuse units and modules across different courses in Brightspace?
Brightspace allows you to export and import content packages, enabling reuse of units and modules across courses. Use the Course Admin > Import/Export/Copy Components feature to select specific units or modules, saving time and maintaining consistency.
Quick checklist
- Outline your course goals and logical progression before building units.
- Name units clearly and consistently, reflecting content scope and order.
- Group related modules within units to avoid overwhelming students.
- Use Brightspace Content tool features like Table of Contents and module descriptions for navigation clarity.
- Schedule regular reviews to update and reorganize units and modules as needed.
- Watch for overly long units, inconsistent naming, and unclear module grouping.
What this advice does not cover
This guide focuses on organizing units and modules within Brightspace Content tool only, not on other Brightspace course features like quizzes or assignments which require separate management. If you need to streamline assessments or gradebook setup, consult resources specific to those tools.
The single most useful next step is to map your course content in a simple outline outside Brightspace first. This ensures your units and modules reflect a clear, logical flow before you start building. Doing this upfront prevents common navigation issues and saves time during content setup.
See also: How to Create and Manage Assignments in Brightspace: A Step-by-Step Guide · How to Build and Manage a Quiz in Brightspace: A Step-by-Step Guide · How to Grade Student Work in Brightspace: A Clear Step-by-Step Guide