Canvas Assignment Setup Checklist for Elementary Teachers
This checklist guides elementary teachers through setting up clear, age-appropriate assignments in Canvas to engage students and streamline grading.

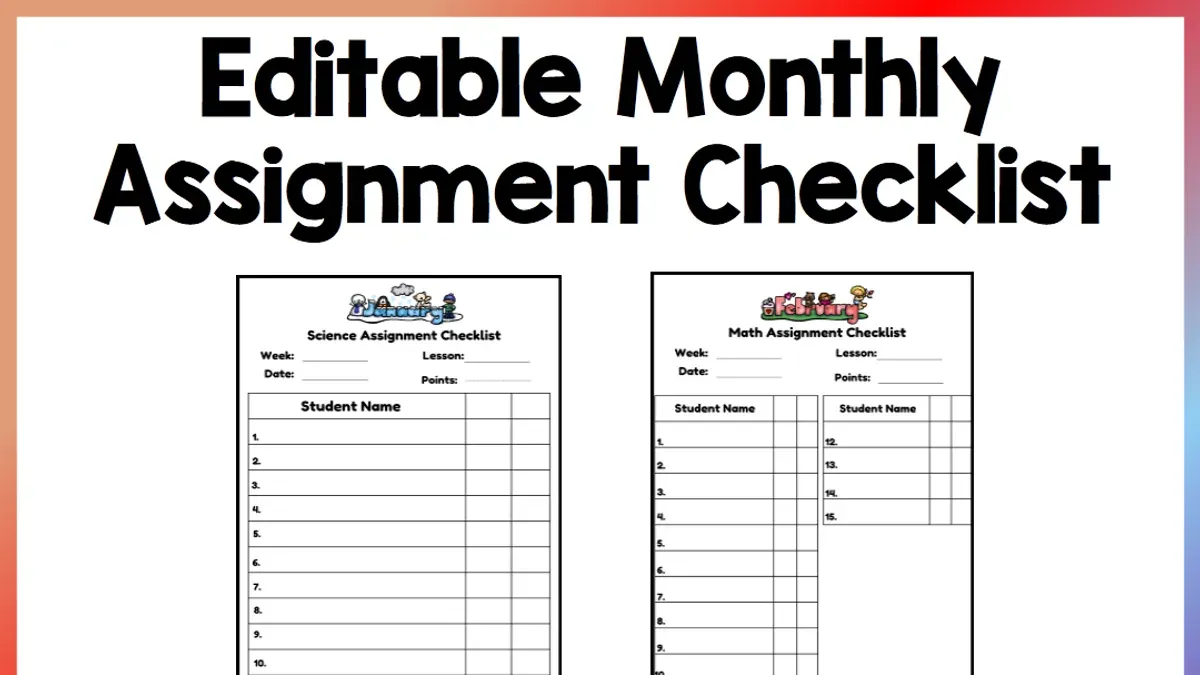
Short answer: To set up assignments in Canvas for elementary students, you need to focus on clear instructions, age-appropriate content, and easy navigation. Use Canvas’s Assignment tool to create tasks that engage young learners while simplifying grading and feedback.
This Canvas assignment setup checklist for elementary teachers guides you through the specific steps you need to take. You’ll learn what materials and information to gather before starting, how to customize assignments for younger students, how to organize them for quick access, set up grading and feedback effectively, assign work to individuals or groups, and troubleshoot common problems. This step-by-step how-to helps you avoid generic LMS pitfalls and addresses the unique classroom management challenges elementary teachers face when using Canvas.
What Do You Need Before Setting Up Assignments in Canvas?
Before you begin creating assignments in Canvas, have a finalized lesson plan aligned directly with your learning goals. This ensures your assignments target specific skills or knowledge areas. Gather your student roster, including any grouping details if you plan to assign work by group or individually. Confirm you have the correct course access with permissions to create and edit assignments.
Familiarize yourself with the Canvas assignment types—such as online quizzes, file submissions, or discussion prompts—and their settings like due dates and availability windows. Prepare any digital resources or files you will upload, such as worksheets, videos, or links. Having these ready prevents delays during setup and ensures smooth student access.
For example, a simple lesson plan might focus on reading comprehension with an assignment to submit a short summary. Your checklist before setup should include your lesson plan document, student list, Canvas course access, knowledge of assignment types, and all digital materials ready to upload.
- Review and finalize your lesson plan aligned with learning goals. You should see clear objectives and assignment purpose.
- Confirm your student roster and any groupings. Your list should be accurate and up to date.
- Verify you have course permissions to create assignments. You should see the "Assignments" link in your Canvas course menu.
- Review Canvas assignment types and settings to choose the best fit. You should understand options like submission types and grading methods.
- Prepare all digital files and resources for upload. Files should be named clearly and accessible.
- Finalized lesson plan aligned with goals
- Current student roster and grouping info
- Course access with assignment creation rights
- Knowledge of Canvas assignment types and settings
- Digital resources/files ready for upload
How Do You Create an Assignment That Fits Elementary Students’ Needs?
Choose assignment types that match young learners’ skills. For early grades, use "Text Entry" for short answers or reflections, "File Upload" for artwork or scanned worksheets, and "Quiz" for simple multiple-choice or true/false checks. Avoid complex formats that require advanced typing or navigation.
Write clear, simple instructions. Use short sentences and add visual aids like icons or images directly in the assignment description. For example, include a picture of a pencil next to "Write your answer" to guide nonreaders.
Set due dates and availability windows to guide pacing. Configure the "Assign" section so assignments open just before students start the unit and close shortly after to keep work timely without overwhelming students.
Use Canvas’s "Differentiated Assignments" feature to scaffold learning. Assign easier versions or additional supports to students who need them by setting custom due dates, availability, or requirements per student or group.
- Go to "Assignments" and click "+ Assignment." You should see the assignment creation page.
- Enter a title like "Plant Life Cycle Drawing." Select "File Upload" as submission type.
- In "Instructions," write "Draw and color the plant life cycle stages. Take a photo and upload it here." Add a small flower icon image below the text.
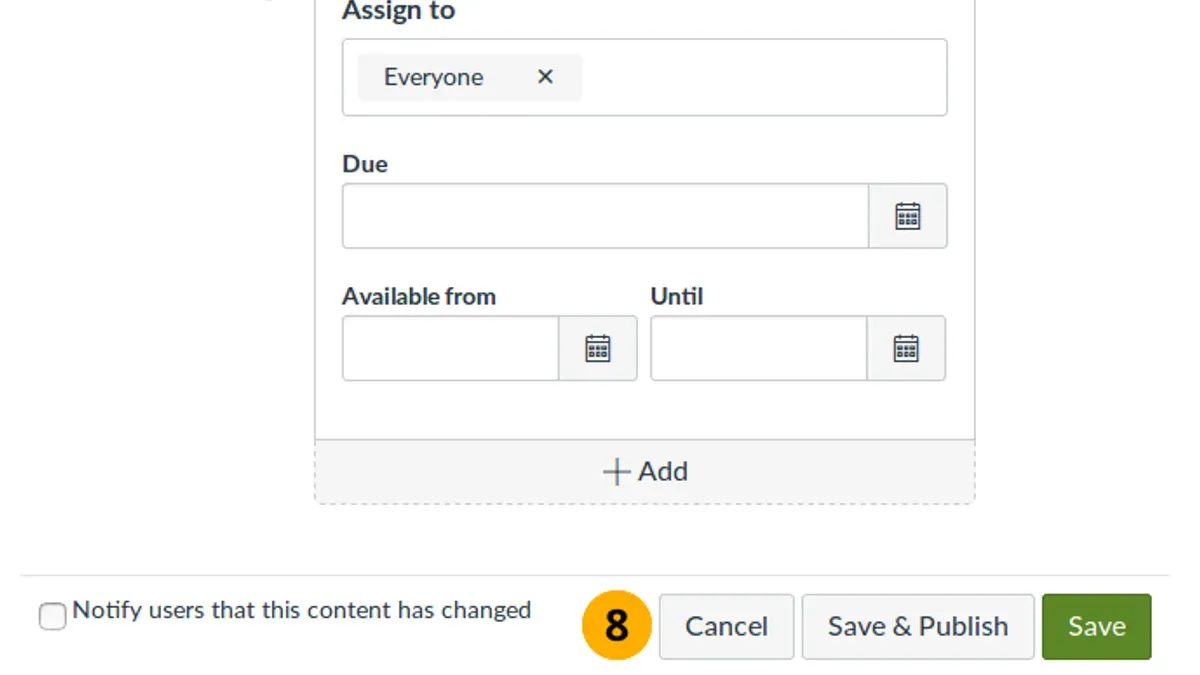
- Set "Assign" to "Everyone," with due date one week from today and availability starting two days before.
- Use "+ Add" under "Assign To" to select specific students if you want to assign a scaffolded version with simpler directions.
- Click "Save & Publish." The assignment appears in the list with correct settings.
How Can You Organize Assignments for Easy Navigation and Tracking?
Group assignments into modules by week or topic to give students a clear roadmap of what to complete. Modules act as containers, preventing a jumble of assignments and helping students focus on one set at a time. Without modules, students can get lost scrolling through long lists of tasks, increasing confusion and missed deadlines.
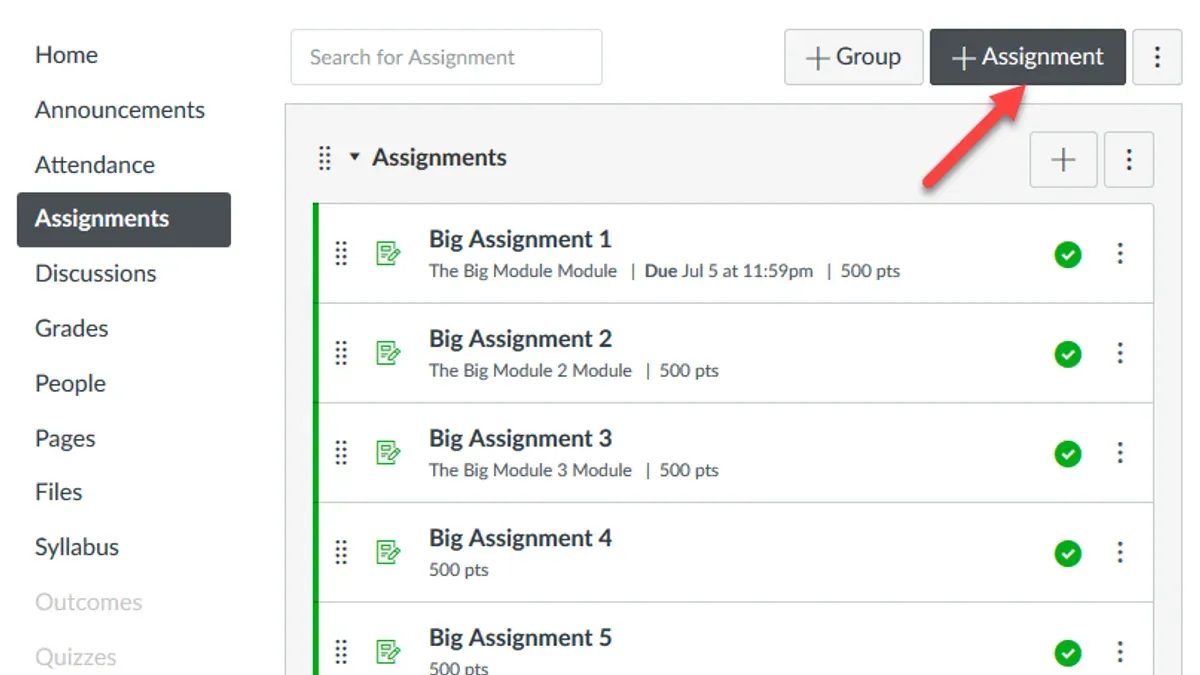
Use consistent naming conventions. Include week numbers, topics, and assignment types in titles—for example, "Week 3: Reading Comprehension Quiz." This clarity aids both students and you in quickly identifying each task.
Set prerequisites within modules to enforce sequential learning. Require completing one assignment before unlocking the next to maintain pacing and scaffold skills logically. You can find this in the module settings under "Requirements."
Link assignments to relevant standards or learning objectives by adding these details in the assignment description or tags. This makes tracking student progress against goals easier during grading and parent communication.
- Create a module named for the week or topic. You should see it listed in the Modules section.
- Add assignments to the module. They appear nested inside, not scattered.
- Edit each assignment’s title to include week/topic and type. Titles update visibly on the student view.
- Set prerequisites by clicking the three-dot menu on the module, selecting "Edit," then "Add requirement." A locked icon shows on assignments with prerequisites.
- Include standards or objectives in the assignment description area. These notes appear when students open the task.
How Do You Set Up Grading and Feedback Options Effectively?
Choose the grading type that matches your goals and your students’ developmental stage. For many elementary assignments, "Complete/Incomplete" keeps grading simple and clear. Use "Points" grading for tasks where you want to measure progress more precisely, such as writing assignments or math quizzes. Avoid complex grading schemes that can confuse young learners or slow your workflow.
Set up a rubric tailored to elementary skills to standardize grading and save time. A sample rubric for a writing assignment might include criteria like "Sentence Structure," "Spelling," and "Idea Clarity," each rated on a 1–3 scale. Rubrics reduce subjectivity and help you give targeted feedback efficiently.
Use Canvas’s comment bank to store common feedback phrases, speeding up your responses. Consider audio or video comments to engage students who may struggle with reading text feedback. If your school allows, enable anonymous peer review to foster student reflection and collaboration.
- Go to the assignment settings and select the grading type (Points or Complete/Incomplete). Confirm the change saves and appears on the grading page.
- Click "Add Rubric," create categories appropriate for the skill level, and save. You should see the rubric linked to the assignment.
- Open the SpeedGrader, access the comment bank to add or edit comments. Confirm you can insert saved comments into student feedback.
- Enable peer review under assignment options if applicable, then check the submission page to confirm students can submit reviews anonymously.
| Sample Rubric for Elementary Writing Assignment | 1 - Needs Improvement | 2 - Developing | 3 - Proficient |
|---|---|---|---|
| Sentence Structure | Sentences incomplete or confusing | Some sentences complete and clear | Sentences clear and complete |
| Spelling | Many spelling errors | Few spelling errors | No spelling errors |
| Idea Clarity | Ideas unclear or off-topic | Ideas mostly clear | Ideas clear and well-expressed |
How Do You Assign Work to Individual Students or Groups?
Canvas allows you to tailor assignments to individual students or groups to address varied learning needs and encourage collaboration. To assign differentiated work, start by editing the assignment and selecting "Assign to". Enter the name of the specific student or group; this lets you set unique availability and due dates for each. For example, you can set an extended due date for a student needing more time without affecting others.
To create groups, go to "People" in your course navigation, then "+ Group Set". Name the group set and add groups manually or use auto-grouping. When assigning group work, choose the assignment, edit it, and select the group set under "Assign to" to distribute it to all members simultaneously. Canvas tracks submissions per student within the group, making monitoring straightforward.
Use the "Grades" or "SpeedGrader" area to view submission status by student or group, helping you identify who needs reminders or support. This setup supports differentiated instruction and efficient class management.
- Edit the assignment and select "Assign to"; enter the student or group name. You should see the assignment list update with individual availability fields.
- To create groups, navigate to "People", click "+ Group Set", name it, and add groups. You should see the new groups listed.
- Assign the group by editing the assignment and selecting the group set in "Assign to"; confirm the assignment now shows those groups.
- Track submissions in "Grades" or "SpeedGrader" to see status per student or group; submission indicators should be visible.
What Are Common Issues When Setting Up Assignments and How Do You Fix Them?
Assignments not appearing to students usually stem from availability date settings. Check the "Assign" tab and ensure the "Available from" date is current or past. If you use "Until" dates, confirm they haven't expired, or students will lose access.
Incorrect submission types block students from uploading work. Verify the "Submission Type" matches the expected format—"File Upload" for documents or "Online Text" for typed responses. Mismatches cause confusion and missed submissions.
Grading errors often arise from selecting an incompatible grading type or forgetting to publish grades. Review the "Grading" section and confirm the grading scheme fits your rubric. Publish grades promptly to avoid student uncertainty.
Students missing notifications usually result from disabled assignment notifications or inactive course announcements. Ensure notifications are enabled under "Account > Notifications" and send a course announcement when assignments go live to prompt awareness.
- Open the assignment settings and check the "Assign" dates; set "Available from" to today or earlier. You should see the assignment visible in the student view.
- Confirm the "Submission Type" aligns with your assignment needs (e.g., "File Upload"). Students should be able to submit without errors.
- Review the grading settings and select an appropriate grading type (e.g., "Points" or "Complete/Incomplete"). Publish the grades after grading to ensure visibility.
- Verify notification settings in your account and send a course announcement. Students should receive alerts about the new assignment.
Frequently asked questions
How do I make assignments engaging for young learners in Canvas?
Use multimedia elements like images, videos, and audio instructions to keep young students interested. Break tasks into small, manageable steps using the assignment description field. Incorporate interactive tools like quizzes or discussions to promote active participation and use clear, simple language suited to elementary levels.
Can I reuse assignments across different classes or years?
Yes, you can reuse assignments by saving them as templates or copying them between courses. Use the "Import Content into this Course" feature found under the course settings menu to bring assignments from previous classes. Adjust due dates and details as needed to fit the new group.
How do I handle late submissions and extensions in Canvas?
Set the "Due Date" and "Available Until" dates carefully to control submission windows. For individual extensions, use the "Assign to" feature to modify due dates for specific students. Monitor late submissions in the Gradebook, which flags late work automatically if the submission is past the due date.
What if students don’t have access to devices at home?
Provide offline options like printable worksheets or project-based assignments that don’t require digital access. Consider setting up class time for completing Canvas assignments on school devices. Communicate with families to identify who needs additional support and coordinate with your school’s technology resources.
What this advice does not cover
This checklist focuses on Canvas assignment setup and does not cover broader classroom management or curriculum development strategies. If you need guidance on behavior management techniques, lesson planning, or differentiated instruction beyond Canvas assignments, consult resources specialized in those areas. This guide assumes you have basic familiarity with Canvas navigation and course creation.
Quick checklist
- Gather age-appropriate assignment materials and clear instructions before setup.
- Use the “Assignments” menu to create assignments labeled with simple, descriptive titles.
- Set submission types to “Online” with file uploads or text entry suitable for young learners.
- Organize assignments into Modules reflecting units or weeks for easy navigation.
- Enable “Assignment Groups” to streamline grading categories.
- Use rubrics with clear, simple criteria for consistent grading and feedback.
- Assign to individual students or groups via the “Assign to” field to differentiate work.
- Double-check availability dates and submission settings to prevent access issues.
- Preview the assignment as a student to catch potential confusion.
The single most useful next step is to create a sample assignment in Canvas using these checklist points. Test each setting from the student view to ensure your instructions are clear and the workflow is smooth. This hands-on approach reveals challenges early, helping you refine your process before assigning work to your entire class.
See also: Canvas Announcements Checklist for Teachers with Low Tech Confidence · How to Leave Clear, Effective Feedback on Student Work in Brightspace · How to Grade Student Work in Brightspace: A Clear Step-by-Step Guide