How to Set Up Rubrics in Brightspace: A Clear Step-by-Step Guide
Discover how to set up rubrics in Brightspace with clear steps to improve grading consistency and feedback efficiency.

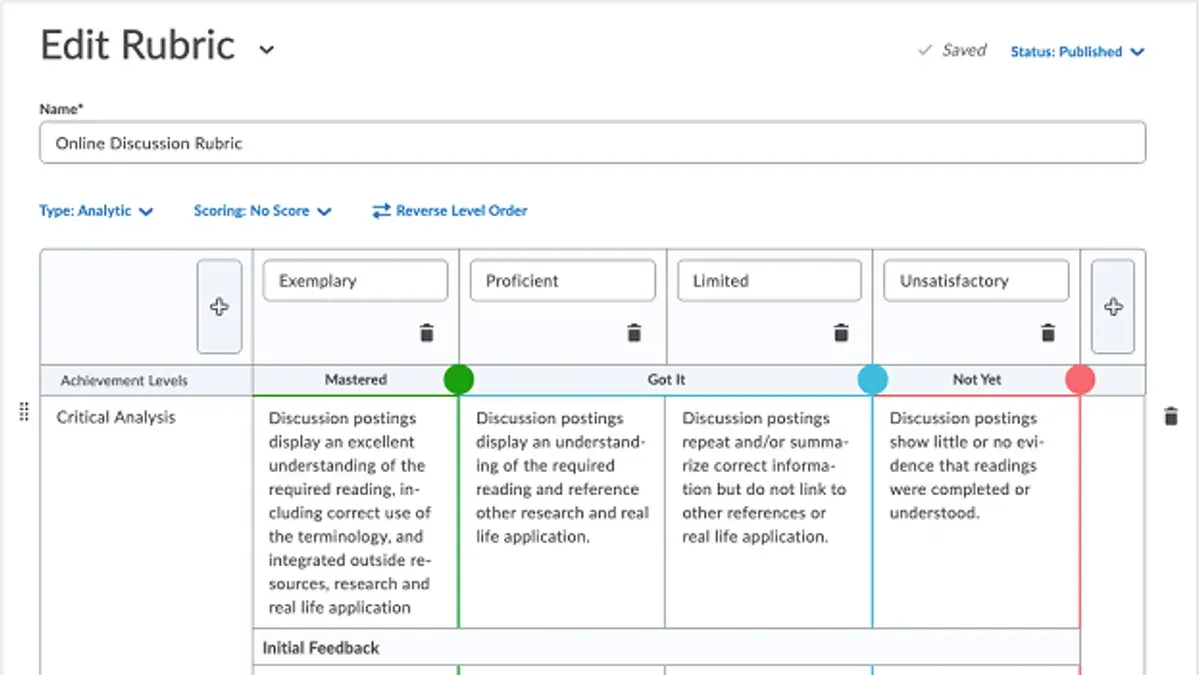
Short answer: To set up rubrics in Brightspace, you start by accessing the Rubrics tool via the Course Tools menu. From there, you create criteria and performance levels, then link the rubric to assignments and the gradebook to streamline grading and feedback.
This article covers how to set up rubrics in Brightspace with a clear, step-by-step approach. You will learn where to find the Rubrics tool, how to build rubrics with detailed criteria and scoring, and how to integrate them with assignments and the gradebook. The guide also explains how to use rubrics efficiently for grading and providing feedback, plus how to edit and reuse them. Finally, it addresses common setup and grading issues you might encounter, helping you avoid pitfalls and save time.
Before you start: What you need to set up rubrics in Brightspace
Ensure you have the proper access before setting up rubrics. You must have instructor or course administrator permissions within Brightspace to create and manage rubrics. Without these roles, the rubric tool will not be available or editable.
Understand why you are using rubrics. Rubrics improve grading consistency by providing clear criteria and performance levels. They also streamline feedback delivery, making your assessment process more transparent and effective for students.
Have a clear assessment or assignment ready. Rubrics link directly to grading items, so you need to know which assignment or assessment the rubric will support. This clarity helps in designing relevant criteria and performance standards.
Be familiar with Brightspace’s navigation basics. You should comfortably access the course navbar, the course administration area, and the Grades tool. Knowing where to find the rubric tool and how it integrates with assignments and the gradebook is crucial for efficient setup.
- Confirm your user role is either instructor or course administrator. Check your access by going to Course Admin and seeing if "Rubrics" is listed. You should see the Rubrics link if you have correct permissions.
- Identify the assessment or assignment you want to associate with the rubric. Have its title and grading setup ready to avoid confusion later.
- Review basic Brightspace navigation: open the course navbar, find Course Admin, and locate the Grades and Assignments tools. You should easily access these areas without error.
Checklist:
- Instructor or course administrator role
- Clear purpose for rubric use (grading consistency, feedback clarity)
- Assessment or assignment identified for rubric association
- Comfortable navigating Brightspace course tools and admin areas
Where is the rubrics tool in Brightspace?
To locate the Rubrics tool, start at your course homepage within Brightspace. This is the central hub for all course management tasks. From there, look to the navbar at the top or side of the screen, depending on your institution's layout. The navbar contains key links for managing course content and settings.
Next, click on Course Admin in the navbar. This section houses various administrative tools related to your course setup. Once inside Course Admin, scroll to the Assessment area where you will find the Rubrics link. Clicking this link opens the Rubrics page.
The Rubrics page displays a list of all rubrics available for your course. You will see options to create new rubrics, edit existing ones, or import rubrics if your institution supports it. The layout typically includes columns for rubric titles, descriptions, creation dates, and status (active or inactive). On some institution setups, the exact names or placement might vary slightly, but Course Admin remains the starting point.
- Navigate to your course homepage; you should see your course name and main navigation options.
- Click Course Admin in the navbar; this opens a page with multiple administrative tools.
- Scroll to the Assessment section; locate and click Rubrics.
- Confirm you see the Rubrics page with a list of existing rubrics and options to create or manage them.
How to create rubrics in Brightspace
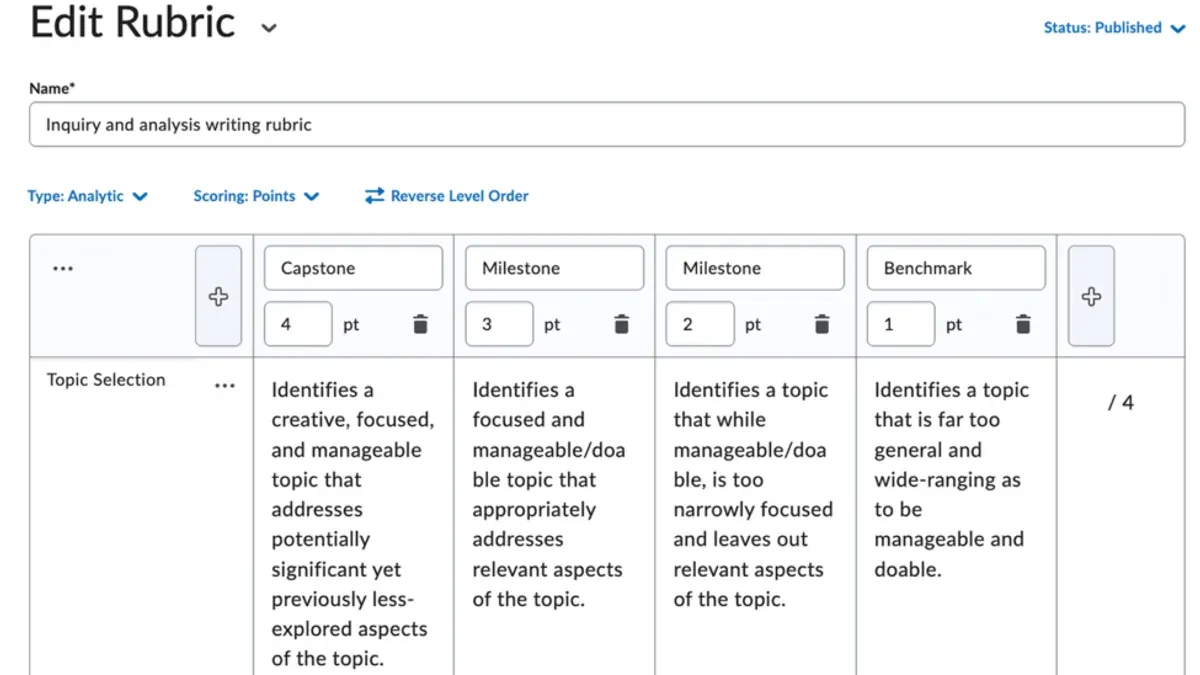
- Go to the Rubrics page and click the New Rubric button. The rubric creation window opens, ready for you to start customizing.
- Enter a clear, descriptive name for your rubric in the Name field. Optionally, add a description to clarify the rubric's purpose or context. This helps you and others quickly identify the rubric later.
- Define your first criterion by entering a Title that identifies the aspect of the project to assess, such as "Research Quality". Add a concise Description explaining what this criterion measures.
- Set the achievement levels for this criterion. Typically, Brightspace provides four levels by default. Edit their names and descriptions to reflect your standards, for example: "Excellent," "Good," "Satisfactory," and "Needs Improvement." Each level should clearly differentiate performance quality.
- Repeat the previous two steps to add all criteria needed. For a sample project rubric, create three criteria: "Research Quality," "Presentation Skills," and "Timeliness."
- Choose a scoring method from the options: Points, Percentages, or No Score. For a project rubric, select Points and assign a maximum point value, such as 100 total points.
- Assign point values or weights to each criterion and achievement level. For example, "Research Quality" might be worth 40 points, with levels ranging from 40 to 10 points based on performance.
- Use the Preview button to review your rubric. Check that criteria, levels, descriptions, and scoring reflect your intended assessment accurately.
- Click Save and Close to finish. Your rubric is now ready for integration with assignments and grading workflows.
How to set up rubrics with assignments and gradebook in Brightspace
To link a rubric to an assignment, start by opening the assignment where you want to use the rubric. In the assignment settings, scroll to the Rubrics section. Here, attach an existing rubric by selecting it from the list or create a new rubric directly. This integration ensures your rubric criteria directly impact grading.
After attaching the rubric, decide how rubric scores influence the final grade. Brightspace lets you choose between automatic scoring, where rubric scores calculate the grade instantly, and manual override, which allows you to adjust grades after rubric scoring. Automatic scoring improves grading consistency and reduces errors compared to non-rubric grading, where manual entry can lead to inaccuracies and inefficiencies.
Finally, verify that the assignment is linked to the gradebook with the correct total points. The gradebook will then display rubric scores alongside other grades, streamlining assessment review. With rubric integration, you get clearer, more objective grading and faster feedback cycles.
- Open the assignment from the course content or assignments list; you should see the assignment editing page.
- In the assignment settings, locate the Rubrics section; it should allow you to attach or create a rubric.
- Select an existing rubric or create a new one; the rubric name should appear in the assignment settings once attached.
- Choose between automatic scoring or manual override for rubric scores; confirm the selection is saved.
- Check the points possible for the assignment and ensure it matches the rubric total; verify the assignment appears in the gradebook with correct points.
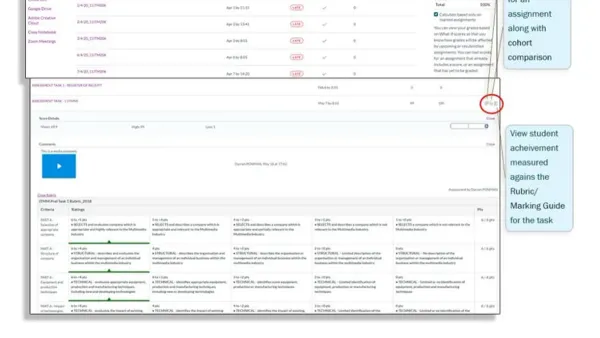
Sample gradebook views show rubric-linked assignments with score breakdowns and totals, whereas non-rubric grading typically shows only final scores without criterion detail. This setup improves grading accuracy and provides transparency to students.
How to use rubrics for grading and providing feedback
- Access the assignment grading interface from the assignment submission folder. You should see the list of student submissions ready for evaluation.
- Open the rubric attached to the assignment by clicking the rubric icon or link visible alongside the submission. This launches the rubric overlay or panel next to the submission content.
- For each criterion in the rubric, select the appropriate achievement level that matches the student’s work. The system calculates the score automatically based on your selections, reflecting cumulative points.
- Add personalized comments tied to specific rubric criteria by clicking the comment box associated with each level. This allows targeted feedback that clarifies strengths and areas for improvement.
- Review the total score and comments, then publish the grade and feedback. Students will receive their detailed rubric evaluation and your comments through Brightspace’s grade release process.
Using rubrics in this way standardizes grading and ensures transparent, criterion-based feedback. The clearly linked comments and levels help students understand exactly how their work meets expectations and where they can improve. This integration simplifies your grading workflow while enhancing communication with students.
| Criterion | Achievement Level Selected | Score | Comments |
|---|---|---|---|
| Thesis clarity | Meets Expectations | 4 | Clear and focused thesis statement. |
| Evidence support | Exceeds Expectations | 5 | Strong, relevant examples provided. |
| Organization | Needs Improvement | 2 | Some sections lack clear transitions. |
| Grammar and style | Meets Expectations | 4 | Minor grammatical errors, overall clear prose. |
How to edit and reuse rubrics in Brightspace
To maintain rubrics effectively, start by locating the rubric you want to modify in the Rubrics tool under Course Admin. Select the rubric to open its details. You can edit criteria, achievement levels, or scoring methods to reflect changes in course objectives or assessment standards. Save your changes to update the rubric instantly across all linked assignments.
For reuse, Brightspace allows you to copy rubrics, enabling efficient deployment in other courses or assignments without rebuilding from scratch. This is especially useful when courses share similar evaluation standards, saving considerable setup time. After copying, you can adjust the rubric within the new course context without affecting the original.
Be cautious when deleting rubrics. Removing a rubric linked to assignments with recorded grades can cause data loss or grading inconsistencies. Always verify that no active grading depends on the rubric before deletion.
Example: An instructor managing multiple sections of an introductory psychology course copied a rubric from one section to others. This reuse avoided duplicating effort and ensured consistent grading criteria across all sections, streamlining assessment management.
- Go to Course Admin > Rubrics.
- Select the rubric to edit; click "Edit" to modify criteria or scoring. Save changes and confirm updates reflect in linked assignments.
- To reuse, select the rubric and click "Copy." Choose the destination course and rename the rubric as needed.
- Open the copied rubric in the new course to adjust details without altering the original.
- To delete, select the rubric and check for linked assignments. If none, click "Delete" and confirm removal.
Troubleshooting common rubric setup and grading issues
If your rubric does not appear in assignment settings, first confirm you have the necessary permissions. Without "Edit Rubrics" rights under your role, rubrics won't be selectable. Also, verify the Rubrics tool is enabled in Course Admin > Tools; disabling it hides rubrics from assignments.
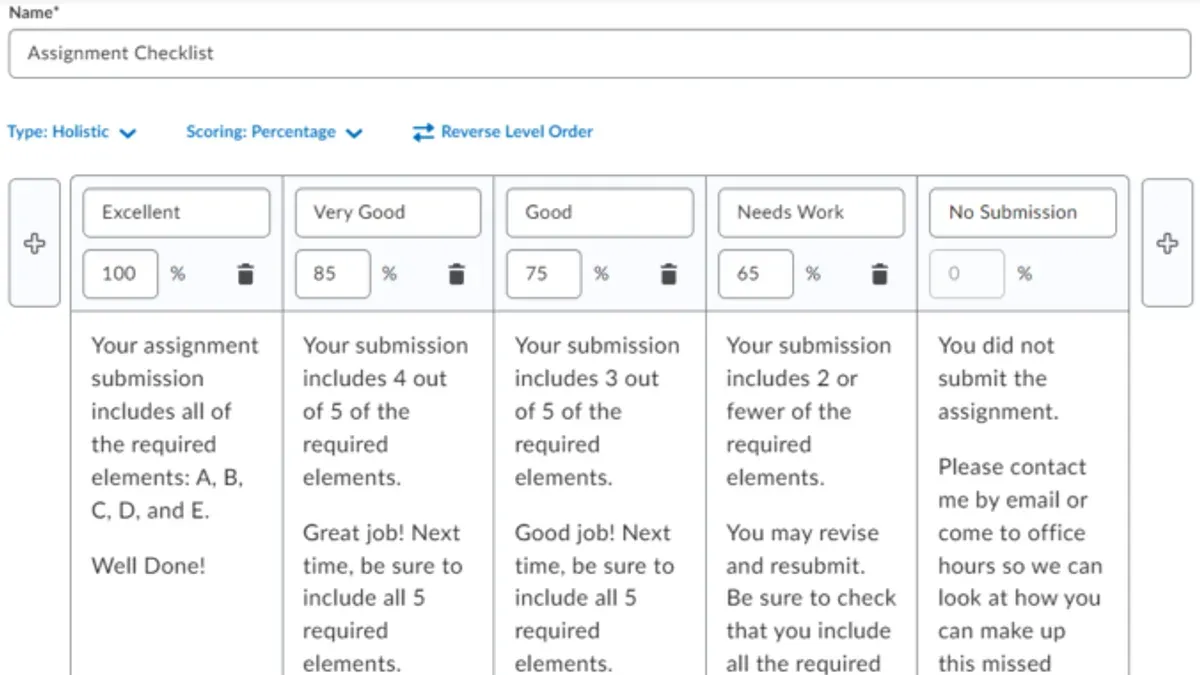
If scores are not syncing with the gradebook, check the linkage between the assignment and gradebook item. Go to Assignments > Edit Assignment > Evaluation & Feedback and ensure "Grade Item" is properly connected. Mismatched or missing grade items cause score transfer failures.
Editing a rubric linked to graded submissions can be restricted. Brightspace locks rubrics once grading starts to preserve score integrity. To modify, you must either detach the rubric or create a copy for edits. Attempting to change a locked rubric triggers errors like "Rubric is locked due to existing grades."
When students cannot see rubric feedback, verify the rubric's release and visibility settings. Navigate to the assignment's Evaluation & Feedback section and confirm "Release Feedback" and "Visible to Users" are enabled. Rubric comments remain hidden if these are off.
Common error messages and fixes include:
| Error Message | Cause | Fix |
|---|---|---|
| "No rubrics available" | Rubric tool disabled or lack of permissions | Enable Rubrics under Course Admin & confirm user role permissions |
| "Score synchronization failed" | Assignment not linked to gradebook item | Link assignment to grade item in Evaluation & Feedback settings |
| "Rubric is locked due to existing grades" | Rubric tied to graded submissions | Duplicate rubric for editing or detach from graded assignment |
| "Rubric feedback not visible to students" | Feedback release settings off | Enable Release Feedback and Visible to Users options |
Following these steps resolves the most frequent rubric setup and grading obstacles, ensuring smooth integration in your course workflow.
Frequently asked questions
How to reply to threads on brightspace?
To reply to threads in Brightspace, navigate to the Discussions tool from the course navbar. Open the specific thread you want to reply to, then click the "Reply" button below the post. Type your response in the text editor and click "Post" to submit. Make sure you are enrolled and have participation permissions in the course for this to work.
How to use brightspace as a student?
As a student, start by logging into Brightspace and selecting your course from the dashboard. Use the navbar to access course content, assignments, grades, and discussions. Submit assignments via the Assignments tool, check feedback and grades in the Grades section, and participate in discussions through the Discussions tool. Familiarize yourself with the calendar and notifications to stay on track.
How to use brightspace?
Brightspace is organized around course navigation menus. Access content, assignments, grades, quizzes, and discussions through the navbar. Use the Content tool to review materials, submit work in Assignments, and monitor your progress in Grades. For instructors, setup involves creating course materials, configuring assessment tools, and communicating with students through announcements and discussions.
How to set up grades in brightspace?
Go to the Grades tool from your course navbar, then select "Manage Grades". Create grade items manually or link them to assignments and quizzes. Set grading schemes, categories, and weights as needed. Ensure grade items are published to students only when you want them to see the scores. Regularly sync gradebook settings with your assessment activities.
Where is the rubric in brightspace?
The Rubrics tool is found under the course navbar labeled "Course Admin" or directly under "Assessments" depending on your setup. Click "Rubrics" to create, edit, or manage rubrics. You can then attach rubrics to assignments or discussions during setup or later through the assignment’s settings under the Evaluation tab.
Quick checklist
- Confirm you have instructor or course designer access in Brightspace.
- Locate Rubrics under the Course Tools menu.
- Create a rubric with clear criteria, levels, and point values.
- Attach the rubric to an assignment or grade item via the assignment settings.
- Enable rubric scoring in the gradebook for seamless grade syncing.
- Use the rubric during grading to provide consistent feedback and point allocation.
- Edit and reuse rubrics from the Rubrics tool for future courses.
- Refer to Brightspace support if rubric scores don’t sync or feedback does not appear.
What this advice does not cover
This guide does not cover advanced rubric analytics available through third-party tools or custom institutional integrations with Brightspace. If your institution uses external grading dashboards or specialized feedback platforms, consult your instructional technologist or support team for those workflows. This article focuses solely on the native Brightspace rubric setup, assignment linkage, grading, and feedback features.
The single most useful next step is to create a rubric within your course’s Rubrics tool and then attach it to an upcoming assignment. This hands-on step ensures you understand how the rubric integrates with grading and feedback workflows and sets the foundation for clearer, more consistent assessments.
See also: How to Grade Student Work in Brightspace: A Clear Step-by-Step Guide · How to Set Up Peer Review in Brightspace: A Clear 2026 Guide