Moving from Google Forms to Pear Deck: A Clear Checklist for Educators
Learn how moving from Google Forms to Pear Deck checklist enhances interactive, real-time student engagement and feedback during lessons.

Short answer: Moving from Google Forms to Pear Deck checklist gives you interactive, real-time engagement tools that Google Forms can’t match. Pear Deck integrates directly with slide presentations, enabling you to guide students through checklists while collecting live responses and providing immediate feedback.
This article explains the key instructional advantages Pear Deck offers for checklists, how its functionality works in classroom settings, and practical steps to transition your existing Google Forms checklists. You’ll also learn which teaching scenarios benefit most from Pear Deck checklists and common pitfalls to avoid during the switch.
What are the key differences between Google Forms and Pear Deck checklists?
Google Forms functions primarily as a static tool for data collection. You create a checklist as a standalone form, share it, and collect responses asynchronously. It lacks seamless in-lesson interaction, making it difficult to use for live feedback or formative assessment during instruction.
Pear Deck, by contrast, integrates checklists into interactive slides within your presentation. This slide-based approach enables real-time student engagement: students respond during the lesson, and you see their input instantly. This dynamic interaction supports immediate adjustment of teaching based on student needs.
For example, with Google Forms, you might send a checklist on homework completion and review results later. With Pear Deck, you can embed a checklist slide asking students to indicate understanding of key points during a live lesson, then address confusion on the spot.
| Feature | Google Forms | Pear Deck |
|---|---|---|
| Checklist format | Standalone web form | Interactive slide integrated in lesson |
| Real-time interaction | No live response view | Instant student input visible to teacher |
| Use in formative assessment | Limited; post-lesson only | Built for in-lesson feedback |
| Engagement style | Self-paced, asynchronous | Instructor-led, synchronous |
How does Pear Deck checklist functionality work in practice?
Pear Deck integrates checklist questions directly into Google Slides through the Pear Deck Add-on. After installing the add-on, you open your slide deck, select the slide where you want a checklist, and click "Add Question" in the Pear Deck sidebar. Choose the "Checklist" question type, then enter your checklist items—each item appears as a selectable option for students.
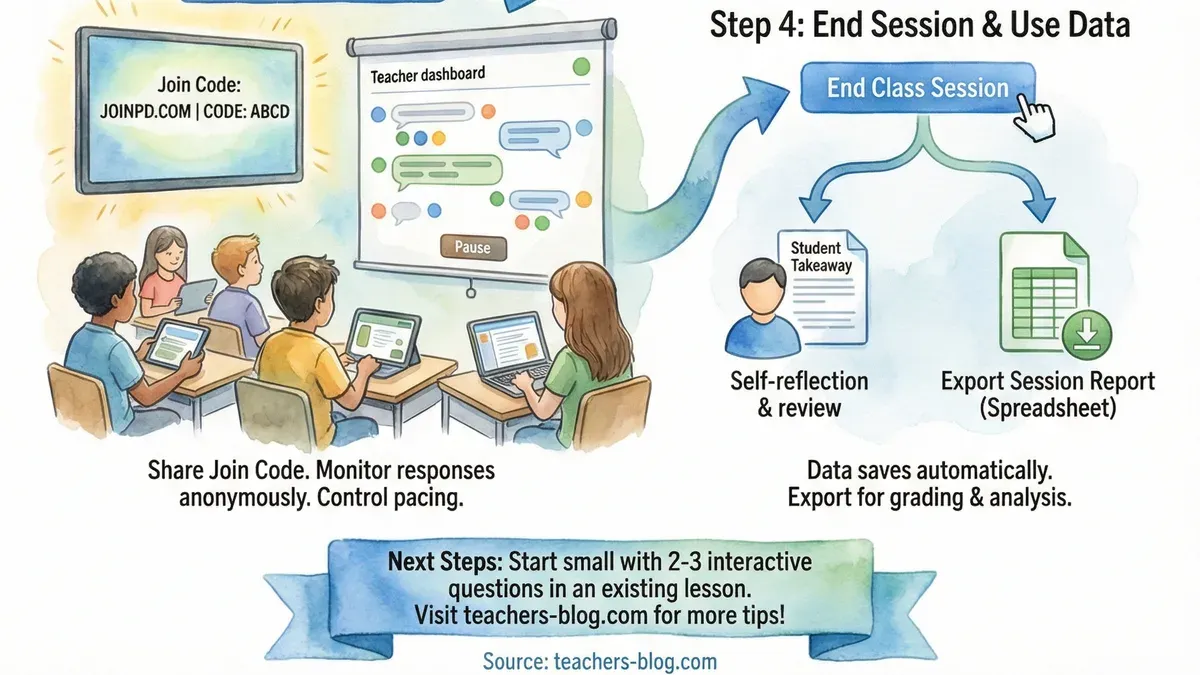
During a live session, students join via a code on their devices and see the checklist slide in real time. They tap or click checklist items to mark completion or confirm understanding. Responses update instantly, allowing you to monitor progress live. For example, you might run a checklist asking students to verify they completed steps in a science experiment as you teach, confirming key actions before moving on.
After the session, you access the "Session Dashboard" from Pear Deck to review student responses. You can see individual and aggregate data, export results to Google Sheets, or identify items needing reteaching. Screenshots of the dashboard show a clear grid with student names in rows and checklist items in columns, marked as checked or unchecked.
Step-by-step example:
- Open Google Slides and launch Pear Deck Add-on.
- Insert a new slide or select an existing one.
- Click "Add Question" and pick "Checklist."
- Enter checklist items, e.g., "Read instructions," "Gather materials," "Complete step 1."
- Start the Pear Deck session and share the join code with students.
- Students interact with the checklist; you monitor responses live.
- End session and review data in the Session Dashboard.
How can you transition your existing Google Forms checklists into Pear Deck?
Start by identifying the types of questions in your Google Forms checklist: multiple choice, checkboxes, or short answer. In Pear Deck, replicate these using the "Multiple Choice" and "Draggable" slide types or the "Text Response" slide. For example, a Google Forms checkbox list asking students to mark completed tasks becomes a Pear Deck "Draggable" slide where students drag checkmarks over each task, adding interactivity missing from static checkboxes.
Redesign your checklist slides to take advantage of Pear Deck’s real-time engagement. Instead of a single long form, break the checklist into several slides, each focusing on a small group of items. This pacing encourages active participation and allows you to monitor progress live.
Manage student access by sharing the Pear Deck join code or link at the start of your session. Unlike Google Forms, which students access independently, Pear Deck sessions require live participation through your Google Slides presentation. Set clear instructions for students to join promptly and keep devices charged.
| Google Forms Checklist Item | Pear Deck Equivalent | Added Interactivity |
|---|---|---|
| Checkbox question: "Mark tasks you completed today" | Draggable slide with task list and draggable checkmarks | Students drag checkmarks live; teacher sees progress in real time |
| Multiple choice: "Select the step you’re on" | Multiple Choice slide with the same options | Immediate class-wide visibility of responses |
| Short answer: "Describe any challenges you faced" | Text Response slide | Allows open-ended input with live sharing options |
Checklist for transition:
- Audit your Google Forms questions and categorize by type
- Open Pear Deck Add-on in Google Slides and insert corresponding interactive slides
- Break checklist into multiple slides for better engagement
- Prepare a clear join code announcement for students
- Test your Pear Deck session before class to ensure smooth flow
What classroom scenarios benefit most from using Pear Deck checklists?
Pear Deck checklists excel during formative assessments in live lessons. You can pose checklist questions at key points to gauge student understanding instantly, adjusting your instruction based on real-time responses. This dynamic interaction is impossible with static Google Forms, which collect data only after the lesson ends.
Interactive exit tickets and attendance checklists are another effective use. Instead of simply marking presence or completion, students engage with prompts or reflections as they check out, providing richer insights and maintaining focus until the lesson closes.
Collaborative or discussion-driven checklist activities also benefit. Pear Deck lets you design slides that prompt group reflection or peer feedback within the checklist format, encouraging active participation rather than passive submission.
For example, a middle school science teacher replaced a traditional Google Forms quiz with a Pear Deck checklist during a lab session. Students checked off steps as they completed them, responded to embedded reflection questions, and shared observations live. The teacher reported higher engagement and more accurate, immediate data on student progress, allowing targeted support within the same class period.
What common mistakes should you avoid when switching to Pear Deck checklists?
One frequent error is attempting to replicate Google Forms workflows exactly without adapting to Pear Deck’s interactive features. For example, simply copying a linear checklist into Pear Deck slides misses opportunities for live engagement and can result in a dull, ineffective session. Instead, redesign your checklist to leverage Pear Deck’s slide types like draggable or multiple-choice to boost student interaction.
Another common pitfall is underestimating the importance of student tech readiness and training. Pear Deck requires students to join sessions and interact in real time, which can cause delays or confusion if they are unfamiliar with the process. Providing a brief tutorial or a practice session beforehand can prevent wasted class time and frustration.
Finally, ignoring privacy settings and data export options compared to Google Forms can lead to compliance and workflow issues. Unlike Google Forms, Pear Deck’s data export may be limited to Google Slides or Google Drive formats, and privacy controls are managed through the Pear Deck Add-on and Google Classroom integration. Check these settings carefully to maintain data security and ensure you can access student responses as needed.
- Don’t copy Google Forms workflows verbatim—redesign for interactivity.
- Prepare students with clear instructions on joining and using Pear Deck.
- Review Pear Deck’s privacy and data export options before use.
Frequently asked questions
Can I export Pear Deck checklist responses like I do with Google Forms?
Yes, you can export Pear Deck checklist responses, but the process differs from Google Forms. Pear Deck lets you export session data as a Google Sheet or download it as a CSV file via the "Session Review" panel. Keep in mind that detailed individual responses and slide-by-slide analytics are accessible only during or shortly after live sessions.
Do students need to create Pear Deck accounts to submit checklists?
No, students do not need to create Pear Deck accounts to submit checklists. They join sessions using a code or link provided by you and submit responses anonymously or under a nickname. This lowers barriers for participation and speeds up the process, especially for younger students or those without school-managed accounts.
Is Pear Deck compatible with all devices my students use?
Pear Deck works across most modern devices including Chromebooks, Windows and Mac computers, tablets, and smartphones. It runs inside Google Slides or PowerPoint Online, so any device that supports these platforms can access Pear Deck checklists. However, some older browsers or devices may have limited functionality or slower performance.
Can I use Pear Deck checklists offline or without live sessions?
Pear Deck requires a live session for interactive checklists to function because responses are collected in real time. Offline use or asynchronous completion is not supported. If you need to gather checklist data without a live session, Google Forms remains the more suitable tool.
What this advice does not cover
This guide does not cover advanced Pear Deck add-ons or pricing tiers; educators should evaluate cost implications before switching. It also does not address deep integrations with learning management systems or custom scripting options. If your school requires detailed data analytics beyond Pear Deck’s standard reports, consider additional tools or platforms. For those primarily focused on simple data collection without interactive elements, Google Forms may remain more efficient.

Quick checklist
- Review your current Google Forms checklists to identify interactive elements needed.
- Set up Pear Deck and familiarize yourself with the “Draggable,” “Multiple Choice,” and “Text” interactive slide options.
- Import questions from Google Forms manually into Pear Deck slides within Google Slides.
- Test Pear Deck checklists in a live session to observe student engagement and real-time feedback.
- Adjust pacing and question types to fit your classroom’s learning goals.
- Inform students about the Pear Deck process and how to access sessions.
- Analyze Pear Deck session reports to improve checklist effectiveness.
The most useful next step is to create a short Pear Deck checklist based on one frequently used Google Forms checklist. Run it in a live classroom session to see how real-time interaction and immediate feedback change student engagement. This hands-on approach clarifies the practical benefits and limitations, helping you decide whether to fully transition your checklists to Pear Deck or maintain a hybrid system.
See also: Switching from Google Forms to Padlet: A Practical Guide for Seamless Transition · How to Shift from Google Forms to Kahoot for Interactive Checklists · Switching from Google Forms to Formative: A Clear, Practical Guide · Moving from Formative to Pear Deck: Your Complete Checklist