How to Set Up Parent or Guardian Updates in Brightspace
This guide explains how to link parents or guardians to student profiles and configure updates in Brightspace for timely family communication.

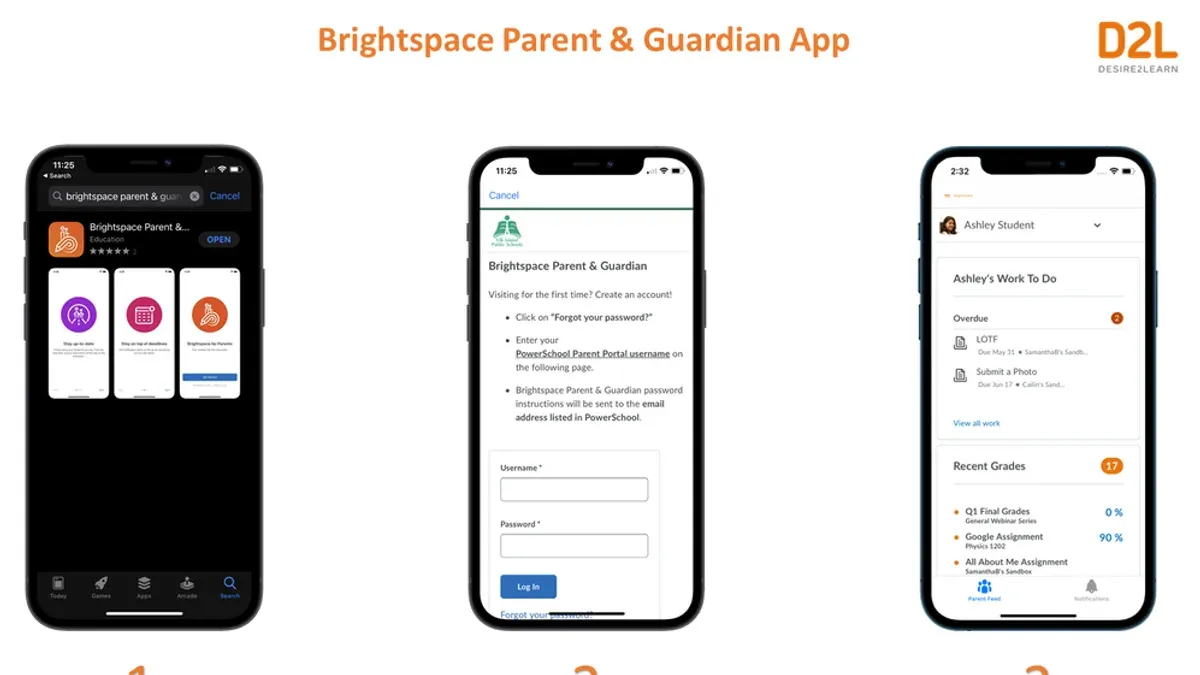
Short answer: To set up parent or guardian updates in Brightspace, you need to link parents or guardians to student profiles, configure notification preferences, and enable the communication settings in the system. This ensures families receive timely updates while maintaining student privacy. You can manage these settings via the Admin Tools under the Communication and Notifications sections.
This article covers how to set up parent or guardian updates in Brightspace with a focus on balancing communication needs and privacy requirements. You will learn what prerequisites are needed, how to connect parents or guardians to student accounts, configure the types of updates sent, and how to enable and test the system. It also addresses common setup issues and tips for maintaining privacy and compliance when communicating with families.
What do you need before setting up parent or guardian updates?
To set up parent or guardian updates in Brightspace, you must have administrative access or specific permissions that allow you to manage communication settings. Without these permissions, you cannot configure or send updates effectively.
Ensure that parent or guardian accounts exist and are correctly linked to student profiles in the system. This linkage is essential for updates to reach the right recipients and for maintaining accurate records.
Verify that your institution has enabled the parent/guardian communication feature within Brightspace. This option is typically controlled at the organizational level and must be active for you to proceed.
Finally, gather accurate contact information and preferred communication methods for each parent or guardian. This preparation avoids sending updates to incorrect contacts and respects communication preferences.
- Log in to Brightspace as an administrator and navigate to Admin Tools > Communication Settings. Confirm that you see options for Parent/Guardian Updates—this indicates you have the required permissions.
- Go to the User Management section and check that parent/guardian accounts are created and linked under each student's profile. You should see a clear association between student IDs and parent/guardian accounts.
- Access Organization Settings > Features and ensure the Parent/Guardian Communication feature is enabled. If it is not, contact your system administrator or Brightspace support to activate it.
- Compile a list of parent/guardian contact emails and preferred methods (email, SMS if supported) for your records before starting the update setup.
How do you link parents or guardians to student profiles?
Start by navigating to the User Management or Communications module in Brightspace. Locate the student’s profile using the search or student list. Once on the profile, find the section labeled "Linked Contacts" or "Parent/Guardian Associations." Here, add parent or guardian accounts by entering their verified email addresses. The system will prompt you to confirm these contacts if they already exist or create new linked accounts if they do not.
To link multiple parent or guardian accounts at once, use the batch upload feature found under the Communications module. Prepare a CSV file with student IDs and corresponding parent/guardian emails formatted according to Brightspace guidelines. Upload the file, and the system will process and link accounts in bulk, reducing manual input errors.
After linking, verify successful association by checking if parents or guardians have access to the student’s updates via their accounts. A quick way to confirm is to view the student’s profile under "Linked Contacts" and ensure emails are correctly connected and status indicators show active linkage.
- Go to User Management or Communications module in Brightspace; you should see the student list or search bar.
- Search for and open the student’s profile; the profile page loads with personal and enrollment information.
- Find the "Linked Contacts" or "Parent/Guardian Associations" section; options to add or confirm contacts appear.
- Enter verified parent/guardian email addresses; the system prompts to confirm or create linked accounts.
- For bulk linking, prepare a CSV with student IDs and emails, then upload it via the batch upload tool in Communications; a success message confirms processing.
- Check the student profile’s linked contacts area; linked emails show with active status confirming correct linkage.
How do you configure the types of updates parents or guardians receive?
Start by navigating to Communication Settings within Brightspace. Under Notification Preferences, select the categories relevant to your communication goals, such as Grades, Attendance, and Assignments. Each category controls a different type of information parents will receive. Be aware that some categories may be restricted by your institution’s privacy policies or legal requirements.

Next, set the frequency for each notification category. Options typically include Immediate, Daily Digest, and Weekly Summary. Immediate notifications boost real-time engagement but may overwhelm recipients; digests reduce volume but delay updates. You can override default settings on a per-course or student group basis to tailor communication precisely.
Legal and institutional policies may limit sharing sensitive data like disciplinary records or health information. Review these policies before enabling notifications to ensure compliance. When in doubt, consult your privacy officer or legal department.
| Notification Category | Impact on Engagement | Sample Notification |
|---|---|---|
| Grades | High—keeps parents informed of academic progress | "Your student scored 85% on the recent math quiz." |
| Attendance | Moderate—alerts parents to absences or tardiness | "Your student was absent from Science class on 10/04." |
| Assignments | High—reminds parents about upcoming due dates | "History essay due on Friday; please ensure your student is prepared." |
- Go to Admin Tools > Communication Settings > Notification Preferences. You should see a list of notification categories with checkboxes.
- Check the boxes for the categories you want parents to receive updates about. Confirm that the selections align with your communication goals and policy restrictions.
- Under Frequency Settings, select Immediate, Daily Digest, or Weekly Summary for each category. A preview of typical message timing appears to confirm your choice.
- For course- or group-specific overrides, select the course in Course Management, then adjust notification preferences for that group. Changes save automatically and reflect in the override section.
- Review your selections against institutional policy guidelines. Use the Policy Compliance Checker tool if available to confirm no restricted data is included.
How do you enable and test parent or guardian updates?
Start by enabling parent or guardian notifications in Brightspace. Navigate to Admin Tools > Communication Settings, then toggle the "Enable Parent/Guardian Notifications" option. A confirmation message, "Parent/Guardian notifications are now active," should appear. This activates updates for all linked parent or guardian accounts.
Next, send a test update to a selected parent or guardian account. Go to Communication > Send Test Notification. Select a sample parent or guardian user and choose a notification type, such as "Assignment Submission" or "Course Progress." After sending, Brightspace will display "Test notification sent successfully."
Verify receipt of the test update by checking the parent or guardian’s email or Brightspace inbox. Confirm the content is accurate, clear, and matches the expected notification type. If details are missing or confusing, revisit Communication Settings to adjust message templates or notification preferences.
Finally, adjust settings based on feedback or any issues discovered. Retest after changes to ensure updates function correctly. This iterative process prevents communication errors and maintains system reliability.
- Enable notifications via Admin Tools > Communication Settings > toggle "Enable Parent/Guardian Notifications" — confirm activation message.
- Send test update from Communication > Send Test Notification — select sample user and notification type — confirm success message.
- Check receipt and content accuracy on parent/guardian side.
- Adjust settings if needed and retest until notifications are clear and reliable.
What are common issues when setting up parent or guardian updates, and how do you fix them?
Failures in parent or guardian updates often trace back to incorrect or missing email addresses. Verify that all parent or guardian emails in the User Management module are accurate and active. Incorrect emails cause delivery failures and bounce-backs.
Another frequent problem is notification settings not saving. This typically happens when you lack the proper permissions. Confirm that your role includes editing communication settings under Admin Tools > Communication Settings before attempting changes.
Parents not receiving updates can also result from spam filters or email blocking. Advise parents to whitelist Brightspace domains and check their spam/junk folders regularly.
System limitations restrict sharing certain data types with parents to protect student privacy. Understand these limits in the Privacy > Data Sharing Settings and set expectations accordingly.
| Error Message or Issue | Resolution | Preventive Tip |
|---|---|---|
| Delivery failure notices | Verify and update parent/guardian email addresses in User Management. | Regularly audit contact info for accuracy. |
| Notification settings revert after saving | Check user permissions for communication setting edits; request admin role if needed. | Assign proper roles before configuration. |
| Parents report not receiving updates | Instruct parents to whitelist Brightspace emails and check spam folders. | Communicate email filtering guidance during setup. |
| Data unavailable to share with parents | Review Privacy > Data Sharing Settings for restrictions; explain limits to stakeholders. | Stay updated on system privacy policies. |
- Confirm parent/guardian emails in User Management are correct. A successful check shows no bounce-back errors.
- Verify your permissions under Admin Tools > Roles and Permissions include editing communication settings. If not, request access; successful confirmation allows settings to save properly.
- Ask parents to add Brightspace domains to their email whitelist and monitor spam folders. Confirm receipt by sending a test notification.
- Review system privacy settings at Privacy > Data Sharing Settings to identify data sharing limits. Successful review ensures you communicate realistic update content expectations.
How do you maintain privacy and compliance when communicating with parents or guardians?
Comply with institutional policies and legal standards such as FERPA in the US or GDPR in the EU. These regulations mandate that student information shared with parents or guardians must be limited to what is legally permitted and institutionally approved. For example, FERPA permits sharing educational records with parents of dependent students but restricts access to sensitive information without explicit consent.
Use Brightspace's privacy controls under Communication Settings to restrict data visibility. Configure updates to exclude sensitive fields like disciplinary records or health information unless specifically authorized. This ensures updates only contain appropriate academic progress and attendance details, reducing the risk of accidental data exposure.
Train staff on proper communication protocols. Emphasize verifying recipient identities, avoiding sharing non-approved information, and following escalation procedures for privacy concerns. Proper training helps prevent common compliance breaches such as sending updates to incorrect contacts or including unauthorized data.
- Review your institution's privacy policy and applicable laws (FERPA, GDPR). You should see a clear outline of permitted parent communications.
- Configure Brightspace Communication Settings to restrict update content to approved categories. Updates should exclude any non-approved student information.
- Establish staff training sessions on privacy protocols. Staff should demonstrate understanding by correctly identifying permissible communication scenarios.
- Regularly audit parent update logs in Brightspace for compliance. You should find no unauthorized data disclosures or incorrect recipients.
Frequently asked questions
Can parents or guardians customize the updates they receive?
Parents or guardians cannot directly customize the types of updates they receive within Brightspace. All update preferences are managed by educators or administrators through the Notification Settings in the parent or guardian profile. You control which categories—such as grades, attendance, or assignments—are sent out.
What should I do if a parent says they are not receiving notifications?
First, verify that the parent or guardian is correctly linked to the student’s profile with a valid email address. Check the Notification Settings to ensure updates are enabled and targeted to the correct categories. Confirm that emails are not blocked by spam filters or firewalls on the parent’s end. Running a test notification through the system can help identify where the breakdown occurs.
Are there any costs associated with enabling parent or guardian updates in Brightspace?
Enabling parent or guardian updates is included as a standard feature in Brightspace and does not incur additional costs. However, if your institution opts for third-party communication integrations or SMS notifications, there may be separate fees depending on your service provider. Confirm with your Brightspace administrator or vendor for specifics.
Can updates be sent in multiple languages for diverse parent populations?
Brightspace supports multilingual communication by sending updates in the language set on the parent or guardian’s profile, if configured properly. You must ensure that the parent profiles include the preferred language setting before notifications go out. If the language is not set, updates default to the system’s primary language.
Quick checklist
- Confirm you have administrative access to Brightspace and the necessary permissions to manage user roles.
- Verify parent or guardian contact information is accurate and linked to the correct student profiles.
- Set notification preferences under Communication Settings to specify the types of updates parents or guardians will receive.
- Enable parent or guardian updates in the Notifications Management area and perform a test notification to ensure delivery.
- Monitor common issues such as incorrect email addresses or permission conflicts and address them promptly.
- Review privacy settings regularly to maintain compliance with data protection policies and limit information shared to authorized recipients only.
What this advice does not cover
This guide does not cover integration with third-party communication tools outside of Brightspace’s native features, which may require separate setup or policies. If your institution uses external systems for parent or guardian communications, consult your IT department or the third-party provider’s documentation for specific instructions. Additionally, this advice assumes you have basic familiarity with Brightspace’s administrative interface.
The most useful next step is to schedule a routine review of your parent or guardian update settings after the initial setup. This ensures that contact information remains current, notification preferences align with school communication policies, and any new system updates or changes do not disrupt the flow of information. Regular checks prevent lapses in communication and help maintain trust with families while safeguarding student privacy.
See also: How to Leave Clear, Effective Feedback on Student Work in Brightspace · How to Organize Units and Modules in Brightspace for Clear Course Navigation · How to Set Late Work Rules in Brightspace: A Step-by-Step Guide