Seamlessly Move Your Tasks from Asana to Notion
Follow this checklist to smoothly move your tasks from Asana to Notion and avoid common import issues for a clean workspace.

Most users do not realize that Notion’s Asana importer caps each import batch at around 14,000 tasks, regardless of how many projects you include.
Another common pitfall is expecting attachments to transfer seamlessly. Each Notion workspace can only import about 100 to 120 file attachments per day from Asana, meaning that if your projects are attachment-heavy, you must spread imports over several days to avoid losing files.
This means any updates in Asana after import won’t reflect in Notion unless you repeat the process.
Checked in November 2026 against Notion, GAX Online, AIToolPick (full list at the end); details like these change, so the date matters.
Move completed tasks in Asana before importing
Notion’s Asana importer allows you to bring in up to about 14,000 tasks per import session, with no strict limit on the number of projects. However, including many completed tasks or projects can clutter your Notion workspace and risk hitting this task limit, causing the import to fail or slow down significantly.
You have the option to exclude completed projects or tasks during the import process by selecting the appropriate filters. This is crucial if your Asana workspace has numerous finished projects that no longer require tracking in Notion.
Before importing, prepare your Asana projects by archiving completed projects or tagging completed tasks clearly. This preparation simplifies filtering and helps you decide whether to import all projects or only active ones. For example, if you have 20 projects but 8 are completed, excluding those 8 during import keeps your Notion workspace focused and within task limits.
Set up Asana projects and teams correctly for import
For Notion to detect and import your Asana projects, each project must be assigned to a team within Asana. Projects that stand alone without team association will not appear in Notion’s importer. This is a critical condition that often causes confusion and failed imports.
To verify and assign projects to teams, navigate in Asana to the project settings. Open the project, then look for the team name displayed near the project title or in the project details pane. If no team is assigned, use the project’s settings menu to add it to an existing team. If needed, create a new team first under the "Teams" section in the sidebar, then assign your project to it.
Additionally, depending on your Asana organization’s administration settings and plan tier, connecting Notion via the Asana OAuth app might require prior admin approval.
- Confirm each Asana project belongs to a team before import
- Assign projects to teams via the project settings or create new teams as needed
- Request admin approval for the Asana OAuth app if authorization fails
Import Asana data into Notion the right way
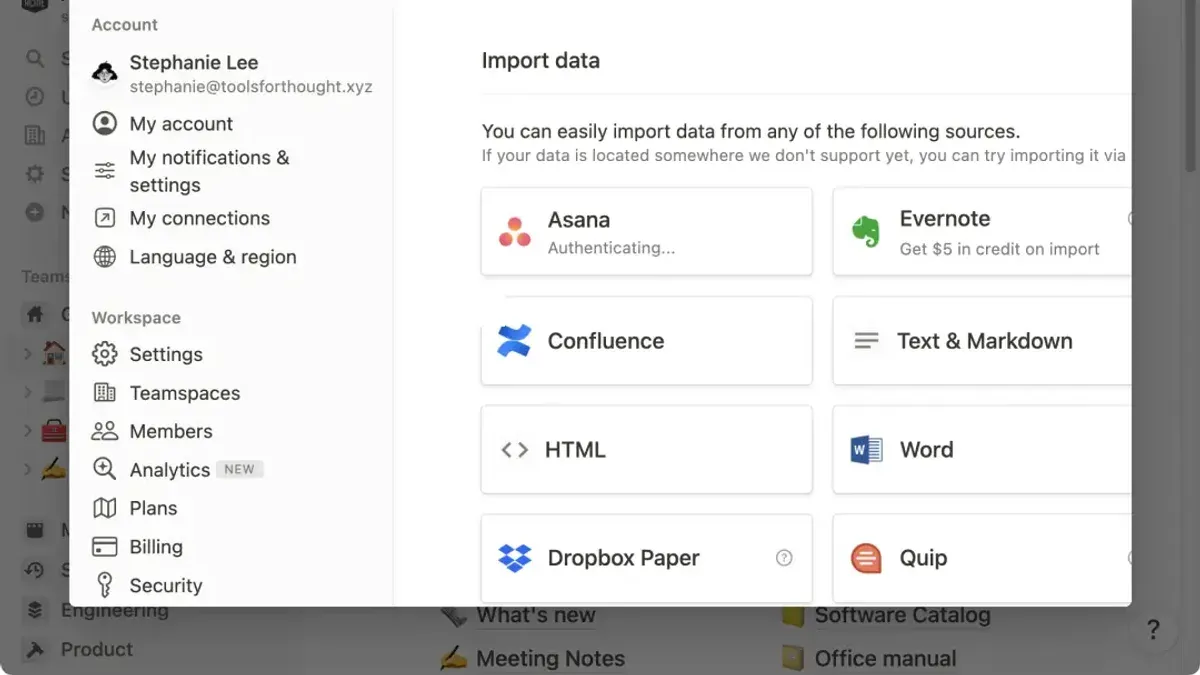
Begin your import on the Notion website or desktop app by navigating to Sidebar → Settings → Import → Third party imports → Asana. Alternatively, inside any Notion page, type the command /asana and select Import to start. This direct approach ensures you access the official importer designed specifically for Asana projects and tasks.
For instance, a large project with 30,000 tasks must be divided into at least three separate imports.
Attachments also have strict limits. Each Notion workspace can import about 100 to 120 file attachments per day from Asana. If your projects include many attachments, plan to spread your import over multiple days to prevent hitting this daily cap.
Treat the import as a static snapshot of your Asana data at the moment you run it.
- Open Notion’s sidebar, go to Settings → Import → Third party imports → Asana, or use the
/asanacommand on any page. - Check your task count and split imports to keep batches under 14,000 tasks each.
- Monitor attachment volume and distribute heavy imports over several days to respect daily limits.
Organize tasks and subtasks in Notion after import
When you import your Asana tasks into Notion, note that subtasks from Asana appear as separate rows, losing their parent-child hierarchy. This happens because Notion treats subtasks as independent items or sub-pages rather than nested tasks. To restore order, you must manually convert these rows into sub-pages or checklist items within Notion.
For example, if you had a task “Launch campaign” with subtasks like “Design creatives” and “Approve budget” in Asana, after import, each will be a separate entry in Notion. Recreate the hierarchy by turning subtasks into sub-pages under the main task or by adding them as checklist items inside the parent page. This step is critical for maintaining clarity and workflow continuity.
Leverage Notion’s versatile views—board (Kanban), table, list, and calendar—to arrange your tasks effectively. Each view supports filtering and sorting, allowing you to tailor task visibility based on project needs. Start with simple database setups to avoid unnecessary complexity; over-customizing early can waste time and complicate future adjustments.
Finally, use Notion’s detailed permission settings at the teamspace level to separate private notes from shared projects. This keeps sensitive information secure while enabling seamless collaboration across teams.
Understand what does not transfer and how to handle it
When migrating from Asana to Notion, several key elements will not transfer automatically and require your manual attention. Automations, dependencies, reporting features, rules, external integrations, and permissions such as role types and project access controls do not carry over. This means workflows relying on Asana’s automation or dependency chains must be rebuilt within Notion.
Comments and activity history are also excluded from the import. You will need to manually copy or archive any essential discussions or updates before the transition. File attachments do not transfer automatically either; you must re-upload them into Notion manually, keeping in mind the daily limit of 100–120 attachments per workspace.
Custom fields often do not map one-to-one between Asana and Notion. Expect to recreate these fields manually in Notion’s databases, adapting their types and properties as needed. For example, a custom dropdown in Asana might become a select or multi-select property in Notion, but you must set this up yourself.
To replicate Asana’s recurring tasks or template-driven workflows, use Notion Template Buttons. These allow you to create buttons that generate predefined task structures or checklists, serving as a practical workaround for missing automation features.
Imagine a project where tasks depend on one another and use custom priority fields, with ongoing conversations in comments. After import, you will see all tasks as flat entries with no dependency links, no comments, and default properties. You must recreate priority fields manually, re-upload key attachments, and rebuild task dependencies using Notion’s relational databases or linked pages.
Compare ease of use between Asana and Notion for task management
This difference makes Notion appealing for teams mindful of budget without sacrificing core task management capabilities.
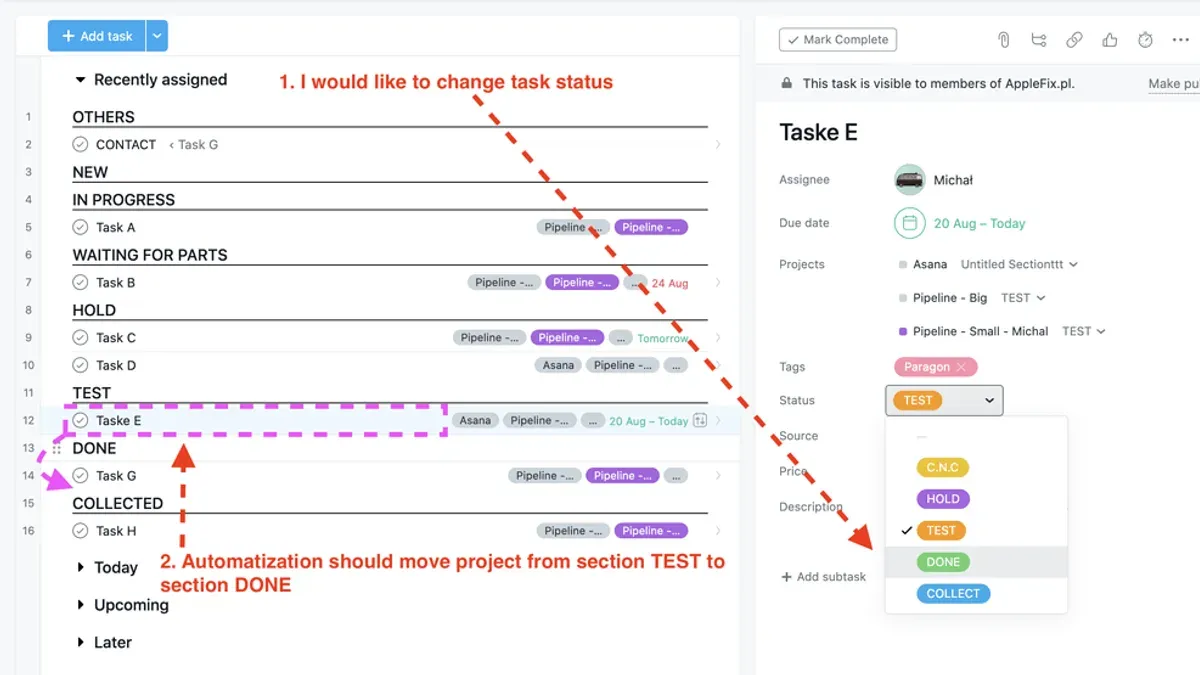
This customization supports diverse workflows and project visualizations. However, Notion's notification system is less robust than Asana’s, increasing the risk of missed updates; integrating Notion with Slack or similar tools is advisable to mitigate this.
For teams considering dual usage, Notion’s synced databases enable a one-way sync by pasting an Asana project link into a Notion page. Changes must be made in Asana to reflect in Notion, as this is not a full import or bi-directional sync. This setup suits teams wanting to maintain Asana’s advanced features while leveraging Notion’s customization.
Notion lacks native support for these features, which could limit your project management efficiency.
| Feature | Notion | Asana |
|---|---|---|
| Starting Price | $8/user/month (Plus plan) | $10.99/user/month (Starter plan) |
| Task Views | Board, Table, List, Calendar with filters and sorting | Limited database views, focused on list and board |
| Notifications | Weaker; integration with Slack recommended | Stronger native notifications |
| Mobile App | Slower, less feature-rich | Faster, more comprehensive |
| Automations | None natively | Built-in advanced automations |
| Sync Options | One-way sync via project link | Native task and project management |
- Evaluate your reliance on advanced automations and reporting features.
- Test notification workflows to ensure critical updates are received.
- Consider integrating Notion with Slack for improved alerting.
Plan your migration timeline and next steps after import
Expect the full migration process to span about two weeks. This timeframe includes auditing your Asana workspace, preparing your Notion structure, completing the data import, onboarding your team, and optimizing workflows. Rushing these steps risks missing critical details or creating disorganized task flows.
After importing, verify that all tasks appear complete and that attachments have uploaded within Notion’s daily limits. Check that your task hierarchy matches expectations, especially since subtasks import as separate entries and require manual rebuilding. This post-import review prevents surprises during active use.
Train your team on Notion’s interface, focusing on permissions and navigation differences from Asana. Clarify whether your organization will fully transition to Notion or maintain some dual usage. For ongoing data updates, consider Notion’s synced databases feature, which allows one-way syncing from Asana via project links but does not replace a full import.
Plan to regularly assess and adjust workflows in Notion. Customizing separate teamspaces for different departments can maintain clarity and scalability. Keep in mind the import is a one-time event; changes in Asana after import won’t reflect automatically in Notion unless you use synced databases. This setup demands continuous review to ensure your task management remains efficient and aligned with your team’s needs.
Read next
- Switching from Asana to Airtable: A Clear Expert Transition Guide
- Switching from Asana to Basecamp: Expert Steps and Insights
- Moving from Airtable to Asana Checklist: Your Expert Transition Guide
- Switching from Asana to ClickUp: A Clear Expert Transition Guide
Frequently asked questions
How to move completed tasks in asana?
You move completed tasks by first filtering them within Asana, then exporting those tasks separately if needed. To ensure they transfer properly, complete tasks should be organized within projects assigned to a team before import, as only those projects are visible to Notion’s importer.
Which is easier between asana and notion?
See the detailed differences table in the section comparing ease of use, which breaks down each platform’s capabilities by version, platform, and account type. Generally, Asana offers straightforward task management with built-in project views, while Notion requires more manual setup but offers greater flexibility once configured.
How to set up asana?
Set up Asana by creating projects and assigning them to teams; only projects linked to a team can be imported into Notion. If a project is not assigned to a team, it won’t appear in Notion’s importer. Refer to the failure map in the setup section for troubleshooting exact error messages and fixes.
How to move tasks in asana?
Moving tasks involves exporting project data via CSV or using Notion’s Asana importer. Ensure tasks belong to projects linked to teams, and respect import limits such as 14,000 tasks per batch and 100–120 file attachments daily. Follow the correct order of import steps to prevent data loss or misalignment.
How to use asana forms?
For form-related data, additional export or integration steps outside Notion’s importer may be necessary.
How to move tasks in Asana to Notion without losing data?
To avoid data loss, only projects assigned to teams are importable, and subtasks export as separate rows without hierarchy, requiring manual restructuring in Notion. Follow the prescribed import order: move completed tasks first, ensure project-team assignments, then import data. Attachments must be managed within daily limits to avoid omission.
References
- Import from Asana to Notion | Notion Help — Notion
- Switching from Asana to Notion: A Migration Guide | GAX Online — GAX Online
- How to Switch from Asana to Notion: Migration Guide 2026 | AIToolPick Blog — AIToolPick
- Migrating from Asana to Notion: A Guide for Marketing Teams — Atomic Spin
- Import projects from Asana for a connected work experience — Notion